Registering or modifying your UK Value Added Tax (VAT) information involves a detailed verification process. This process goes beyond standard checks to ensure strict compliance with UK tax regulations.
Our Billing Department is responsible for conducting thorough reviews to verify the accuracy and authenticity of the information you provide.
In this article, we will guide you through the process of adding or changing your UK VAT number to your account.
Step 1. Log in to your WPX account
Begin by logging into your WPX account. You can do this by visiting the WPX login page.
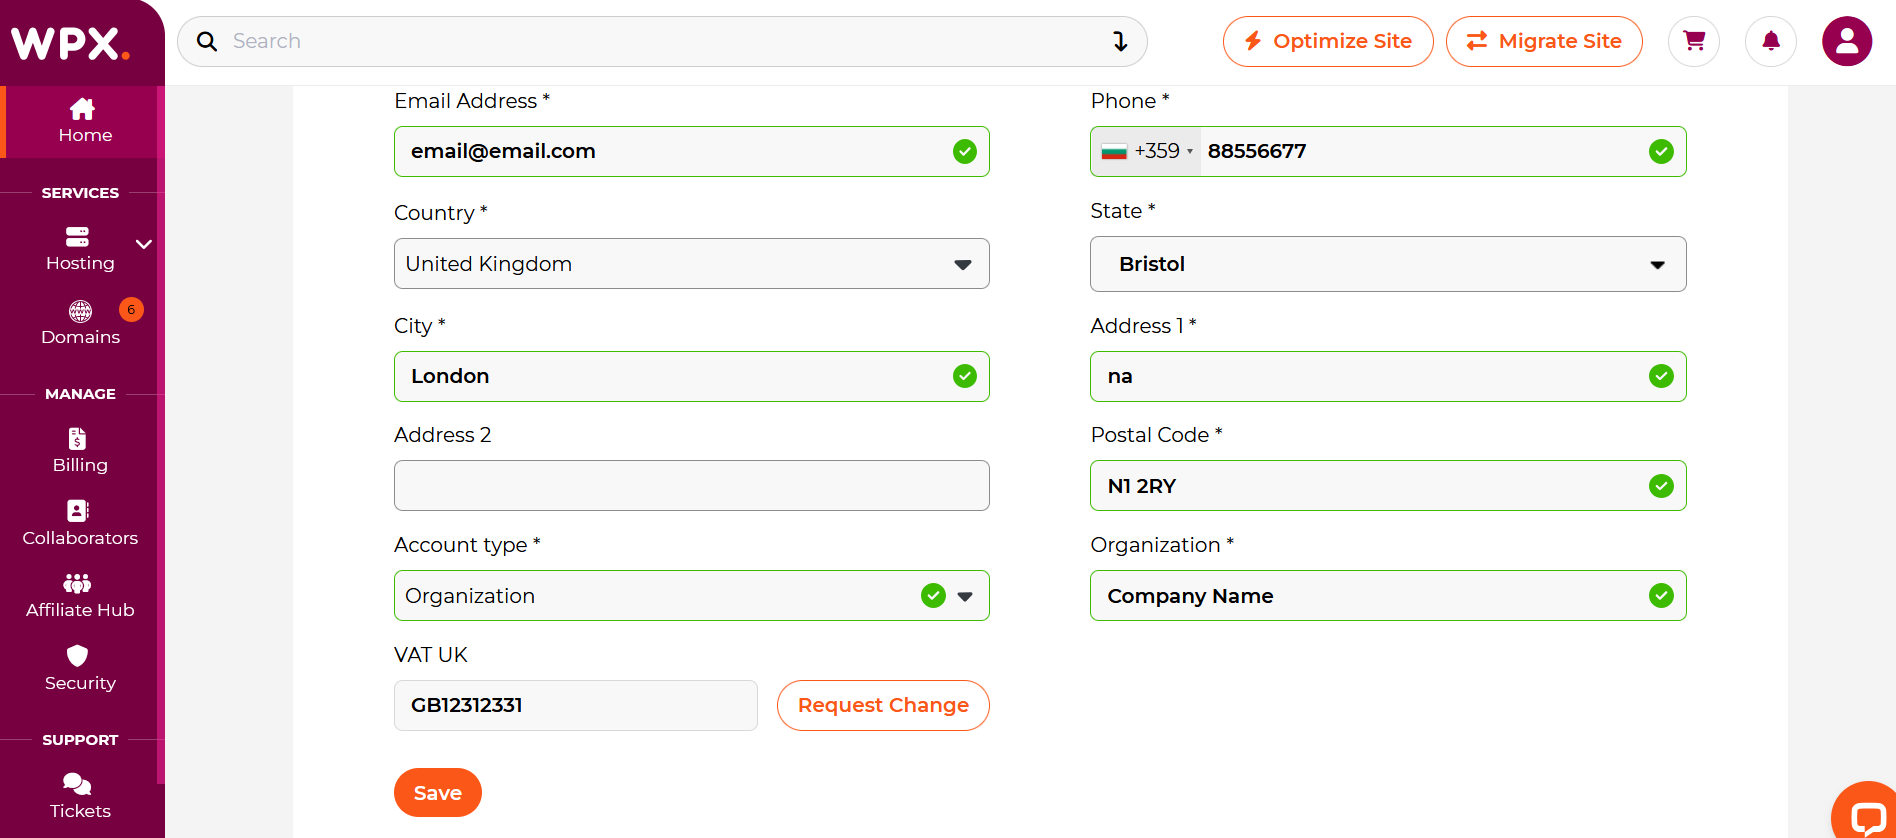
Step 2. Go to your Account Details
You need to go to the My Account icon and then select Account Details as shown in the picture:

Step 3. Request a VAT change
In the Account menu, click on the Request Change button
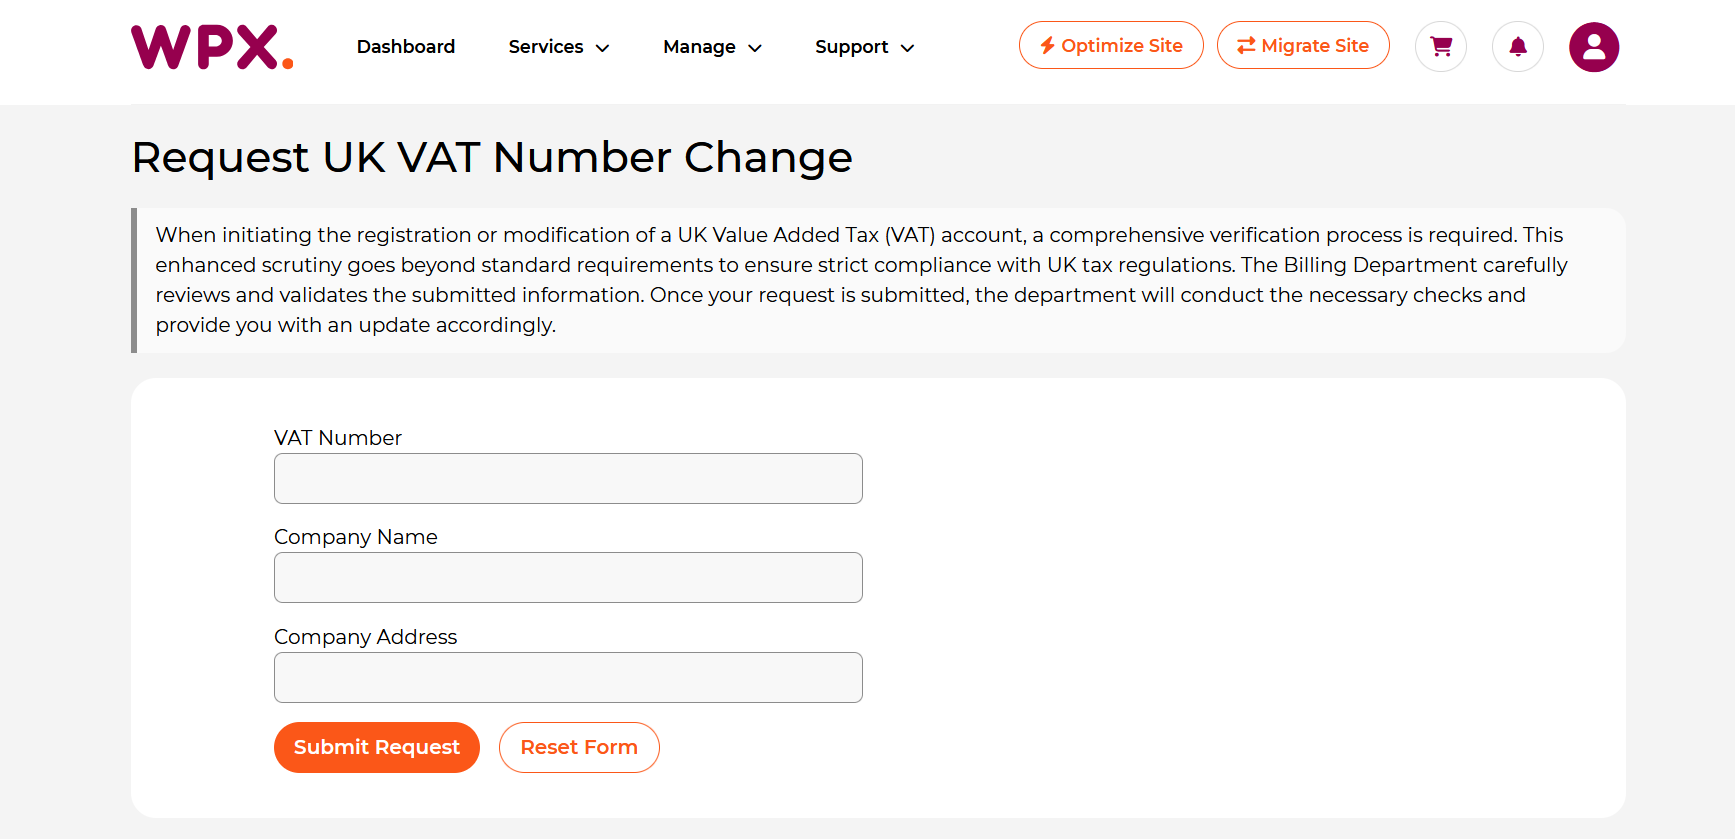
Step 4. Fill out Company Details
Complete the VAT change form with your company details, and then click Submit Request.
Stuck at any point? Don’t worry, just click the live chat widget in the bottom-right, and one of our support agents will assist you in under 30 seconds.