Not sure if your site is loading from WPX or your old host?
If your site has already been migrated and pointed to WPX, there’s a quick way to check whether your device is loading the WPX version or still pulling from your previous hosting provider.
Why is this important?
After migration, it’s tempting to start making changes right away. However, if your device is still loading the old version of the site, those changes could end up being saved on your previous host, not WPX. To avoid confusion or lost work, it’s best to confirm where your site is loading from first.
How do you check?
We’ll place a simple wpxtest.txt file inside the public_html folder of your site on WPX. If you can load that file in your browser, your site is being served from WPX. If not, DNS propagation may still be in progress, and your device is likely still accessing the old hosting environment.
Step 1. Log in to your WPX account
Begin by logging into your WPX account. You can do this by visiting the WPX login page.
Step 2. Go to Control Panel
Once logged in:
- Locate your hosting plan in the WPX client area.
- Click the Control Panel button next to the plan you wish to manage.

Step 3. Open File Manager
Within the Control Panel:
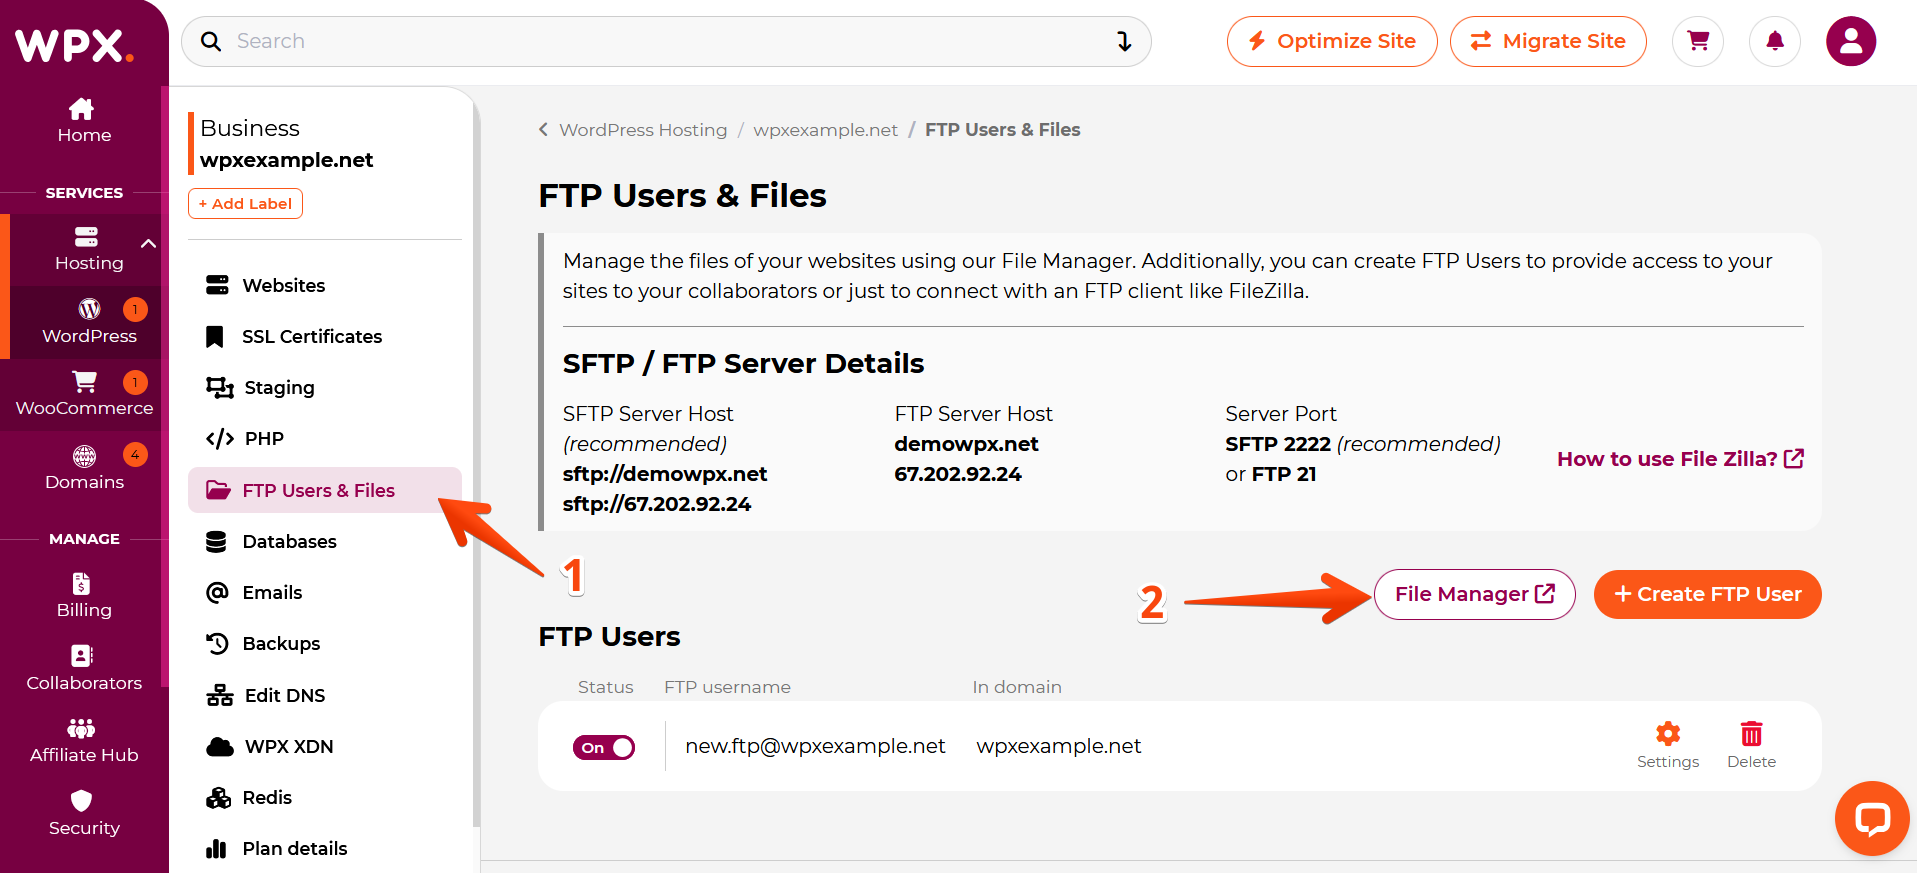
- Select FTP Users & Files.
- Then open the File Manager to manage your website’s files. We’ll create a test file that will help determine whether your site loads through WPX’s servers or not.
Step 4. Create a wpxtest.txt file
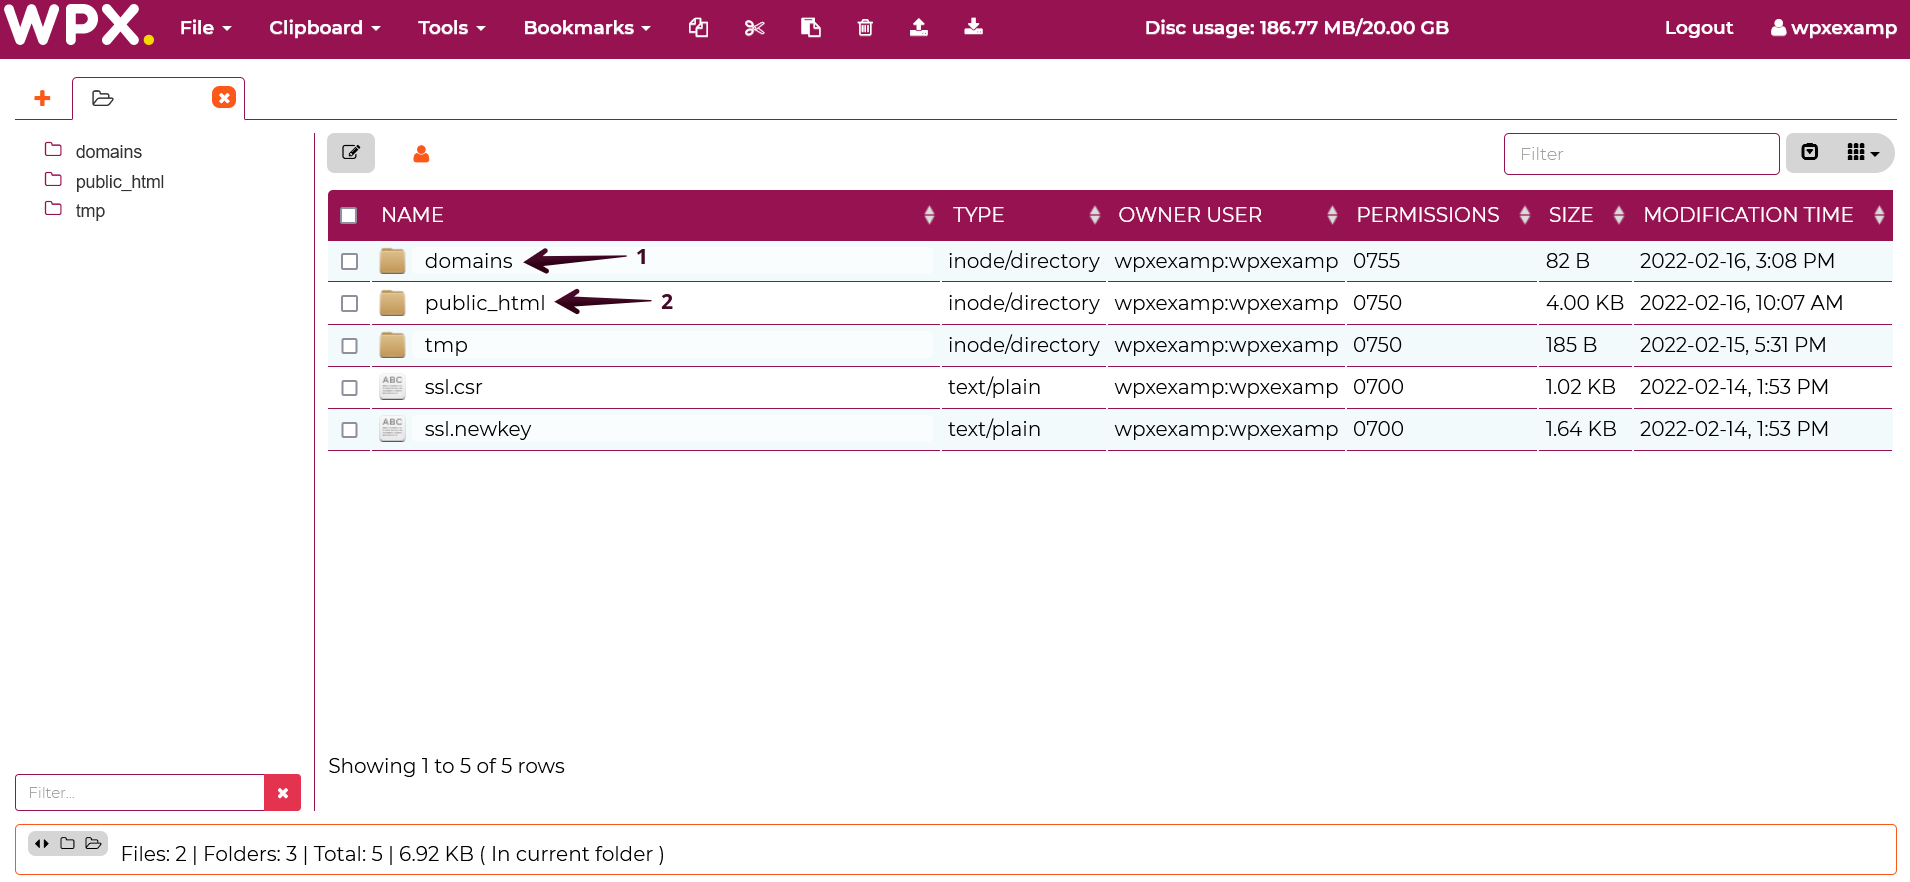
In this example, we’ll add a test file into the public_html directory of newebsite.com.

Select public_html (double click it to open).
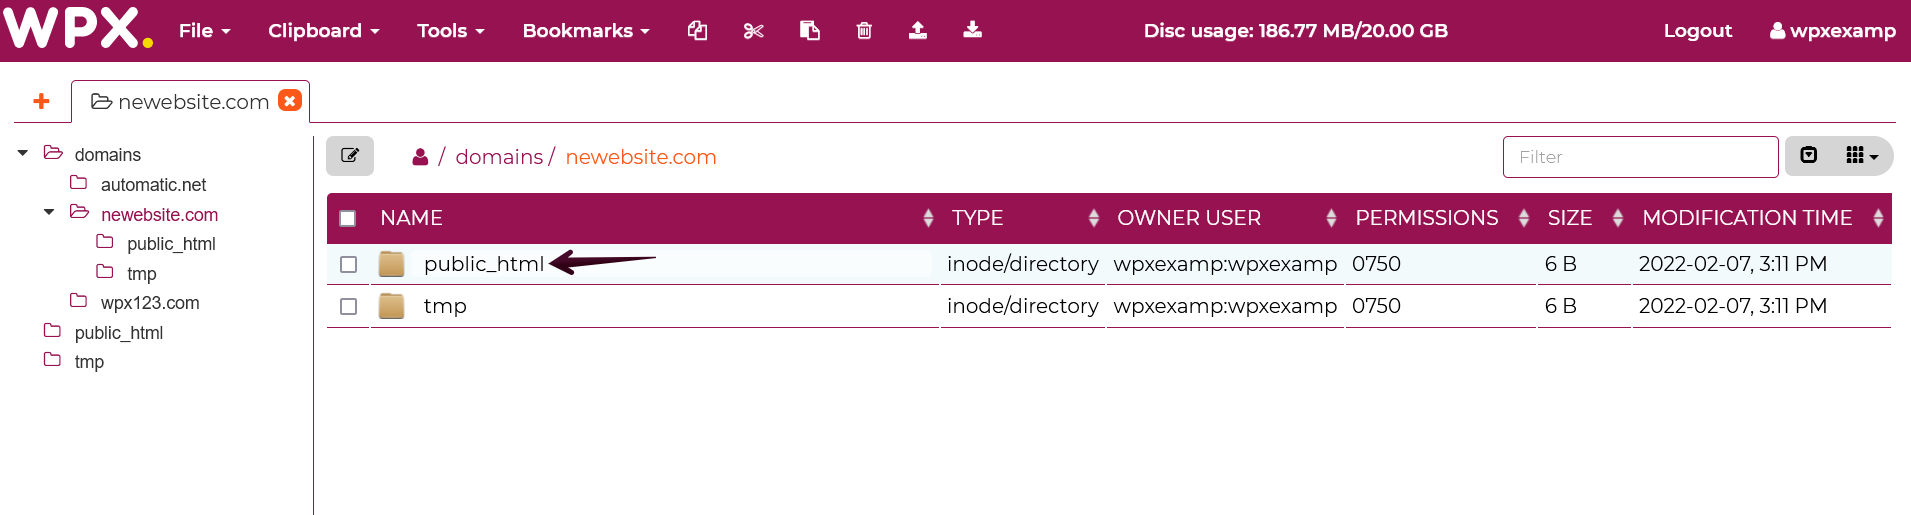
Within the public_html folder:
- Select File to open the dropdown menu.
- Then click on the Create File button.
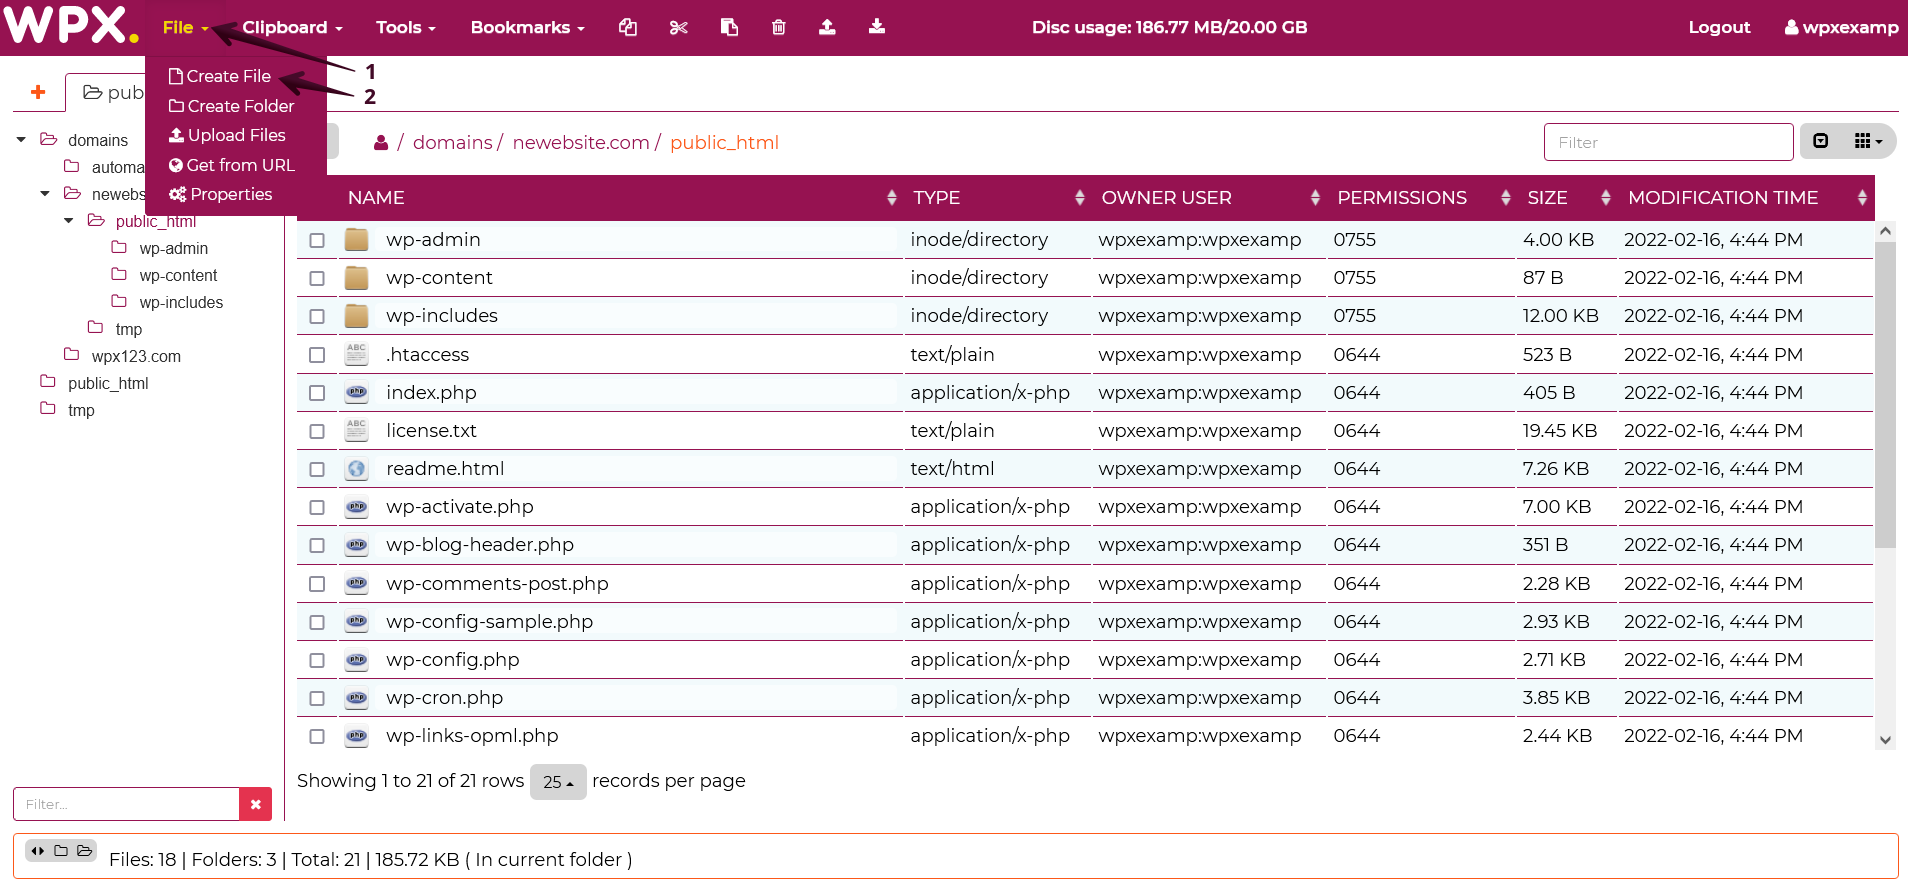
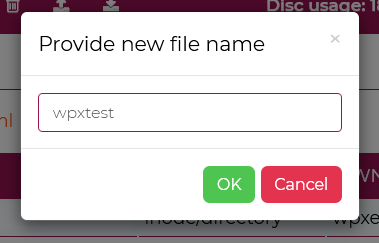
Fill in the name of the file that you’ll later load in the browser. In this example, we’re using wpxtest. Press OK when ready to create a new file.
Now that the file is created, right-click on it with the mouse and select Edit from the menu.
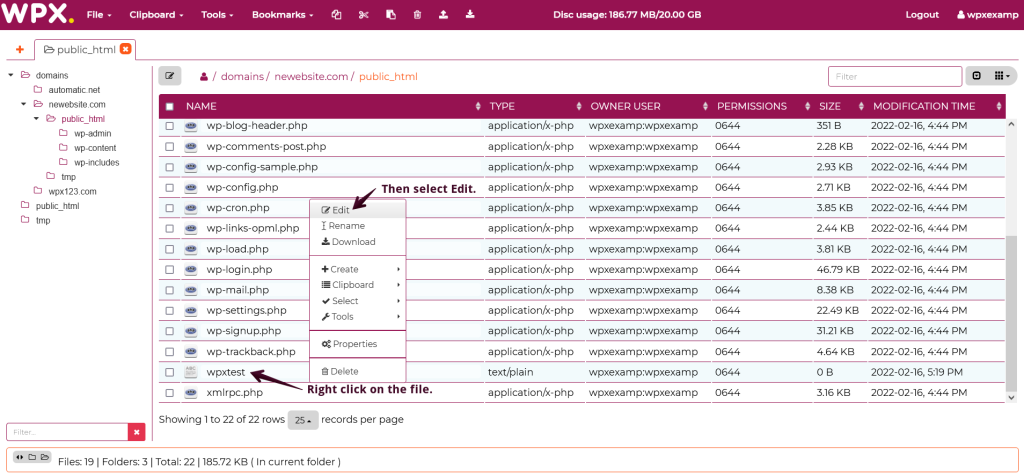
Add any text that you’ll preview in the browser to make sure your site is loading from WPX. And click then Save.

Step 5. Load the file in the browser
To complete the test, you need to load the file from your browser.
- Open a new tab window in your browser.
- Type in the name of your website, followed by the name of the file you created.
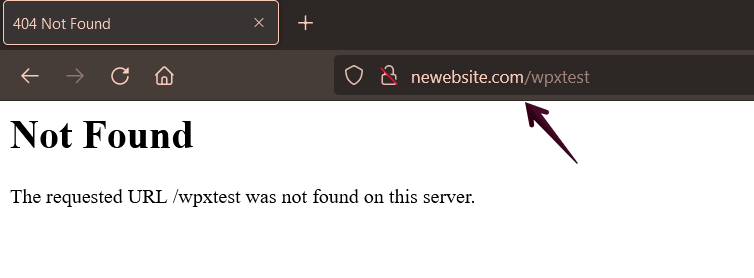
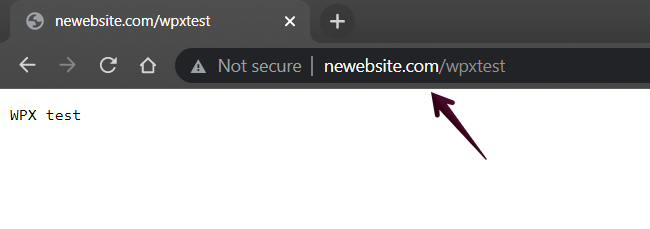
In our case, that is newebsite.com/wpxtest.
The Result
The file we added is not present in your other hosting, which means if it does not display in the browser, the site still loads from the old server. If, however, the file loads, the site is loading from WPX.
If your browser returned a ‘Not Found‘ error page, the site does not load from WPX.
In this case, editing is not recommended. Here you can find more information about what DNS propagation is.
If you see the Text you entered in the file, the site loads from WPX.
If you get stuck with anything discussed on this page, please contact WPX Support via live chat (use the bottom right-hand widget), and they will respond and help within 30 seconds or less.