This article will provide you with the needed information on creating a signature for your given email address in WPX Webmail.
Step 1. Log in to your WPX account
Begin by logging into your WPX account. You can do this by visiting the WPX login page.
Step 2. Go to Control Panel
Once logged in:
- Locate your hosting plan in the WPX client area.
- Click the Control Panel button next to the plan you wish to manage.

Step 3. Go to the Emails menu
Within the Control Panel:
- Select the Emails section.
- Click on the Webmail Client button to open Webmail.

You will be redirected to your Webmail login page. To log in use your email username and password.
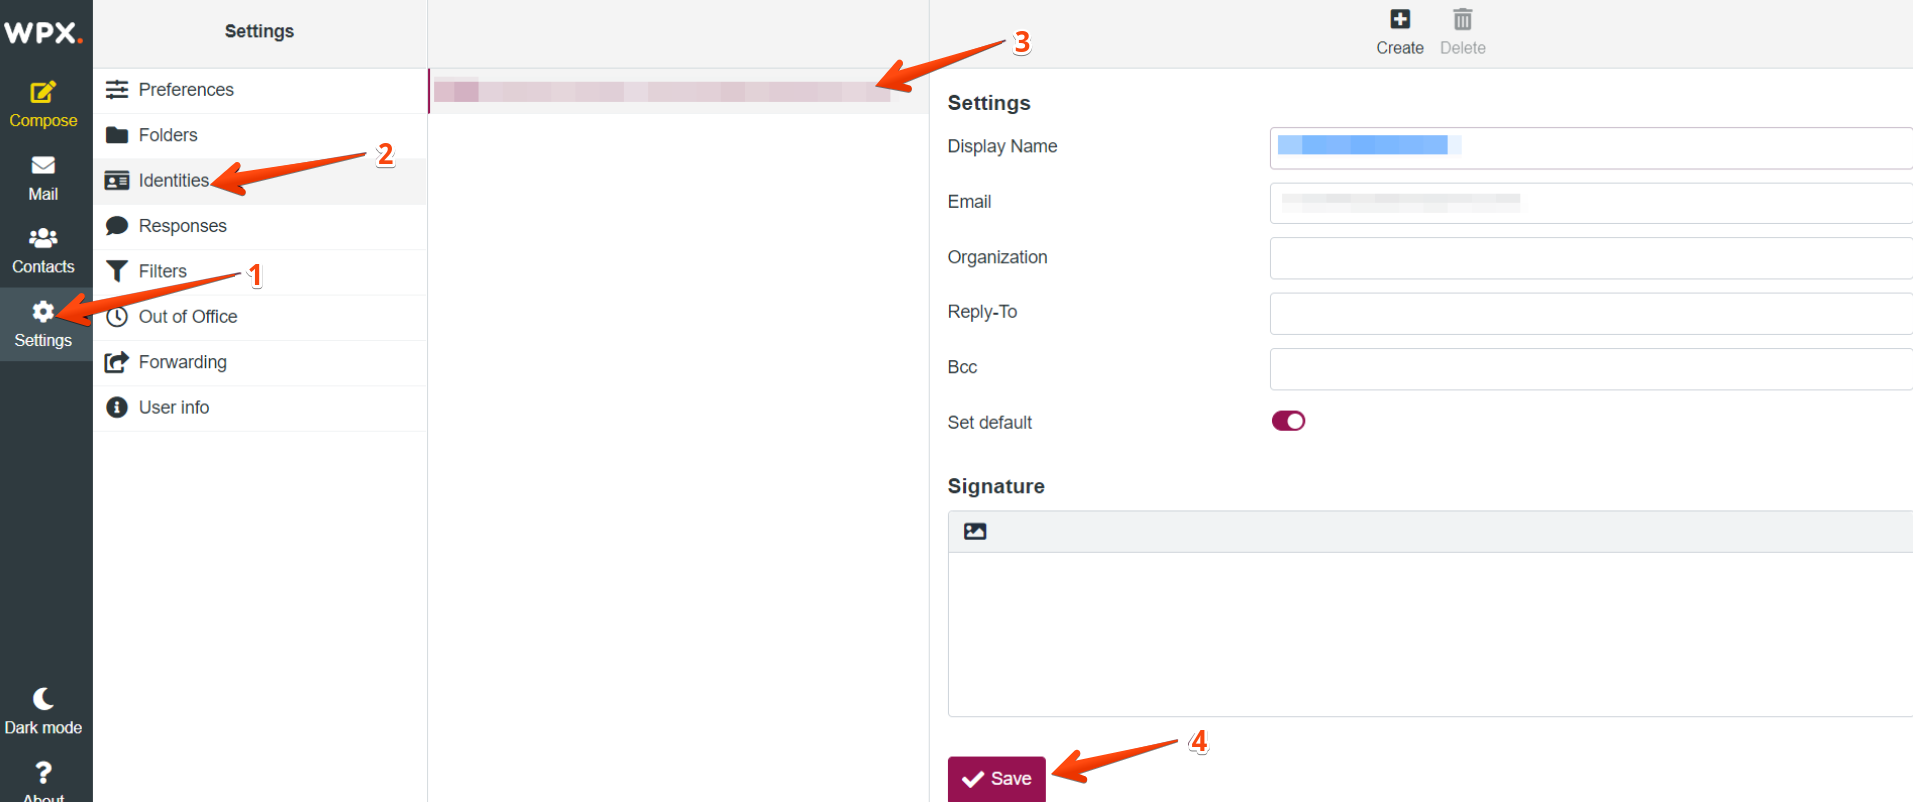
Step 4. Set up your Signature
In the Webmail:
- Select Settings
- Then Identities
- Your Email address
- When you’re ready with the signature, click Save.
Stuck at any point? Don’t worry, just click the live chat widget in the bottom-right, and one of our support agents will assist you in under 30 seconds.