If you need to increase the storage quota of a WPX email box, you can easily do so from your Control Panel. Just follow the steps below.
Step 1. Log in to your WPX account
Begin by logging into your WPX account. You can do this by visiting the WPX login page.
Step 2. Go to Control Panel
Once logged in:
- Locate your hosting plan in the WPX client area.
- Click the Control Panel button next to the plan you wish to manage.

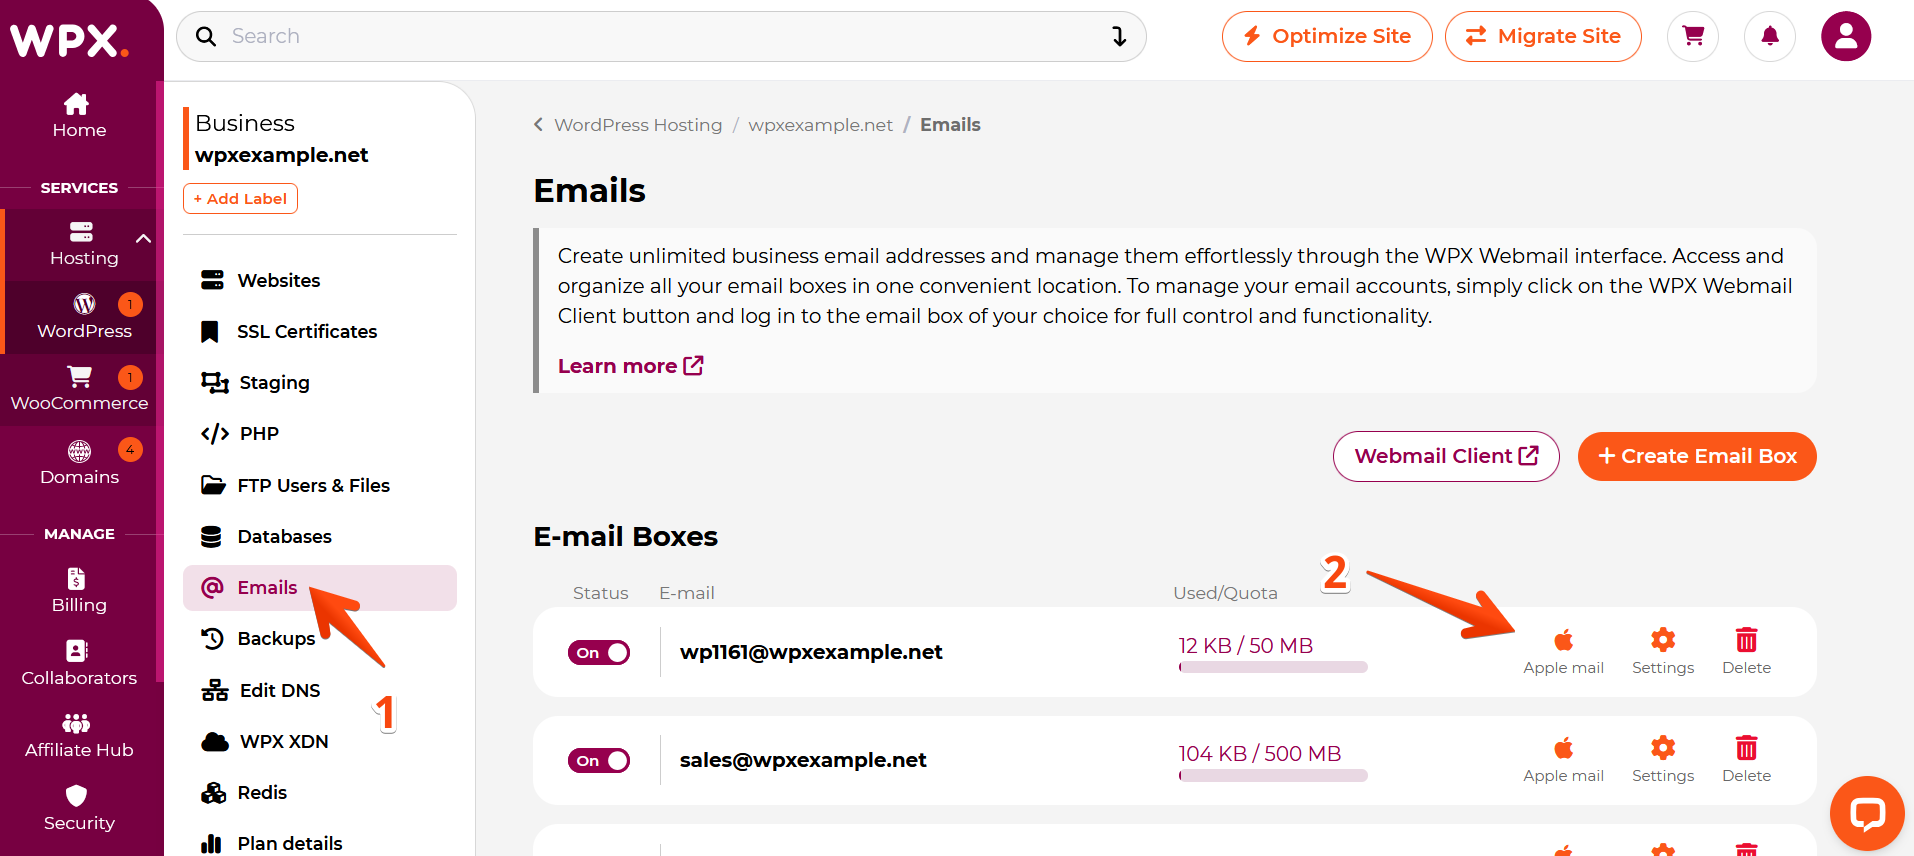
Step 3: Access the Emails Menu
Inside the Control Panel:
- Click on the Emails tab.
- Find the email address you want to manage and click the Settings button next to it.
Step 4: Adjust the Email Quota
Select the Email Box Settings tab, where you can change the storage quota for the mailbox.
You have two options:
Option 1: Unlimited *
You can set the email quota up to Unlimited – That means the email box quota will be the total available disk space in your hosting plan.
Example: If you’re on the Business Plan, your maximum email quota can be up to 10 GB.
Option 2: Set a Custom Quota
Manually enter a custom size (in MB or GB) for the mailbox.
The default quota for new mailboxes is 50 MB, but you can increase this as needed based on your available hosting disk space.

After updating the quota:
- Click the Submit button to apply the changes.
- The new quota will take effect immediately.
If you have any other questions on the topic, please get in touch with WPX Support Team via live chat (use the bottom right-hand widget) and they will respond and help within 30 seconds or less.