Installing WordPress on a new website is quick and easy—it only takes a few clicks. If you skipped this step when adding your website, this article will guide you through the process.
Step 1. Log in to your WPX account
Begin by logging into your WPX account. You can do this by visiting the WPX login page.
Step 2. Go to Control Panel
Once logged in:
- Locate your hosting plan in the WPX client area.
- Click the Control Panel button next to the plan you wish to manage.

Step 3. Install WordPress
Within the Control Panel:
- Click WordPress.
- Then select if you want to install WordPress (in the root directory) or in a Subdirectory.
In this example, we’ll install WordPress in the root directory of wpxexample.net.
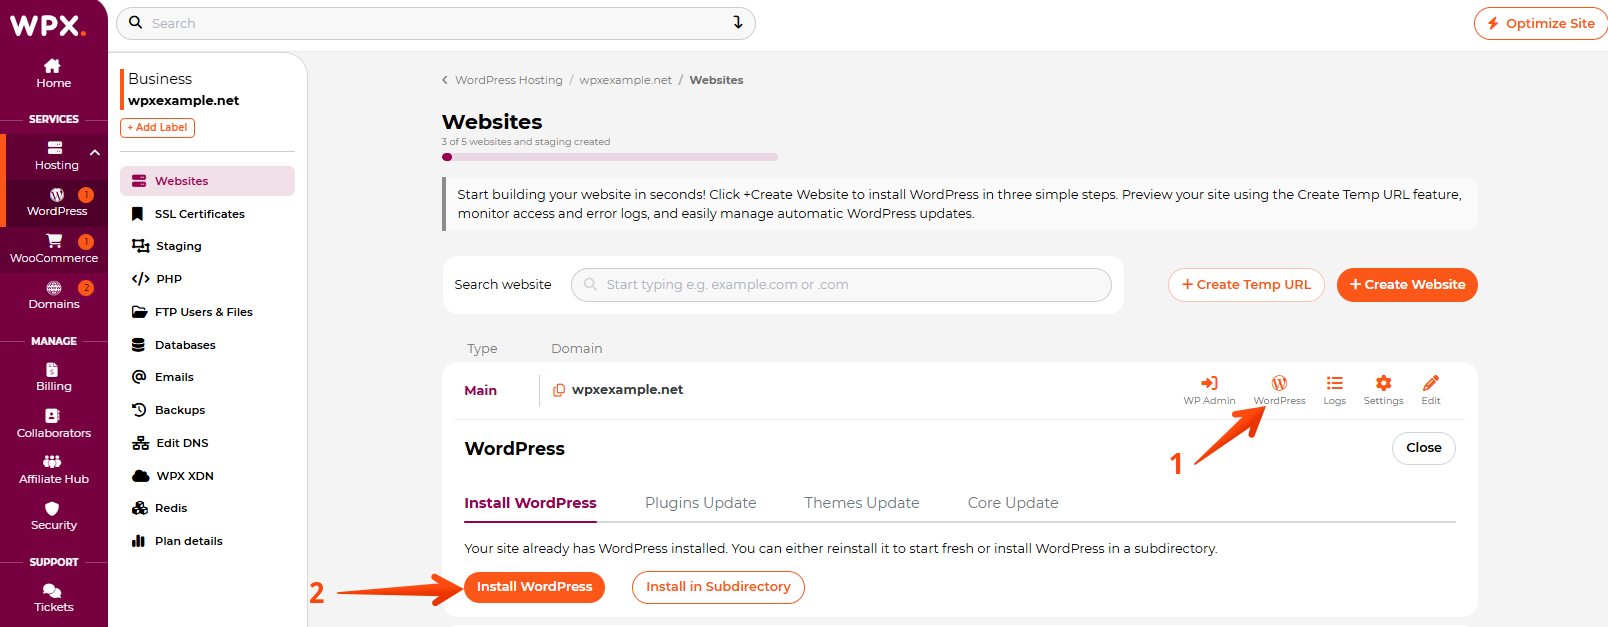
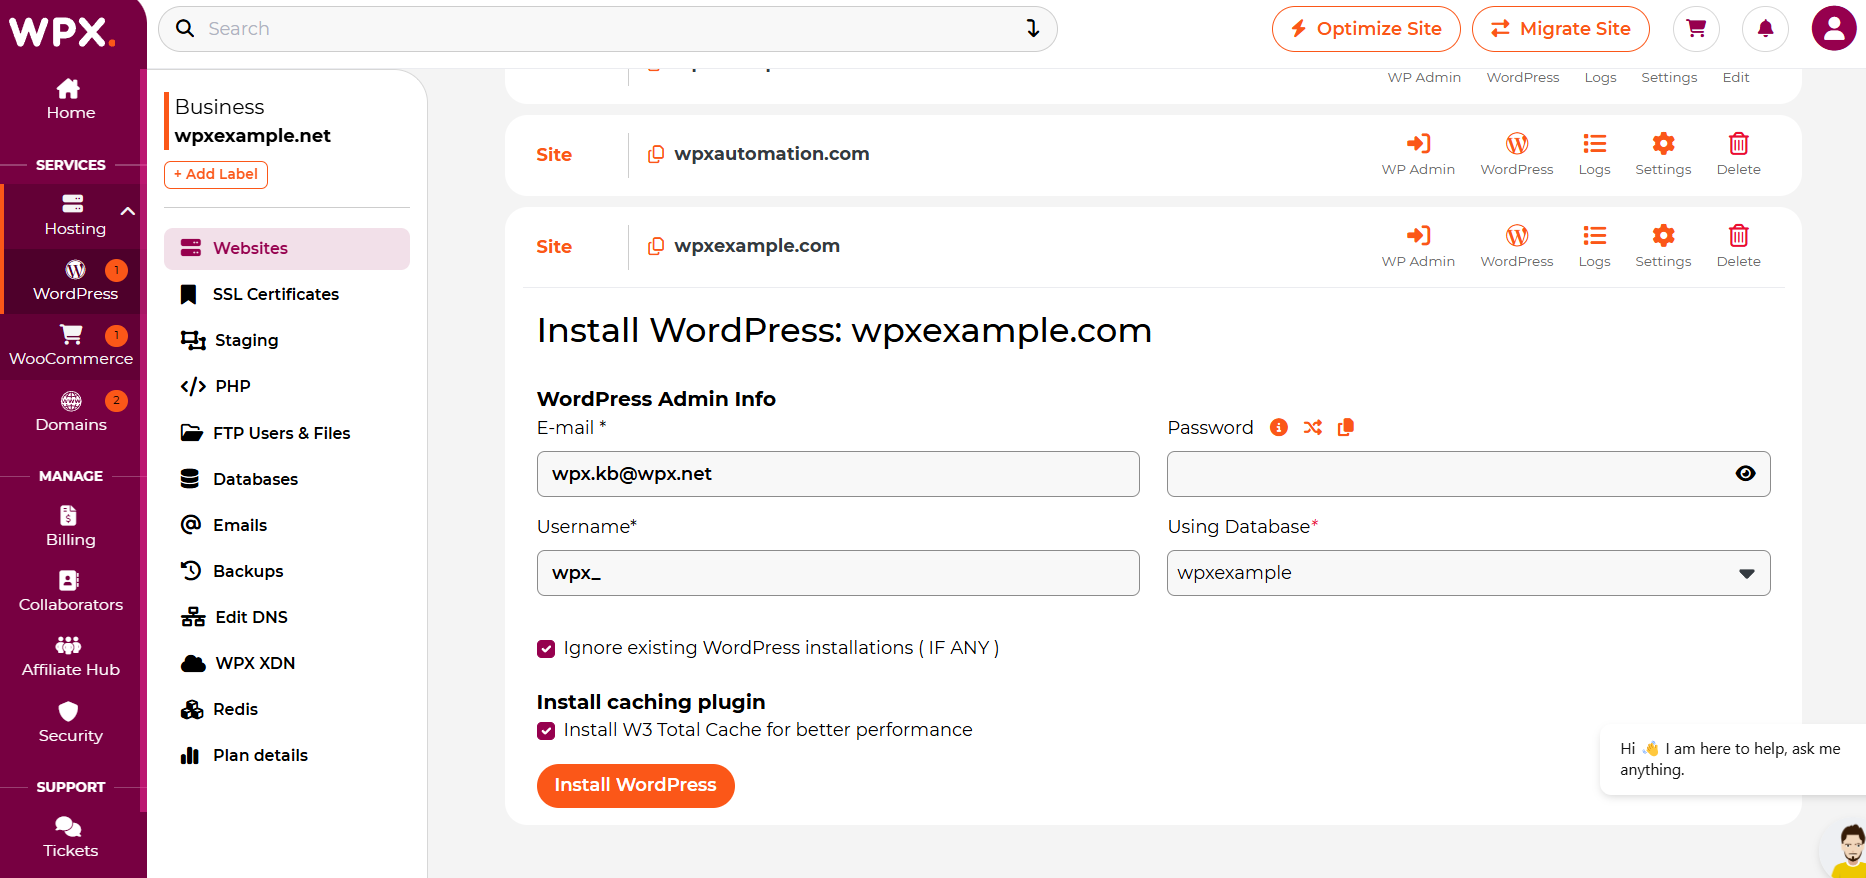
Next, enter your WordPress installation details, then click Install WordPress to complete the setup.
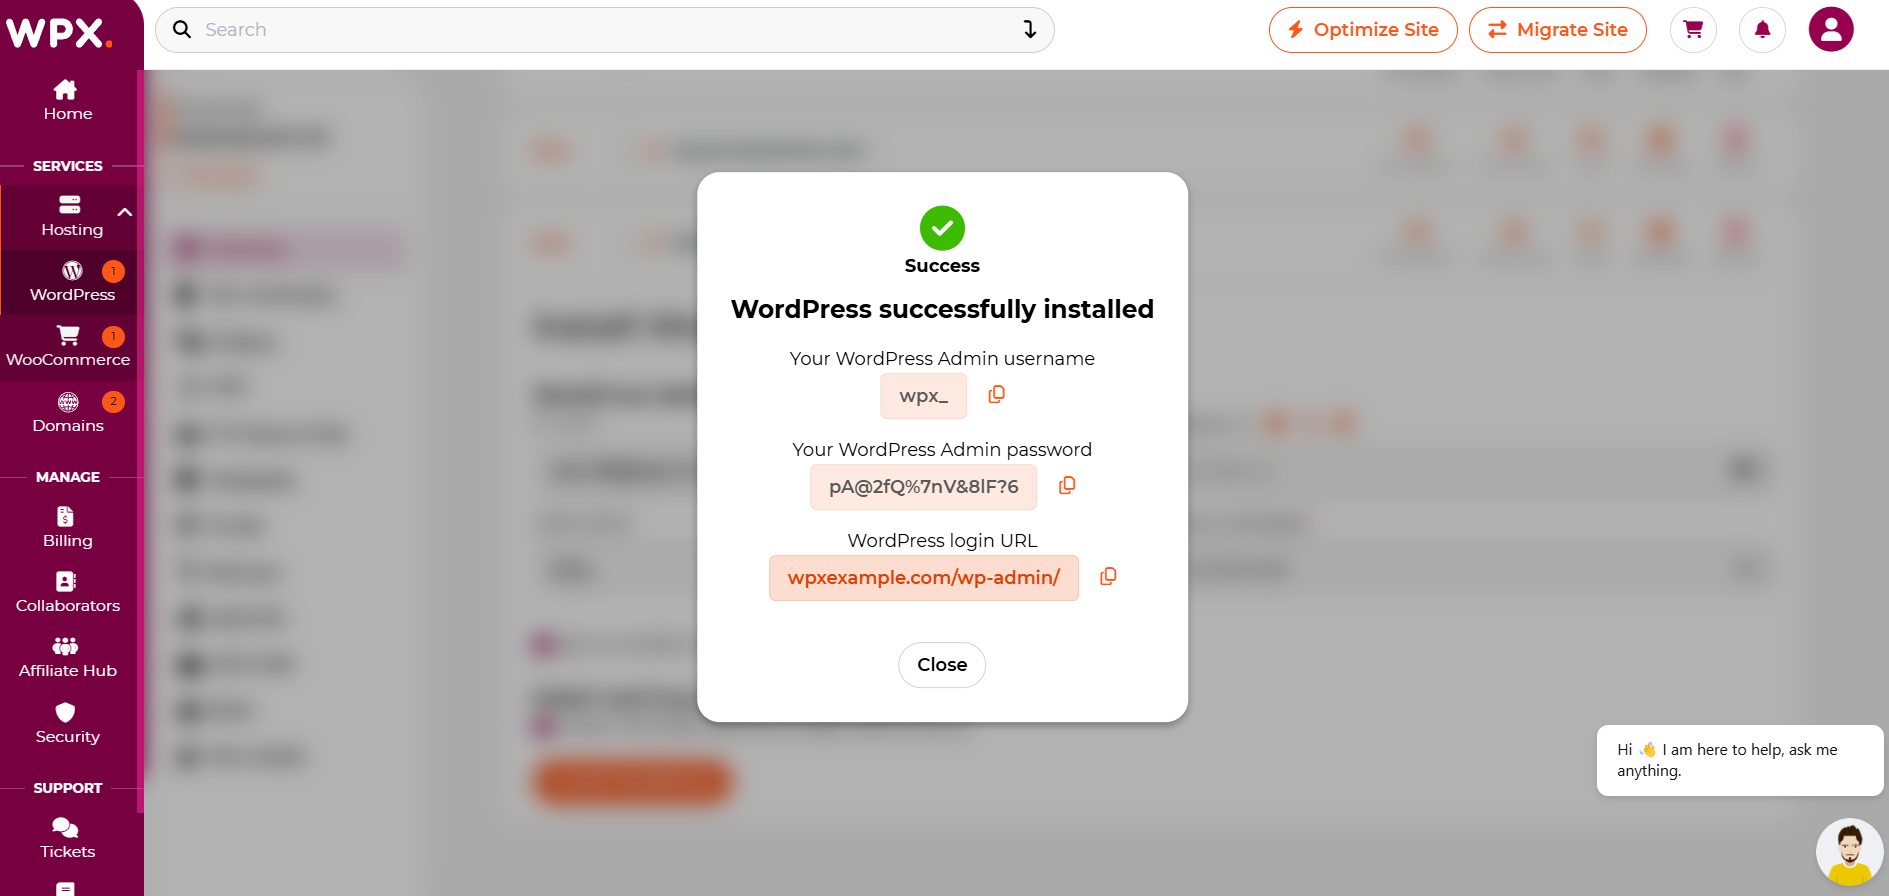
Once the installation is complete, a success pop-up will appear with your WordPress admin login details.
Be sure to copy and securely save your WordPress username and password. For security reasons, never share your WP-admin credentials with anyone.
How can I access the WP admin Dashboard?
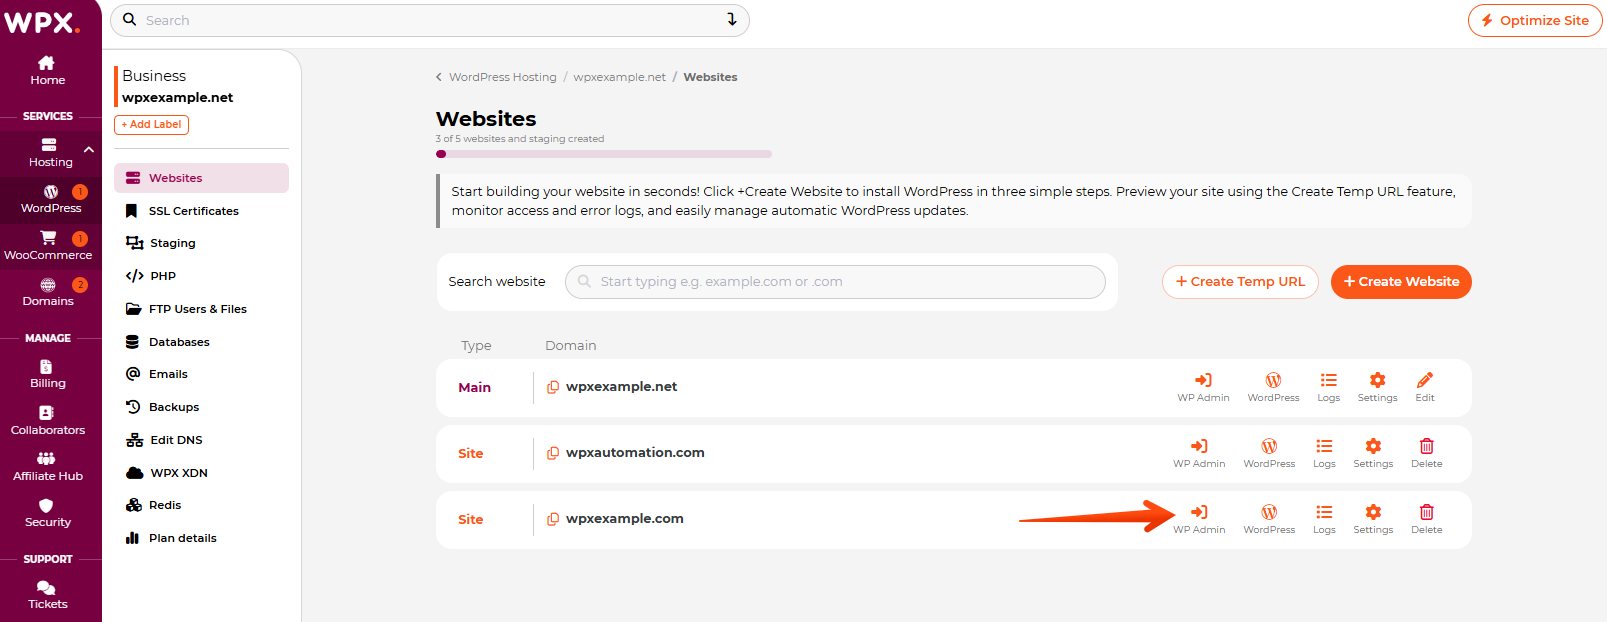
To access your new WordPress dashboard (backend), click the WP Admin button next to the site.
Alternatively, you can type in your site in the browser, followed by /wp-admin:
Then you can log in with the username and password that you’ve just created when installing WordPress.
What if WordPress was already installed on the site?
If WordPress is already installed on your website, but you want to start fresh, simply select Ignore existing WordPress installations.

If you’d like to install WordPress in a subdirectory without affecting your main site, choose the second option and continue from Step 3, making sure to select Install in Subdirectory.
Stuck at any point? Don’t worry, just click the live chat widget in the bottom-right, and one of our support agents will assist you in under 30 seconds.