Pointing your domain to WPX means connecting it (e.g. yourdomain.com) to your WPX hosting account so your website loads from our servers. This can be done in two ways: by updating the Nameservers or the A records of your domain.
An important note before you proceed
If your domain is currently connected to another hosting provider and your site is already live, the content must first be migrated to WPX to avoid downtime. You can see how to request a free migration from here.
Which method to use for pointing your Domain to WPX?
1. Using Nameservers
The following nameservers can be used for any domain you want to point to and host with us – no need to use different ones for different domains.
Alternatively, you can point your domain using only A records. This way you will keep the active DNS zone at its current state and your website will be loading from WPX.
2. Using A records
Using A records will keep your current DNS zone active (at your domain registrar or DNS provider), but your website will load from WPX.
You can find your server IP and XDN IPs in your Plan Details inside your WPX Control Panel.
Step 1. Log in to your WPX account
Begin by logging into your WPX account. You can do this by visiting the WPX login page.
Step 2. Go to Control Panel
Once logged in:
- Locate your hosting plan in the WPX client area.
- Click the Control Panel button next to the plan you wish to manage.

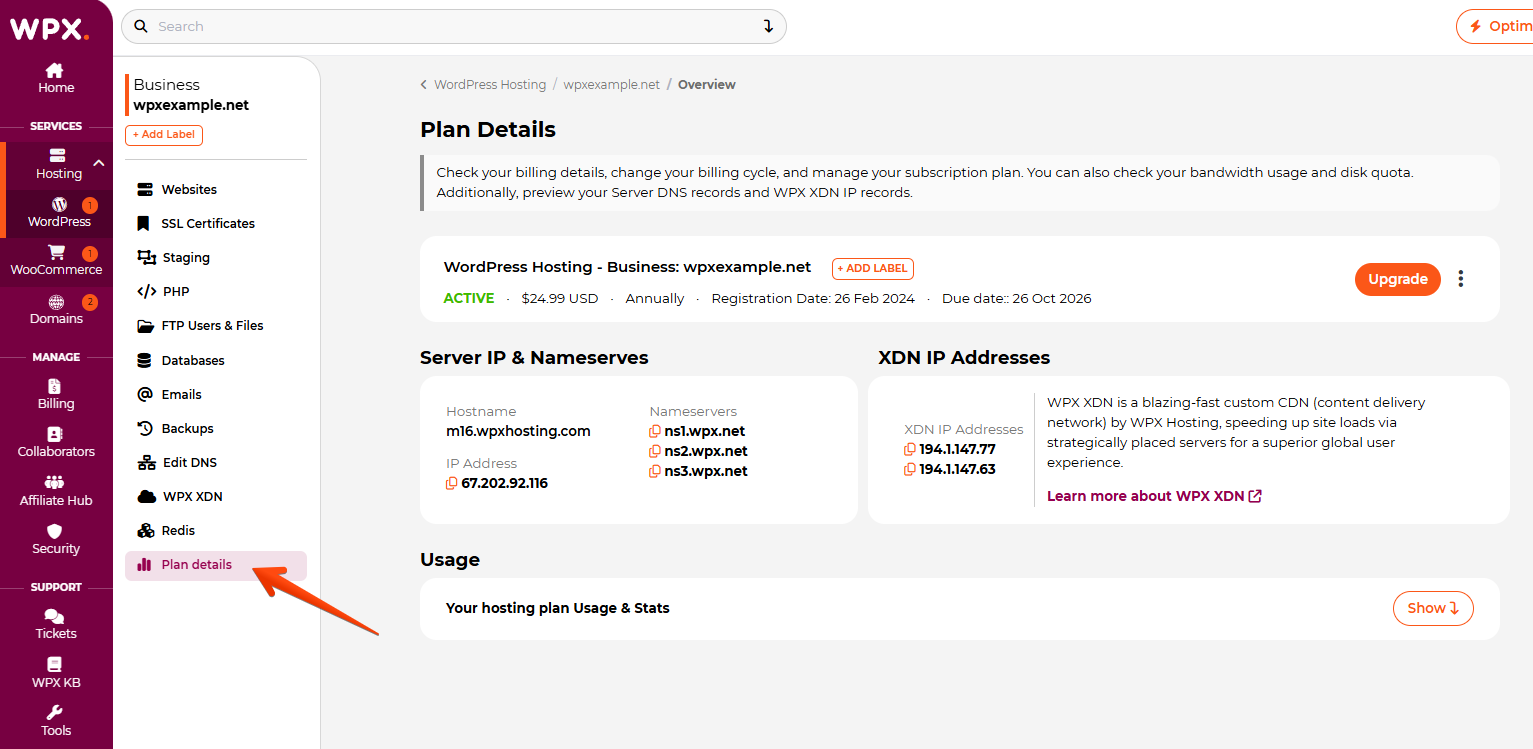
Step 3. Locating the Server Details
You must navigate to the Plan details section.
There you can locate your service details – Server IP, XDN IPs and Nameservers.
Before you proceed, you’ll need to decide whether or not you’d like to use WPX XDN.
If you choose to go without WPX XDN you must use the Server IP:
- Host: Same as domain or ‘@’.
Value/Target: 67.202.92.28 - Host: www
Value/Target: 67.202.92.28
If you choose to use our WPX XDN you must use the XDN IP Addresses:
- Host: Same as domain or ‘@’.
Value/Target: 194.1.147.53 - Host: Same as domain or ‘@’.
Value/Target: 194.1.147.45 - Host: www
Value/Target: 194.1.147.53 - Host: www
Value/Target: 194.1.147.45
Step 4. Updating the DNS
To update your DNS settings, you first need to know where your domain’s DNS zone is managed.
- If you’re updating Nameservers, this must be done from your domain registrar’s panel (where the domain was purchased).
- If you’re updating only the A record, you need to do that within the active DNS zone, which is determined by the currently set Nameservers.
See how you can do that with Bluehost, GoDaddy, HostGator, DreamHost, Namecheap, and Google Domains.
If your domain name is registered with WPX you can see how to change the Nameservers here and the A records here.
Step 5. Wait for the propagation process to be completed
The DNS propagation usually takes anywhere from a few minutes to 48 hours. During the propagation process, some of your visitors will access your website from your old hosting and some from WPX.
It is important NOT to make any changes to the website before the propagation process has been completed. Some of the changes may be saved on your old hosting and they will disappear once the propagation is complete.
You can monitor the progress of DNS propagation using an online tool and read more about the propagation process here.
Have more questions? Contact the WPX Support Team through the live chat widget in the bottom-right corner, and they’ll assist you promptly, typically within 30 seconds.