Has your hosting account been terminated (canceled), and you’re looking to restore your websites? Don’t worry—it’s simpler than you might think! Let us guide you through the steps to bring your websites back online.
To restore your hosting plan and all of your websites, you’ll need to take care of the latest invoice generated by our system.
Your data will be safe with us for up to 90 days after the initial termination date and will be available for restoration.
Step 1. Log in to your WPX account
Begin by logging into your WPX account. You can do this by visiting the WPX login page.
Step 2. Invoice payment
If the hosting service invoice hasn’t been canceled, you can pay it by clicking the Pay Now button in the pop-up that appears on your Home page after logging in.
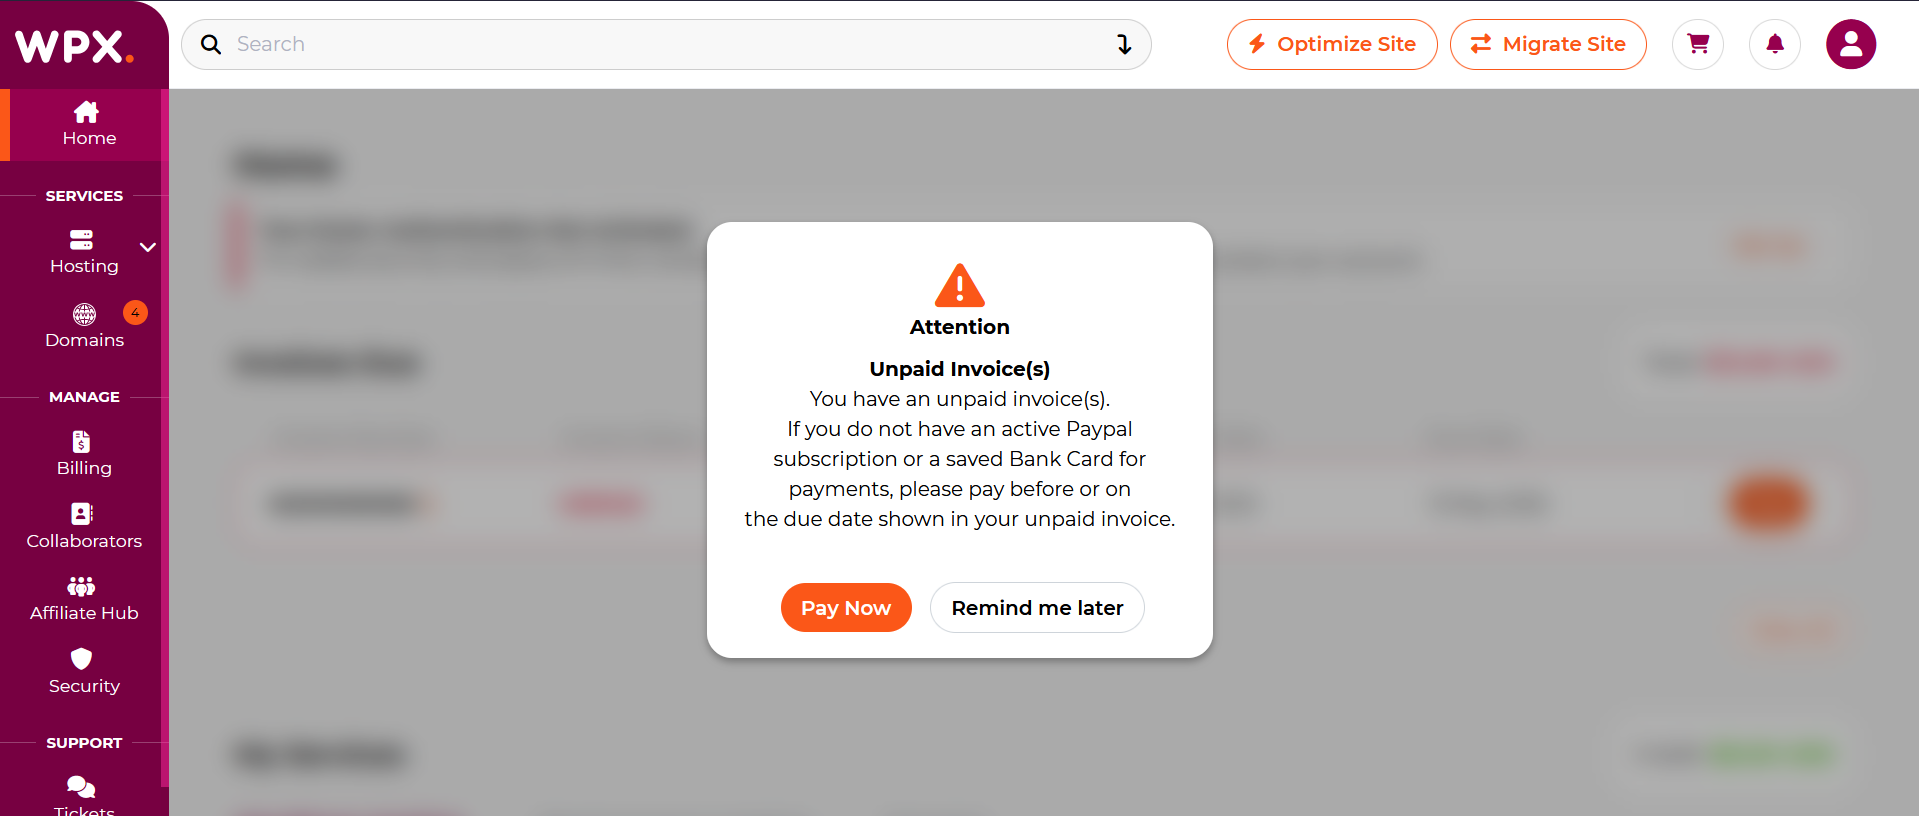
If you’ve accidentally dismissed the pop-up, simply follow the steps below to proceed.
Step 3. Restore Hosting Plan
Select the Restore button next to the terminated hosting plan.
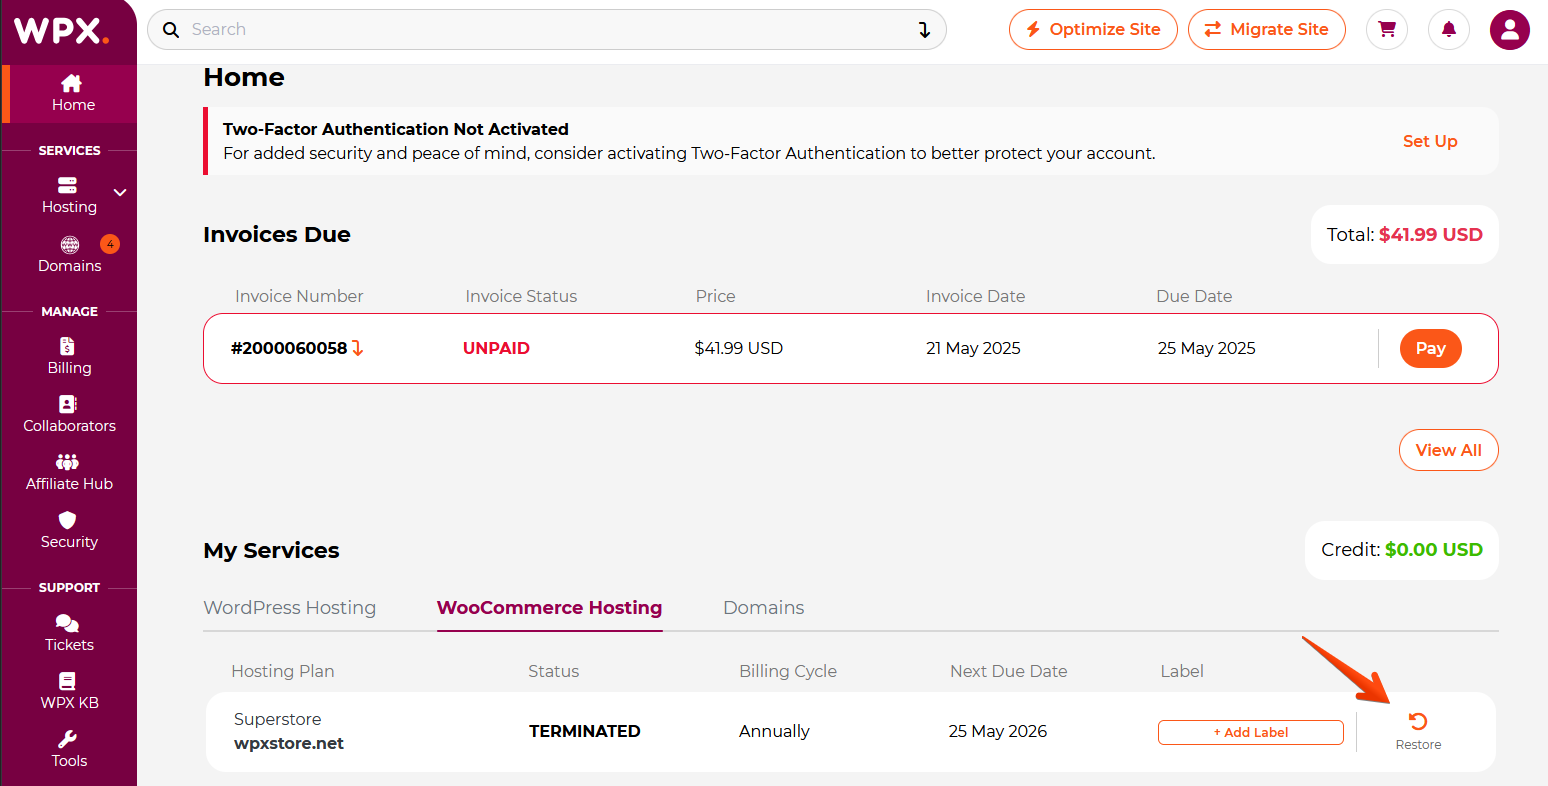
On the pop-up, click on the View Invoices button and complete the payment.
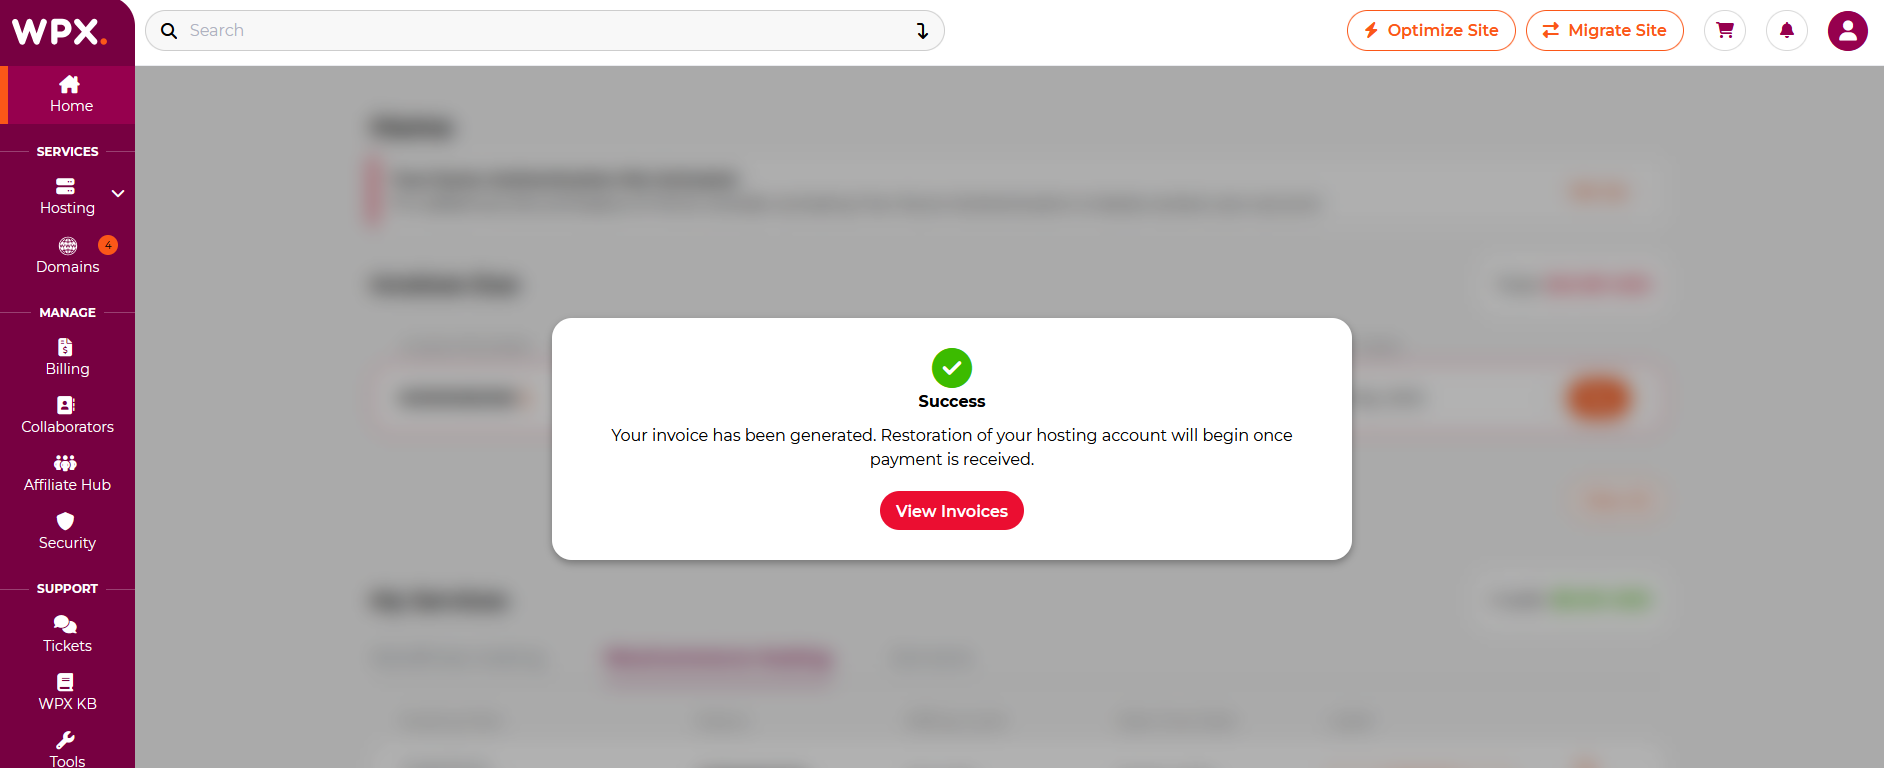
Step 4. Restoration process
After the invoice is paid, please allow some time for our system to restore your hosting plan. Larger plans, such as the Elite, may take longer to fully restore compared to the Business plan.
To avoid service interruptions and manual payments, we strongly recommend setting up an automated payment subscription.
Stuck at any point? Don’t worry, just click the live chat widget in the bottom-right, and one of our support agents will assist you in under 30 seconds.