Installing WooCommerce on a new website is very easy and can be done with just a few clicks. We have simplified the installation process for WooCommerce via our Hosting Panel. Let’s go!
Step 1. Log in to your WPX account
Begin by logging into your WPX account. You can do this by visiting the WPX login page.
Step 2. Go to Control Panel
Once logged in:
- Locate your hosting plan in the WPX client area.
- Click the Control Panel button next to the plan you wish to manage.

Step 3. Create Website
Once you reach your hosting plan Control Panel, click Create Website:
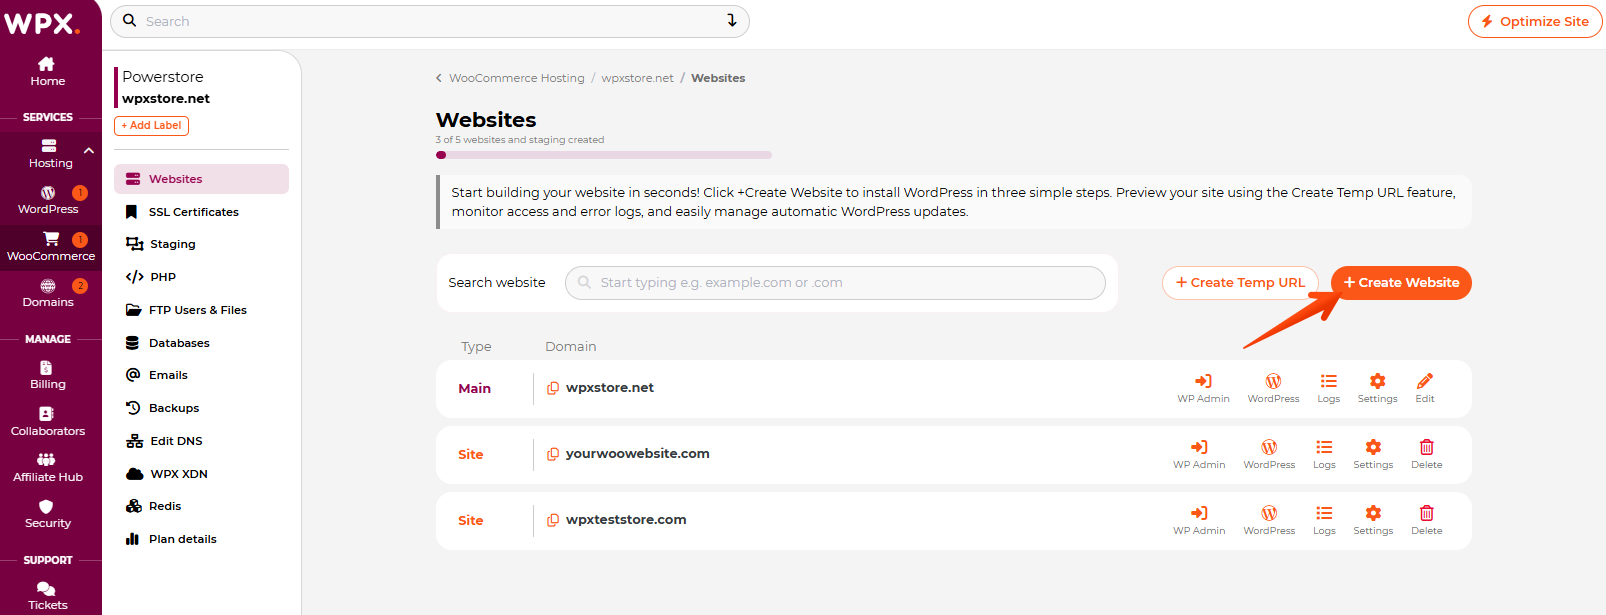
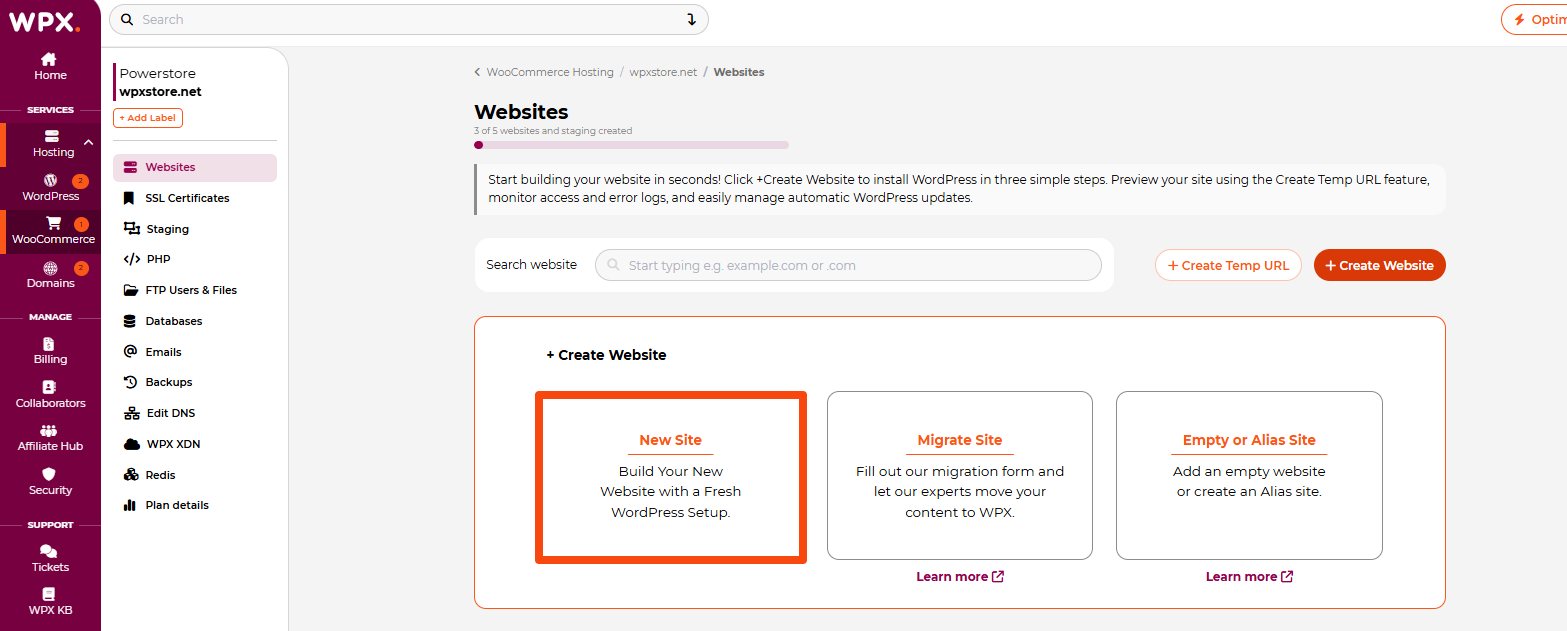
You’ll see a section where you can manage and add new websites to your account.
There are three different options there:
- Add a New Site with a fresh WordPress installation
- Migrate site: Fill out our Migration form if you need to migrate the site that should be added to your account
- Empty or Alias site: If you need to add a site without anything installed, or add an Alias
Depending on what you need, just click on the tab and fill in the required information. In our case, we will add a New Site with a fresh WordPress installation on it:
Step 4. Install WooCommerce
When you choose to add a New Site with WooCommerce, an installation form will appear that will allow you to enter your site details. Below, we’ll walk you through each section of the form:
WordPress Setup Details
- The domain or a subdomain you want to add
- Installation path (if you need to install WordPress in a subdirectory instead of the main directory)

WordPress Admin Info
- WordPress Admin E-mail
- WordPress Admin Username
- WordPress Admin Password

Install Plugins
You have the option to install W3 Total Cache with our pre-configured settings for better performance of your website.
Here you’ll also see the option to install the WooCommerce plugin during setup.

When you’re ready, click on the Create button.
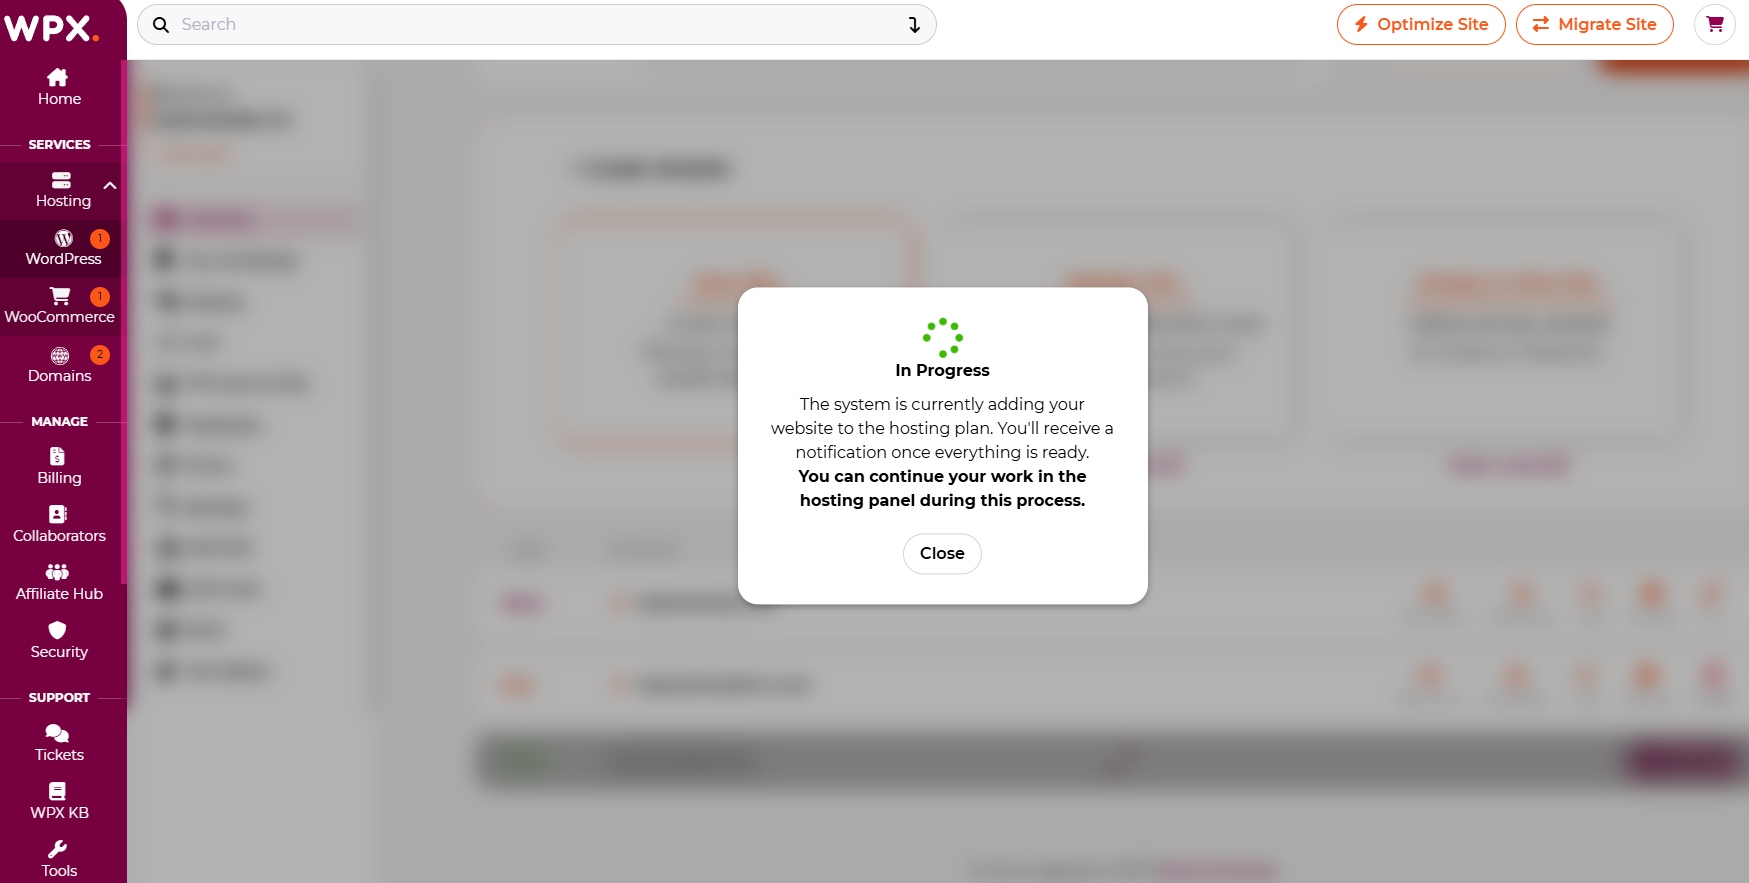
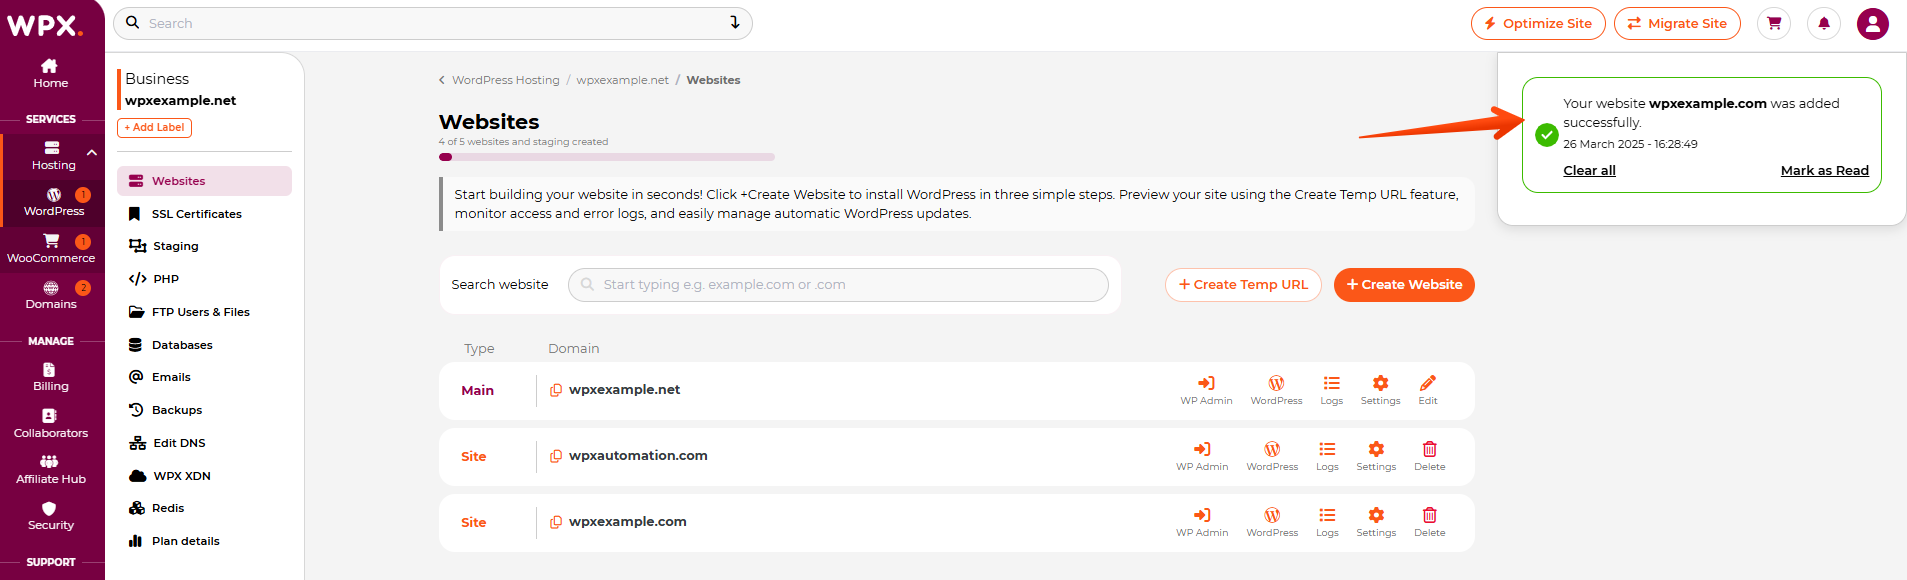
Once the website is added and WordPress is installed, you will receive a pop-up notification in the top right corner.
Stuck at any point? Don’t worry, just click the live chat widget in the bottom-right, and one of our support agents will assist you in under 30 seconds.