In this article, you’ll learn how to upload files directly through the WPX File Manager in just a few simple steps.
Step 1. Log in to your WPX account
Begin by logging into your WPX account. You can do this by visiting the WPX login page.
Step 2. Go to Control Panel
Once logged in:
- Locate your hosting plan in the WPX client area.
- Click the Control Panel button next to the plan you wish to manage.

Step 3. Launch the File Manager
Inside the Control Panel:
- Click FTP Users & Files in the left-hand menu.
- Then click the File Manager button in the newly opened tab.

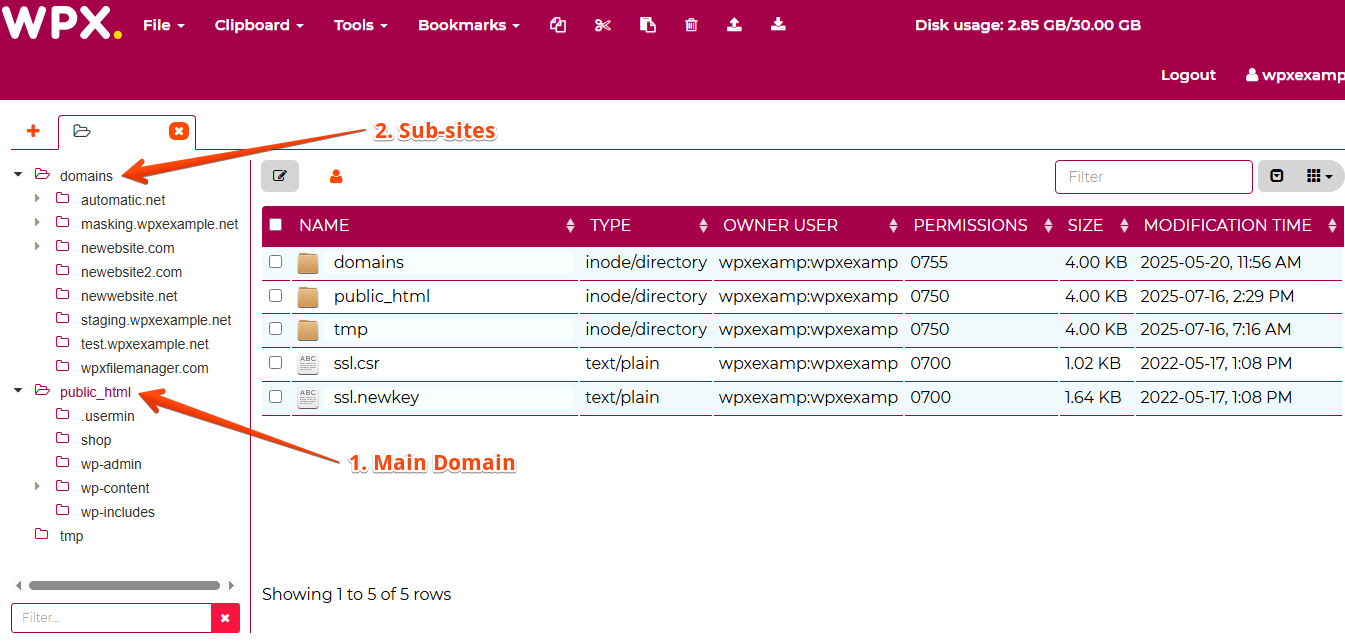
Step 4. Understand File Organization
Each website has its own public_html root directory:
- Your Main Website’s files are located in the general
public_htmlfolder. - Other Websites are stored under:
domains/yourdomain.com/public_html
Step 5. Upload your Files
Navigate to the folder where you’d like to upload the file. (Example: domains/wpxfilemanager.com/public_html)

Click File (1) in the top menu, then select Upload Files (2).

Choose the file you want to upload from your computer and click Open.

Once the upload begins, a confirmation will appear in the bottom-right corner, and your file will be visible in the folder list.

Stuck at any point? Don’t worry, just click the live chat widget in the bottom-right, and one of our support agents will assist you in under 30 seconds.