This article is only for users who do not have hosting services with WPX but have to manage their domain’s DNS zone and add new DNS records.
Step 1. Log in to your WPX account
Begin by logging into your WPX account. You can do this by visiting the WPX login page.
Step 2. Domain Settings
Within the Control Panel:
- Select Domains from the main side navigation.
- Click the Settings button

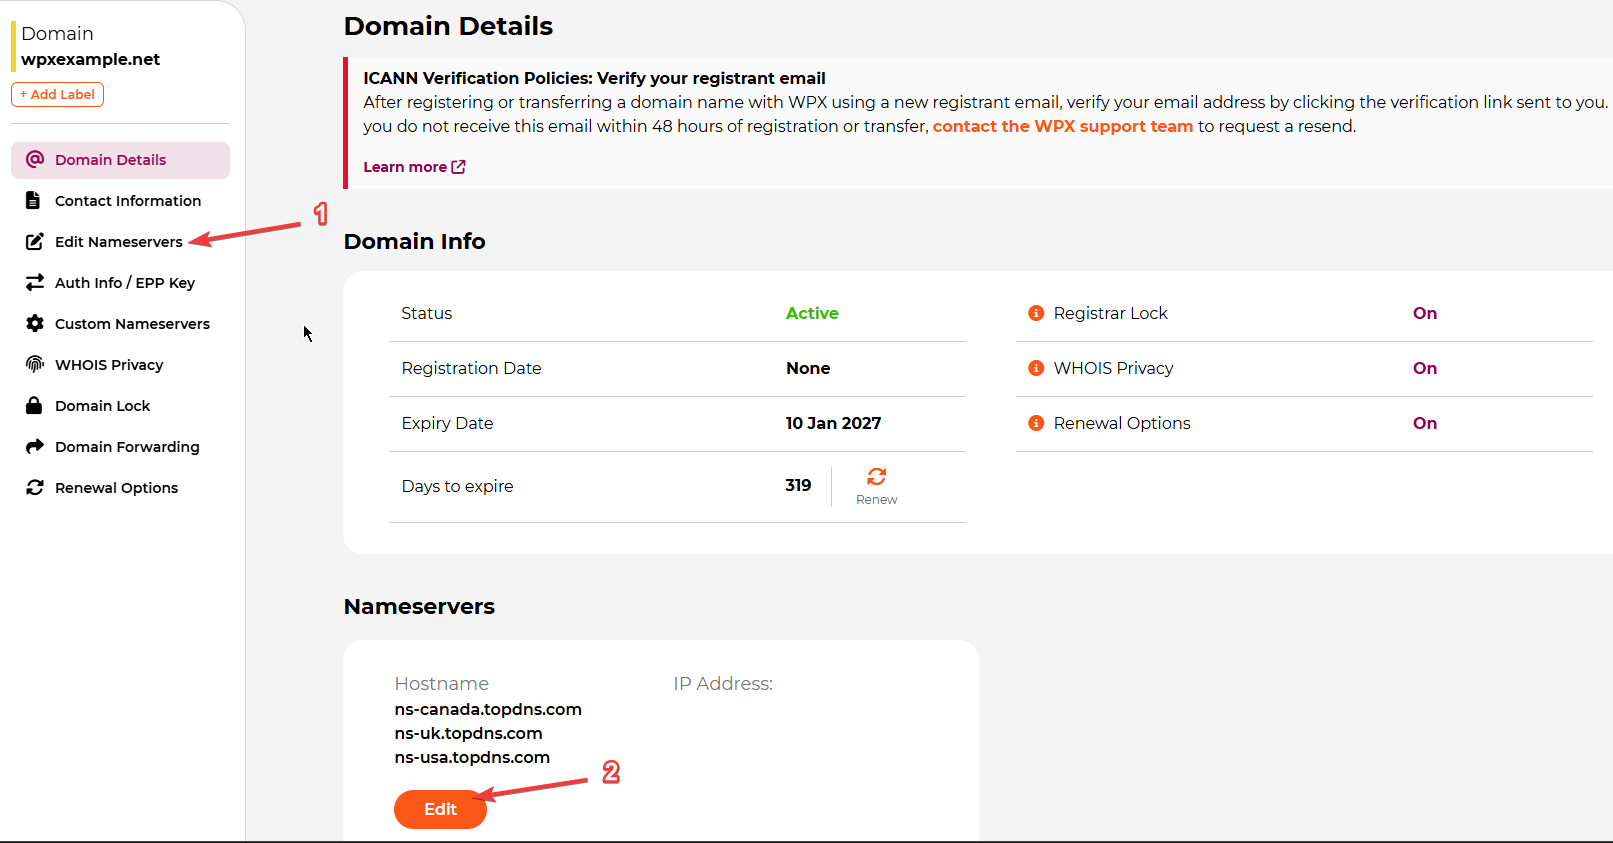
You’ll land on the following page, which shows many details about the domain you’ve selected to manage. The Edit Nameservers (1) button will help you both in changing your NameServers or accessing the advanced DNS management to add new DNS records (such as TXT, CNAME, A records, etc.). You can also directly click on the Edit button (2) below, which will take you to the same page:
Step 3. Manage your DNS records
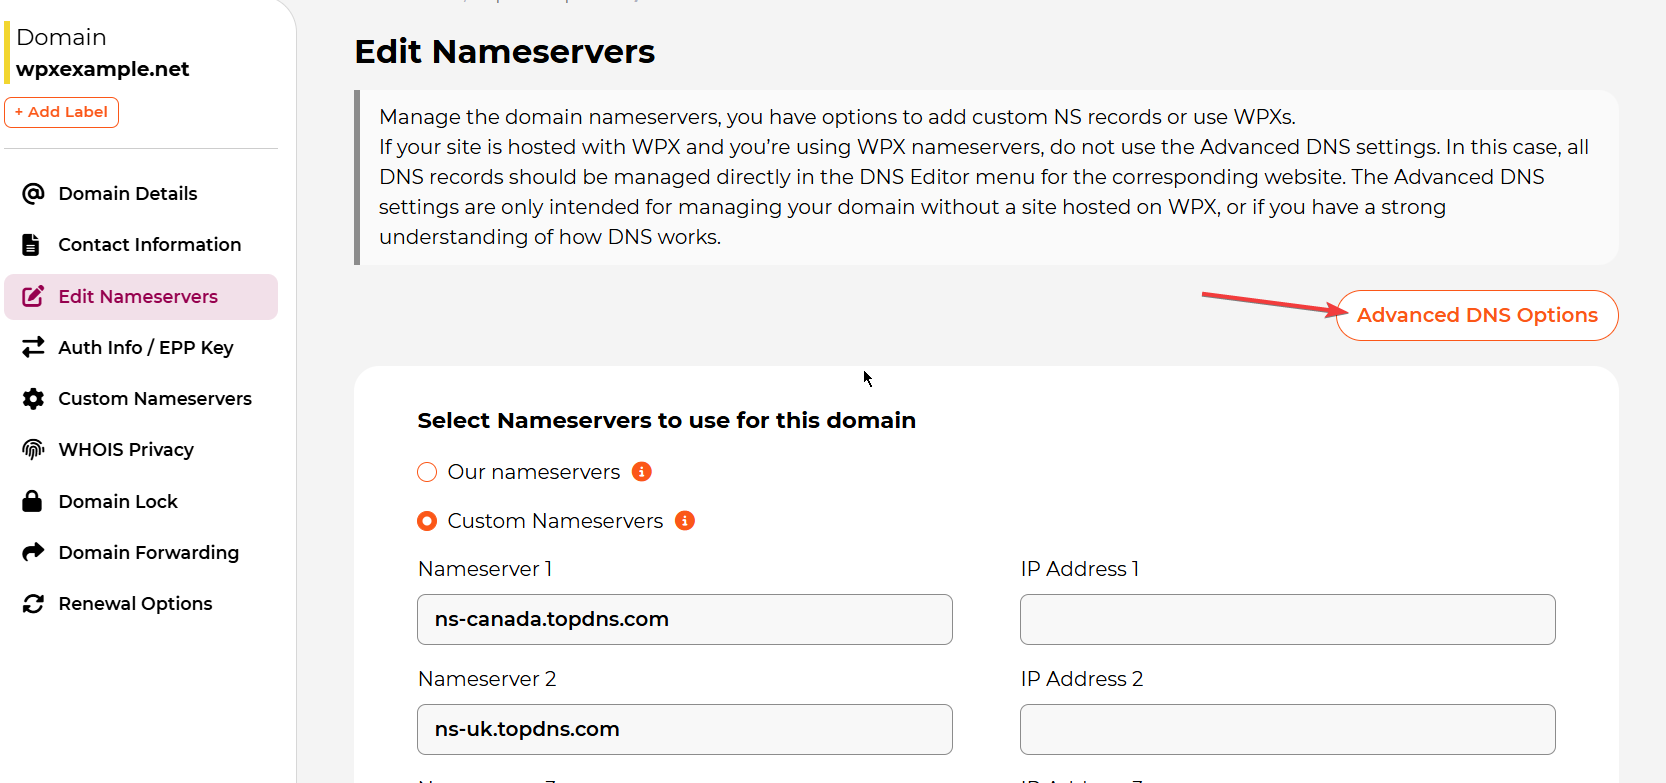
The next page you’ll see after clicking on the Edit Nameservers button is the one below, proceed with the Advanced DNS Options.
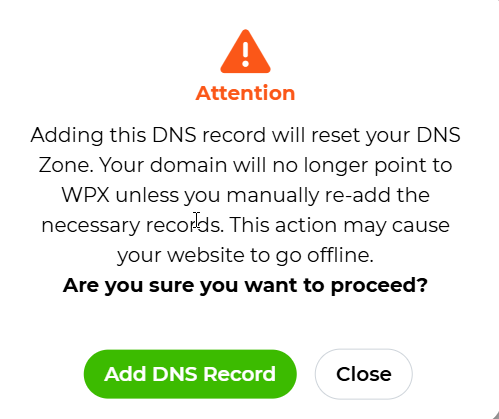
You’ll see the following warning. Make sure to ignore it if your domain isn’t pointed anywhere using NameServers (to a specific hosting service such as WPX). If that’s not the case and your domain is pointed using Name Servers, please make sure to select the Close button.
How to add DNS records?
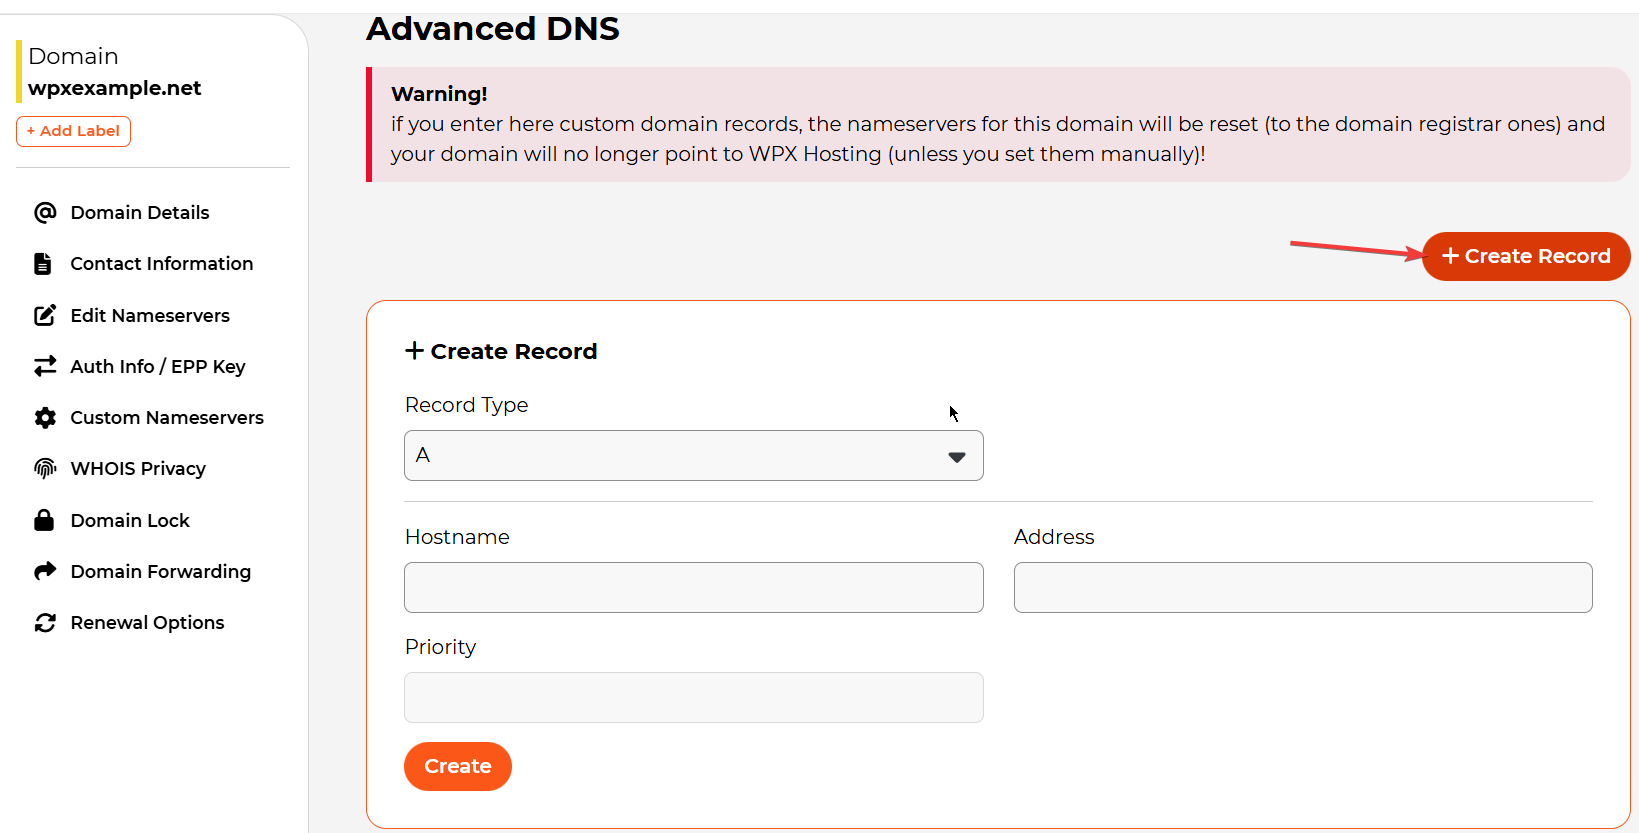
To add a new record, select the +Create Record, then fill in the required information and record type and click on the Create button.
You can select from the following record types:
- A record
- AAAA record
- CNAME
- TXT
- NS
How to delete DNS records?
It’s as simple as adding a record. Make sure to select the Delete Record red button next to the DNS record you need to be removed:

Stuck at any point? Don’t worry, just click the live chat widget in the bottom-right, and one of our support agents will assist you in under 30 seconds.