In this article, we will go through and uncover uncertainties in regards to memory limits in WordPress. There are two types of memory limit and it is important that we distinguish them properly. Most articles regarding the topic name them both the same way, however, they are completely different. Of course, we will go through the errors associated with reaching this limitation and offer different solutions on how to fix them.
What does WordPress Memory Limit Error mean and where can I find it?
In terms of breaking everything down in simpler terms, the Memory Limit is connected to the built-in PHP structure of WordPress itself and it is set by default for each website installation.
The default settings for WP Memory Limit are quite low and sometimes may hinder your workflow and operations in the back end while working on your website. Usually, they can be viewed from each WordPress Dashboard.
To do so, you will need to login your website and navigate to Tools (1) and select Site Health (2):
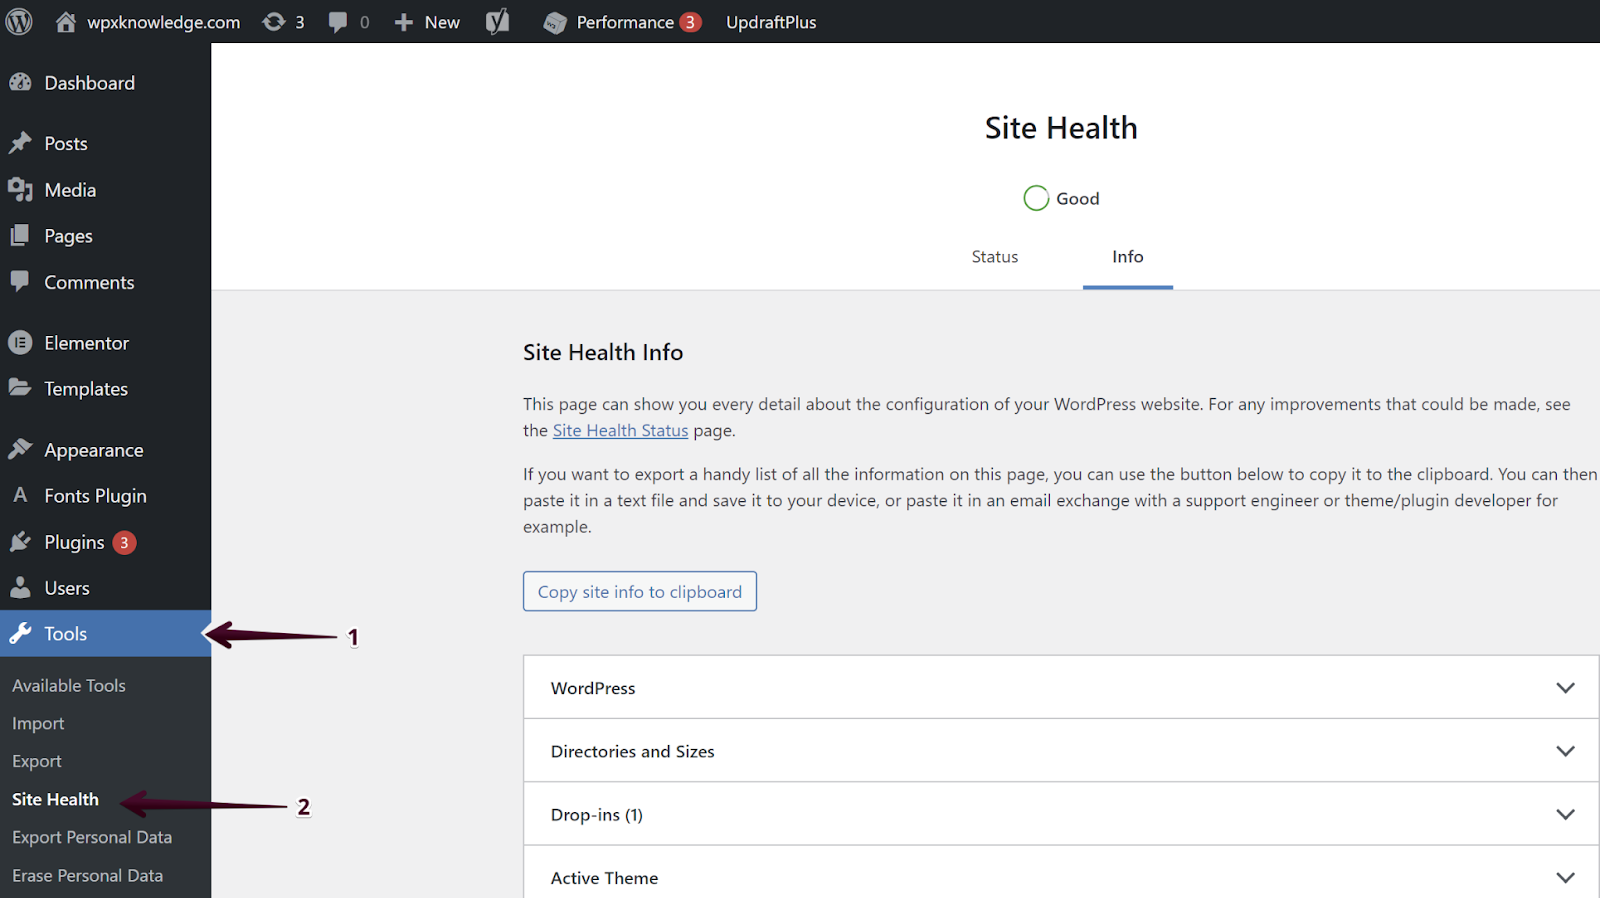
Once you have selected the tab, you will need to choose the section Info:

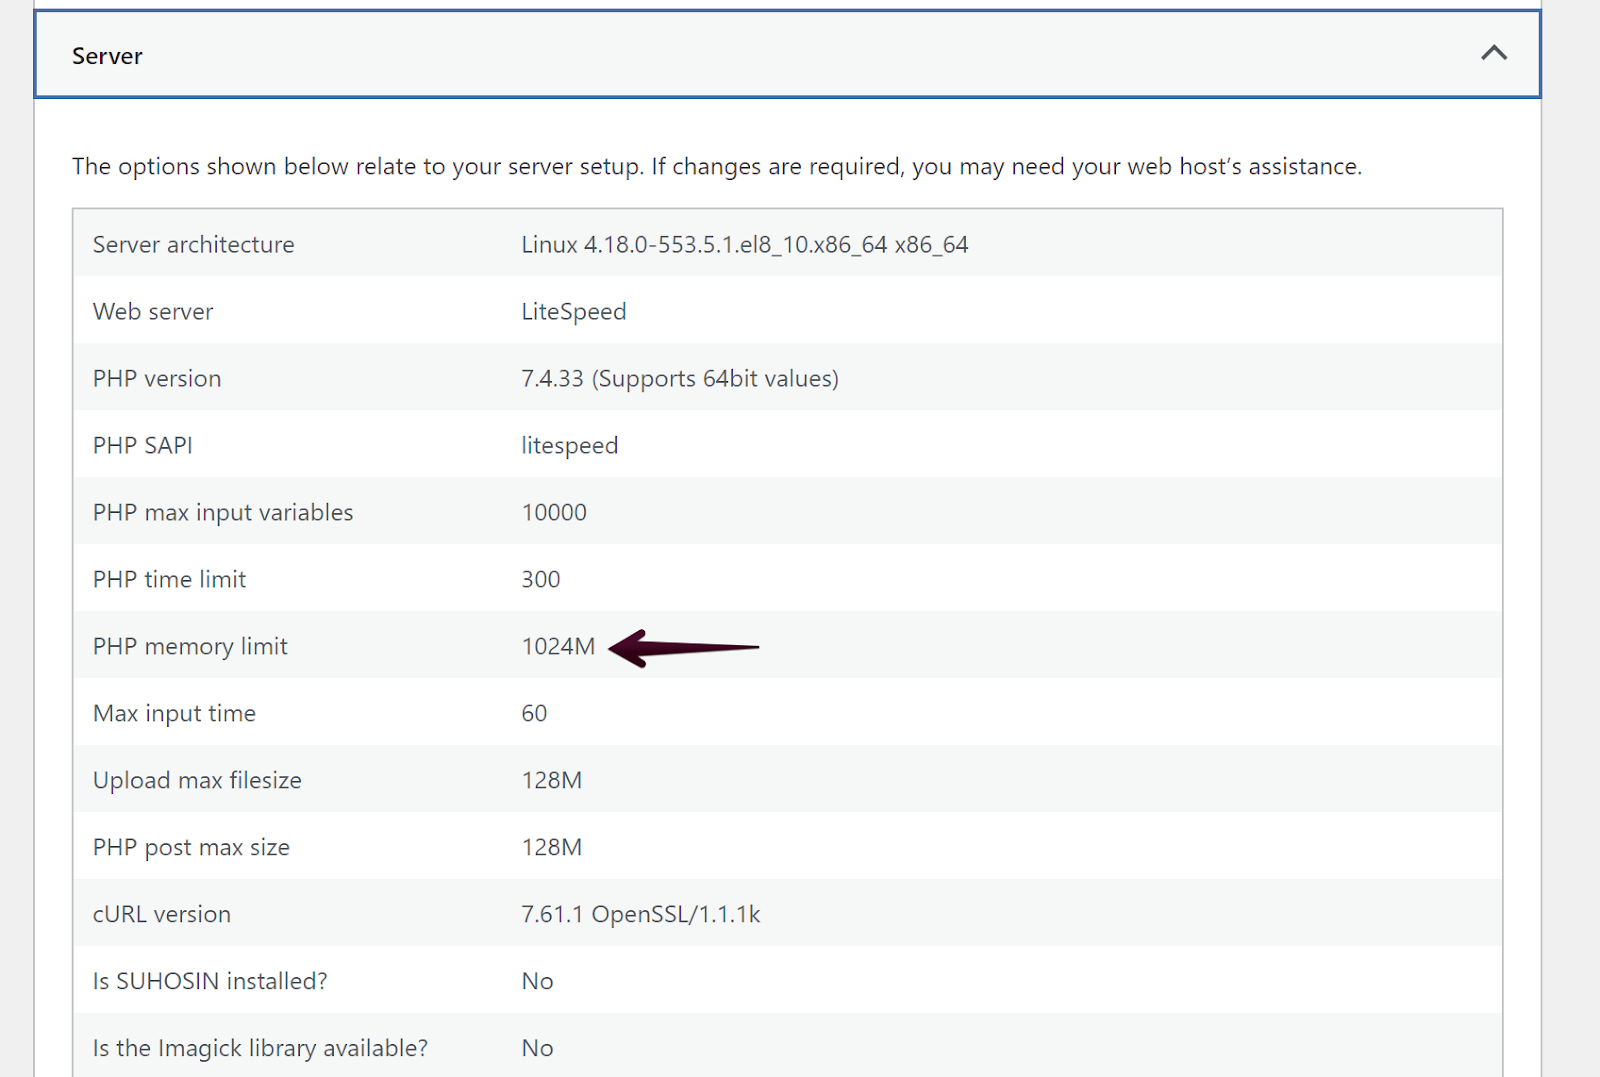
From there, it will load up and provide dropdown options for each specific part of your website, including the resources for your PHP Memory Limit. To view the specific limit set for your website, you need to select Server (1) and see field PHP Memory Limit (2):
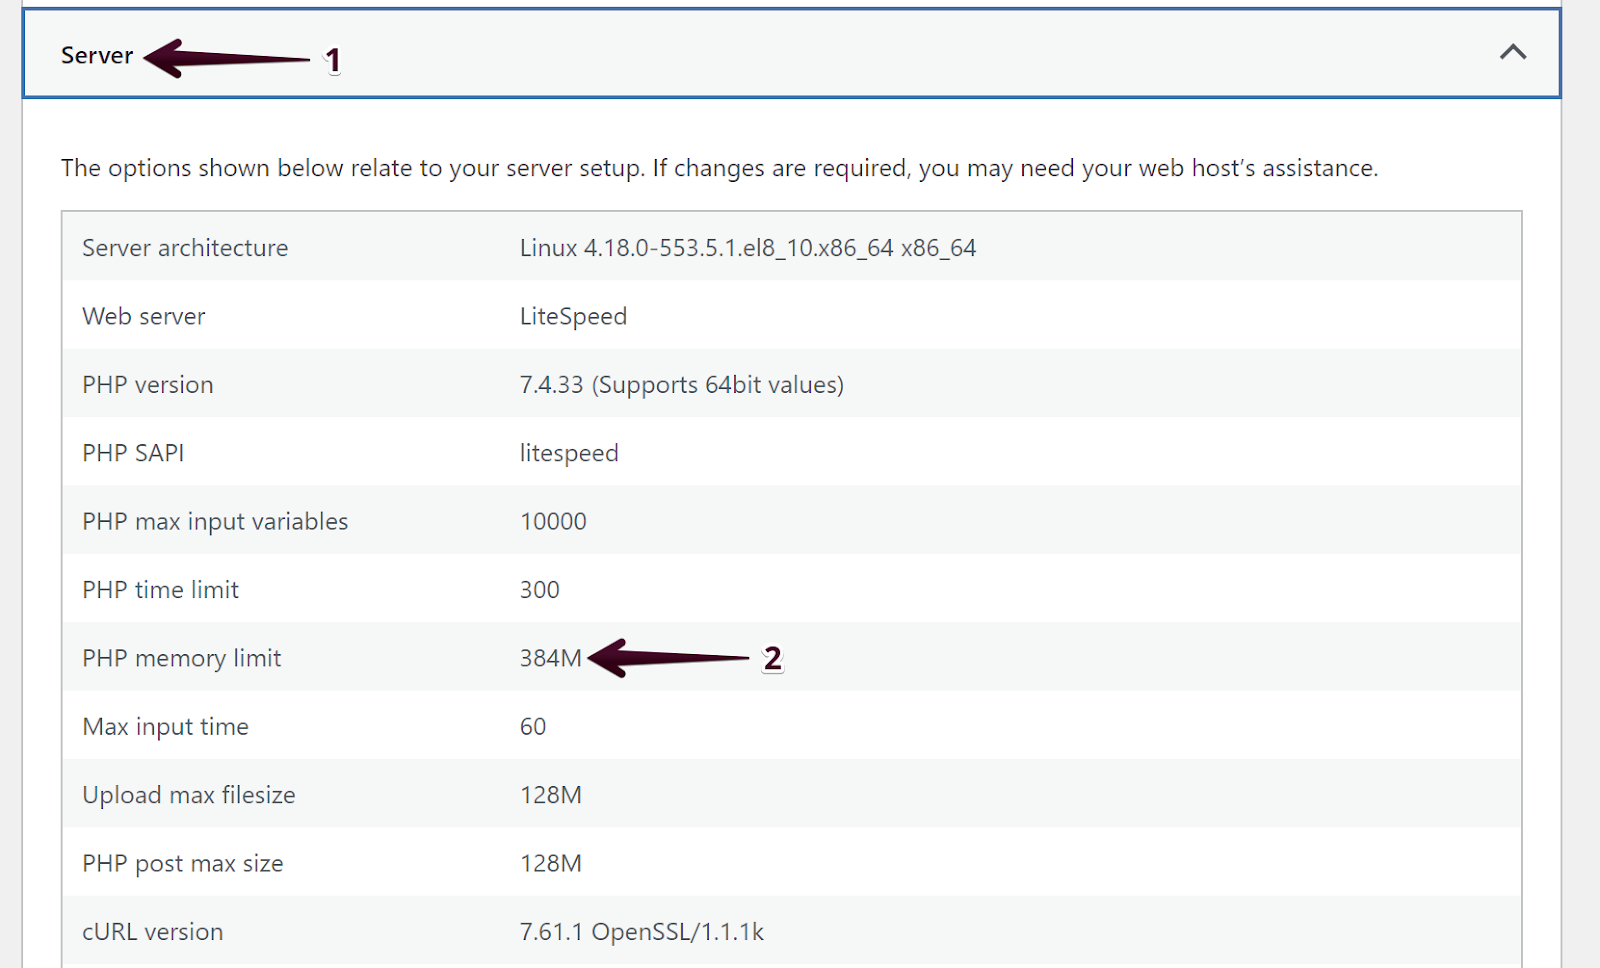
That’s it! The next step would be to set a higher limit to test if that fixes the error.
Fix WordPress Memory Exhausted Error
To fix the error, we will need access to the website files. You can use an external FTP client or our own built-in File Manager to handle the process without much effort.
The file responsible for your WP Memory Limit is the wp-config.php file. To adjust the limit, you would need to navigate through the original path: public_html and you should be able to find it there:
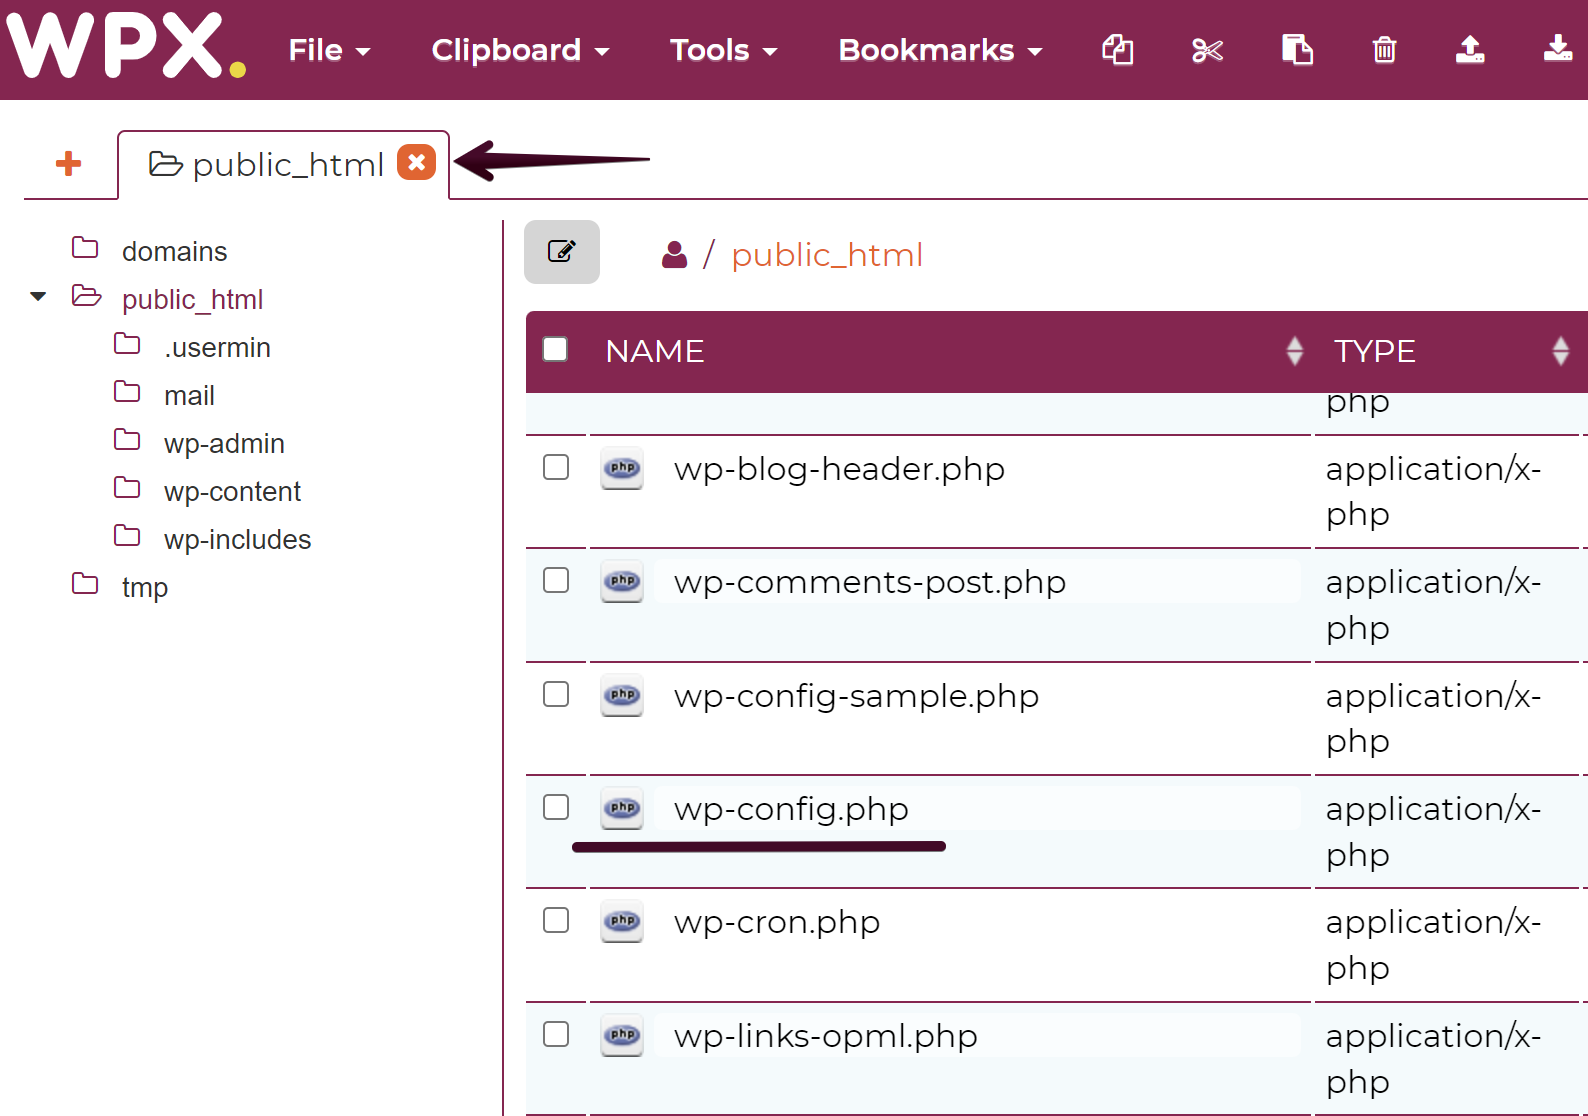
Once you find the file, you simply need to double-click on it to load up the code inside and edit it freely. The final step of the process will require putting a certain code with a higher limitation for your WP Memory Limit.
The code looks like this:
define( ‘WP_MEMORY_LIMIT’, ‘1024M’ );
You can see that the code indicates that the WP Memory Limit should be set to 1024 MB instead of the previous setting by default to 384 MB.
The code needs to be set right above the last possible text and do not forget to Save the changes made to the file:

Once that is done, you can check it by going to Site Health again from Step 1 and revisiting the information shown by WordPress:
That’s it! You have successfully changed the WP Memory Limit for your website.
What’s the difference between WP Memory Limit and Server Memory Limit?
As promised in the beginning, it is important to mention the difference between two types of memory limit. The first one, which we discussed in this topic is named either WP Memory Limit or PHP MemoryLimit, strictly connected to your WordPress installation.
The next one is Server Memory Limit or in other words RAM. That is the allocated server resource for each WordPress website you get per your hosting plan configuration. That limitation is fixed and can not be changed, unless you upgrade the plan itself to a higher one with more resources or vice versa.
I hope that we cleared all the confusion in regards to the two types of memory and how it can be addressed. If you still receive the same error after making the needed changes, then we recommend contacting our WPX Support for further technical guidance.
If you find this article useful, you should also read our blog posts on How to Fix WordPress Permalink Issues and How to Fix LCP Issue in WordPress!