Yes, you can fully replace your live site with the content from your staging site.
This is typically done when the staging version has been built from scratch, with different themes, plugins, or layouts, and you’re ready to push those changes live.
Before diving into the process, make sure you’ve reviewed the following steps to ensure a smooth transition. But if you’re unsure, please don’t hesitate to reach out for assistance from our support team.
Things to Consider Before Proceeding
Before pushing your staging site live using this method, there are a few important precautions to keep in mind to ensure a smooth and safe process.
1. Back Up Your Live Site
Always create a backup of your live site before making major changes. You can use a backup plugin or, even better, the built-in Backup Manager in your WPX Control Panel to create a Personal Backup.
You won’t be able to create a backup during the “merge” step because the files of the live website will already be deleted.
2. Expect Temporary Downtime
Replacing your staging site with the live site will delete all content in the live website. The process involves deleting the existing site files and database before restoring the staging version. As a result, temporary downtime is expected during the transition.
Make sure you’re comfortable with how the WPX Control Panel works before initiating this step. If needed, refer to the full hosting panel overview for guidance.
3. Keep Tools Ready
To minimize downtime and respond quickly if needed:
Prepare a simple HTML maintenance page to upload temporarily. This reassures visitors and avoids confusion from seeing broken pages or error messages.
Keep phpMyAdmin and the File Manager tabs open in your browser before starting the process.
4. Understand What the Merge Does
This method does not use the actual merge option incorporated within the Control Panel. This is a full replacement of your live site with the staging version. Any recent content, user activity, or changes made on the live site that are not present in the staging site will be lost.
If there’s data on the live site that needs to be preserved (e.g., recent blog posts, WooCommerce orders, user comments), make sure to export that data before proceeding. You can then import it back after the staging site has been pushed live.
Step 1. Log in to your WPX account
Begin by logging into your WPX account. You can do this by visiting the WPX login page.
Step 2. Go to Control Panel
Once logged in:
- Locate your hosting plan in the WPX client area.
- Click the Control Panel button next to the plan you wish to manage.

Step 3. Prepare phpMyAdmin and File Manager
To minimize downtime, let’s open phpMyAdmin and the File Manager in different tabs.
To open the phpMyAdmin:
- Select Databases to preview all databases in this hosting plan
- Check the database name of your live website to know which content should be deleted later. In our case, that is example_site.
- Click on phpMyAdmin

Okay, keep it open in a new tab and get back to the control panel to prepare the File Manager.
To open the File Manager:
- Go to FTP Users & Files
- Select File Manager
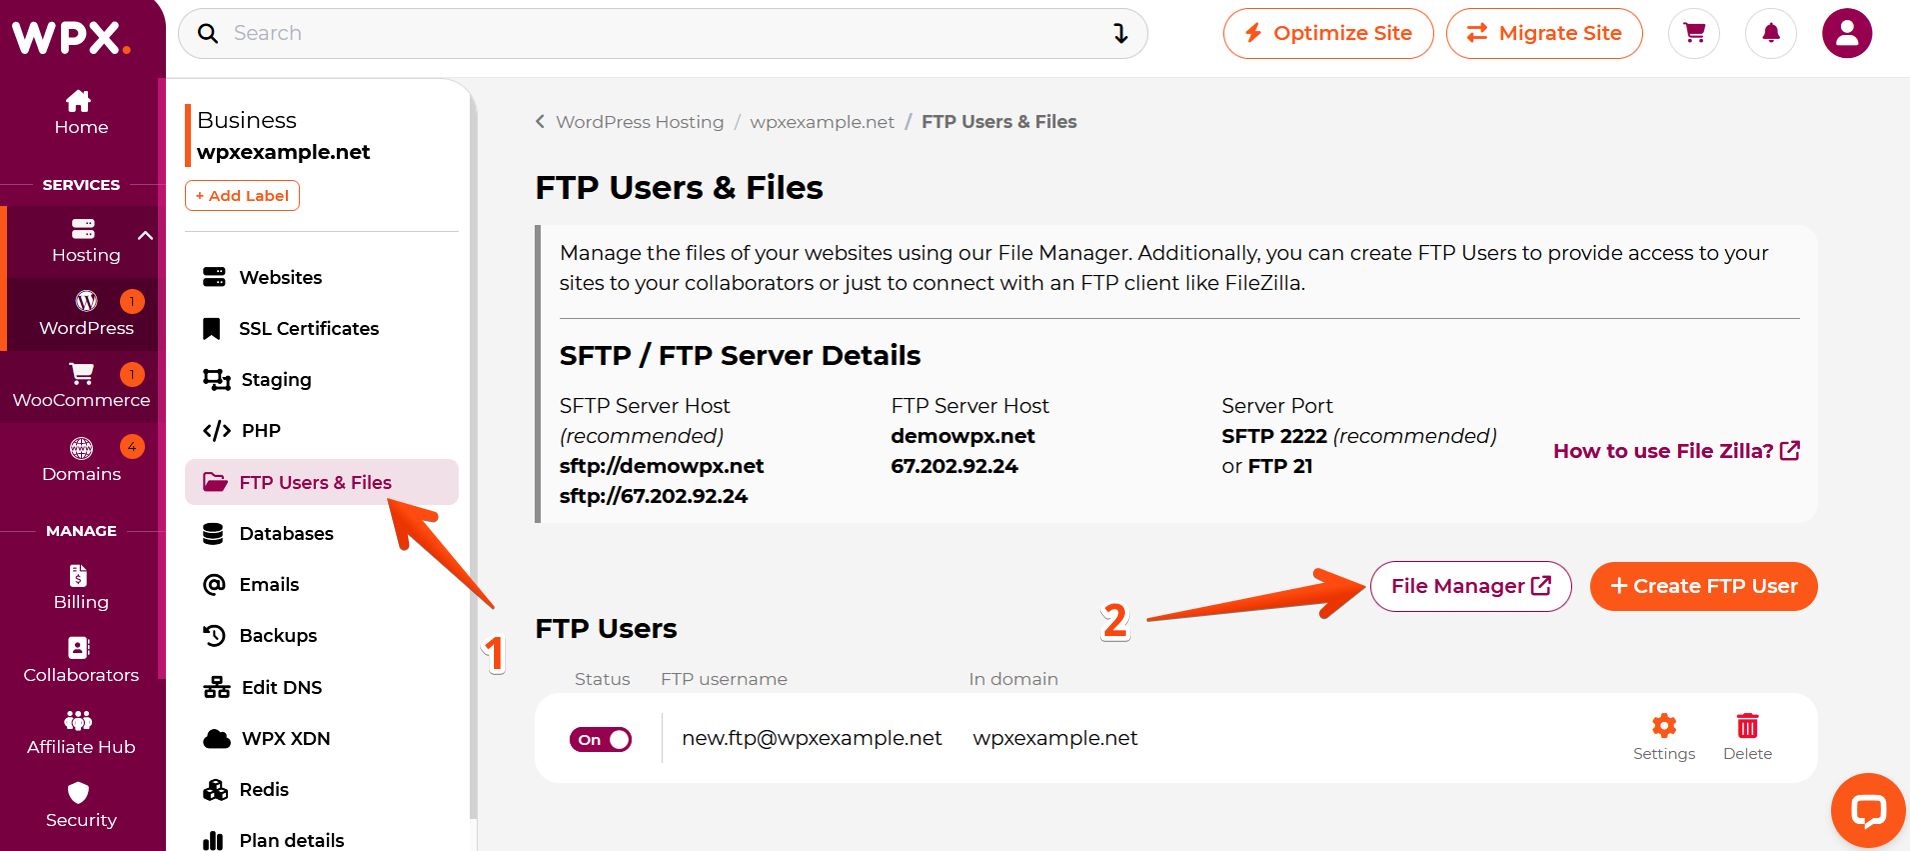
Before you proceed further, locate the live site files, which are stored in its public_html directory.
In our example, our live site is the main site. The files of the main website are located in public_html.
If the site you’re using is not your main one, you can find its files in the domains/yourlivesite.net/public_html directory.
Now that you have everything prepared, let’s start by dropping the database of the live site using phpMyAdmin.
Step 4. Drop the Database of the live site
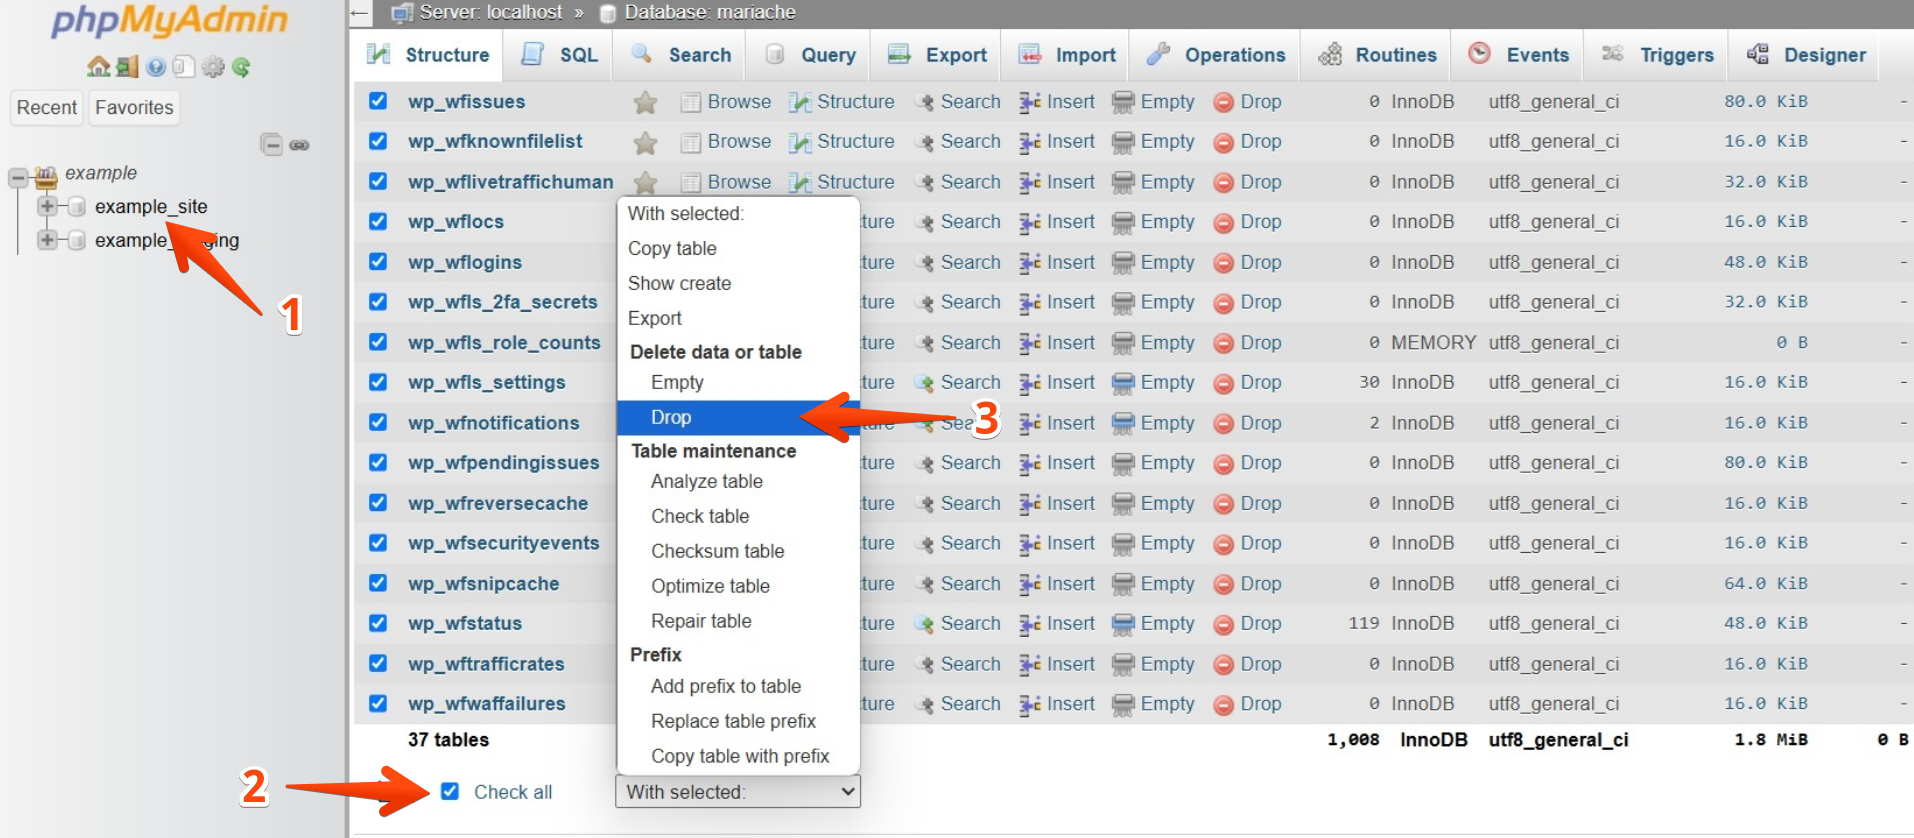
Open the tab with your phpMyAdmin and follow the steps to drop the database:
- Select the Live site database, in our case example_site.
- Scroll down in the right panel and select all tables by checking the Check all box.
- Right-click with the mouse to open the menu and choose Drop.
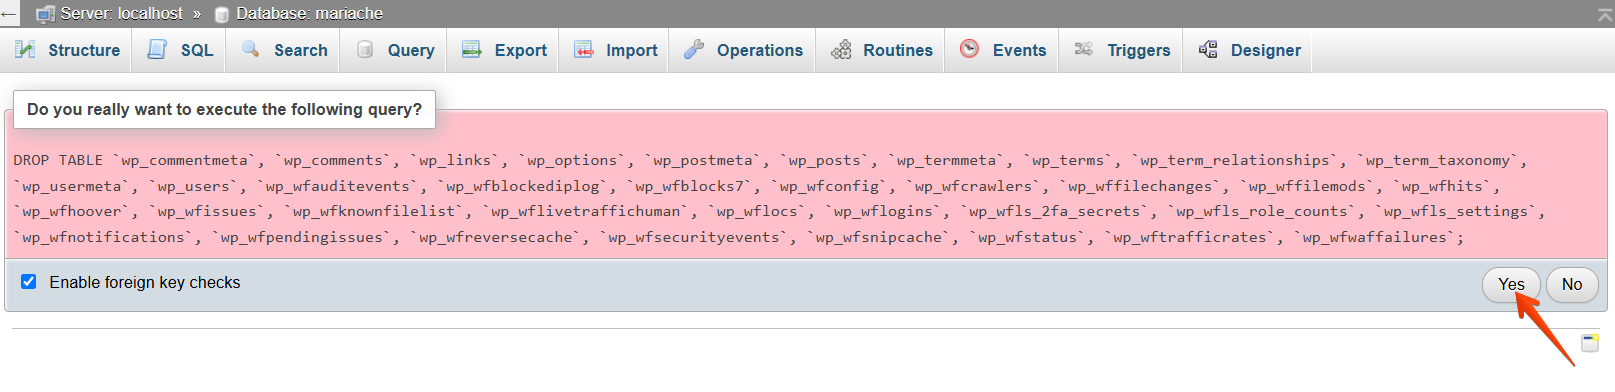
In the confirmation prompt, click Yes to delete the tables.
Step 5. Delete all Files except wp-config
Once the database is dropped, it’s time to remove the Live site files.
Go to the File Manager tab that you’ve already prepared. And open the live site’s public_html directory.
- Make sure you are in the correct website directory.
- Select all files except the
wp-config.phpfile (and if you set up an HTML maintenance page, exclude it too). - Click on the Bin button to delete the selected files.
- A pop-up window will appear to confirm the changes.
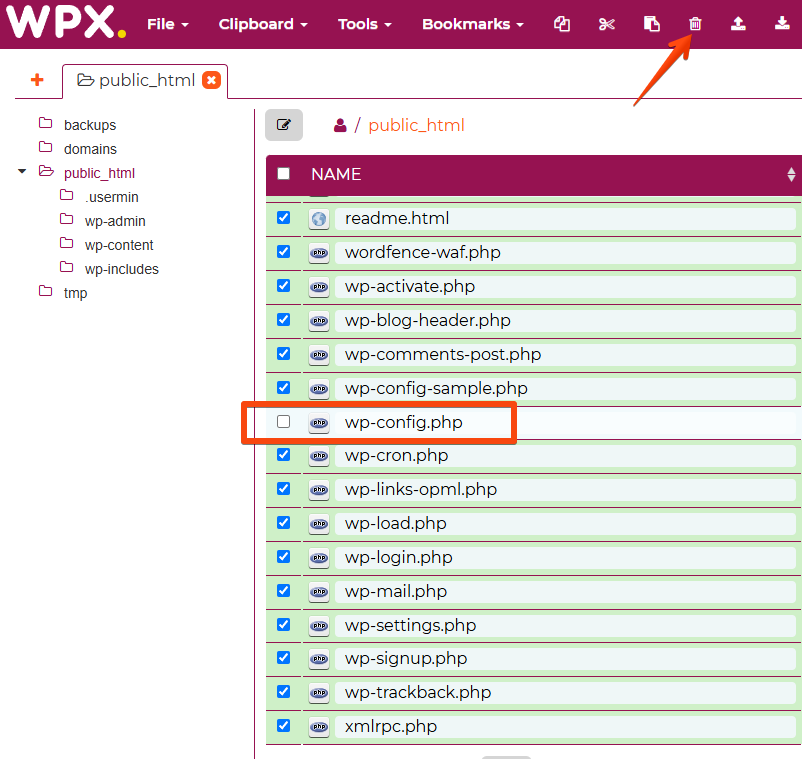
Review the list of files carefully before confirming deletion. Make sure that wp-config.php is not included in the deletion list, as this file contains critical configuration settings for your WordPress site.
If you’re using an HTML maintenance page, be sure to exclude it as well. Deleting the maintenance page will result in a generic WPX error screen being displayed to your visitors during the transition period.
Taking a moment to double-check this step can help prevent unnecessary downtime or confusion.
Step 6. Replace the Live Site with the Staging Site
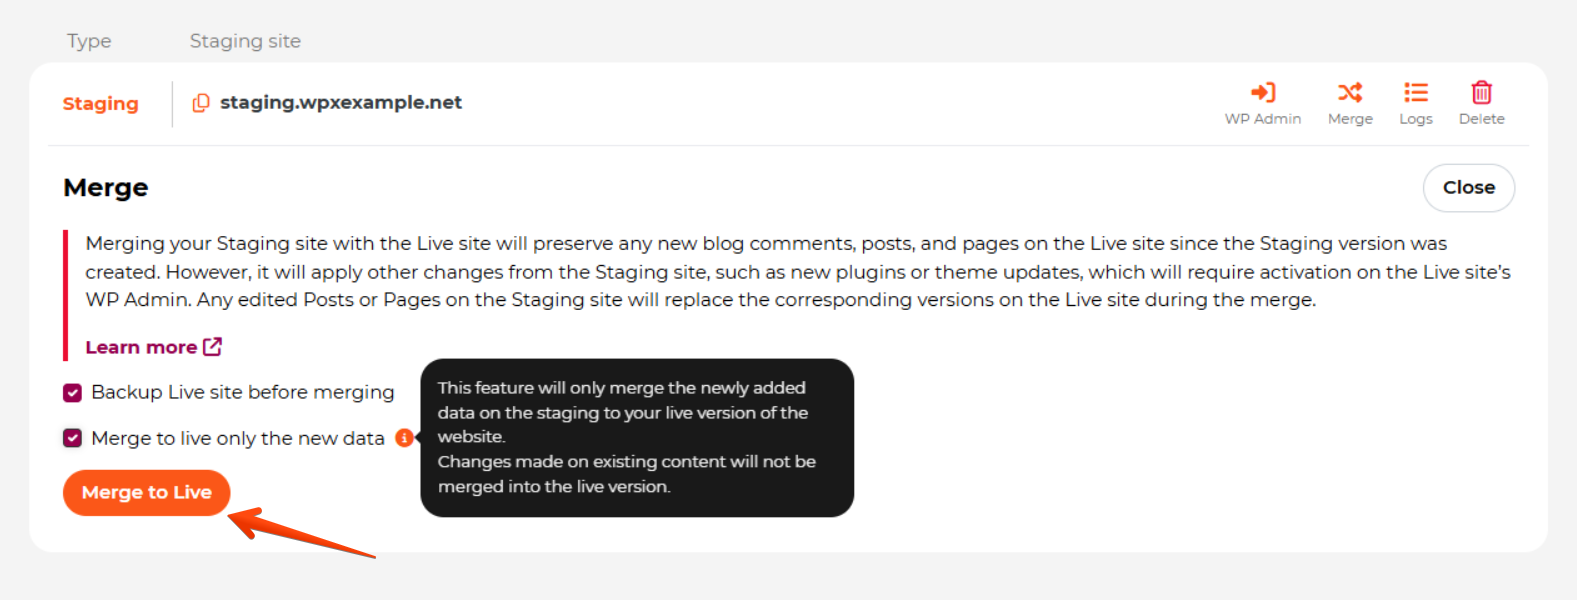
These are the final and easiest steps: we’ll use the merge button to complete the replacement.
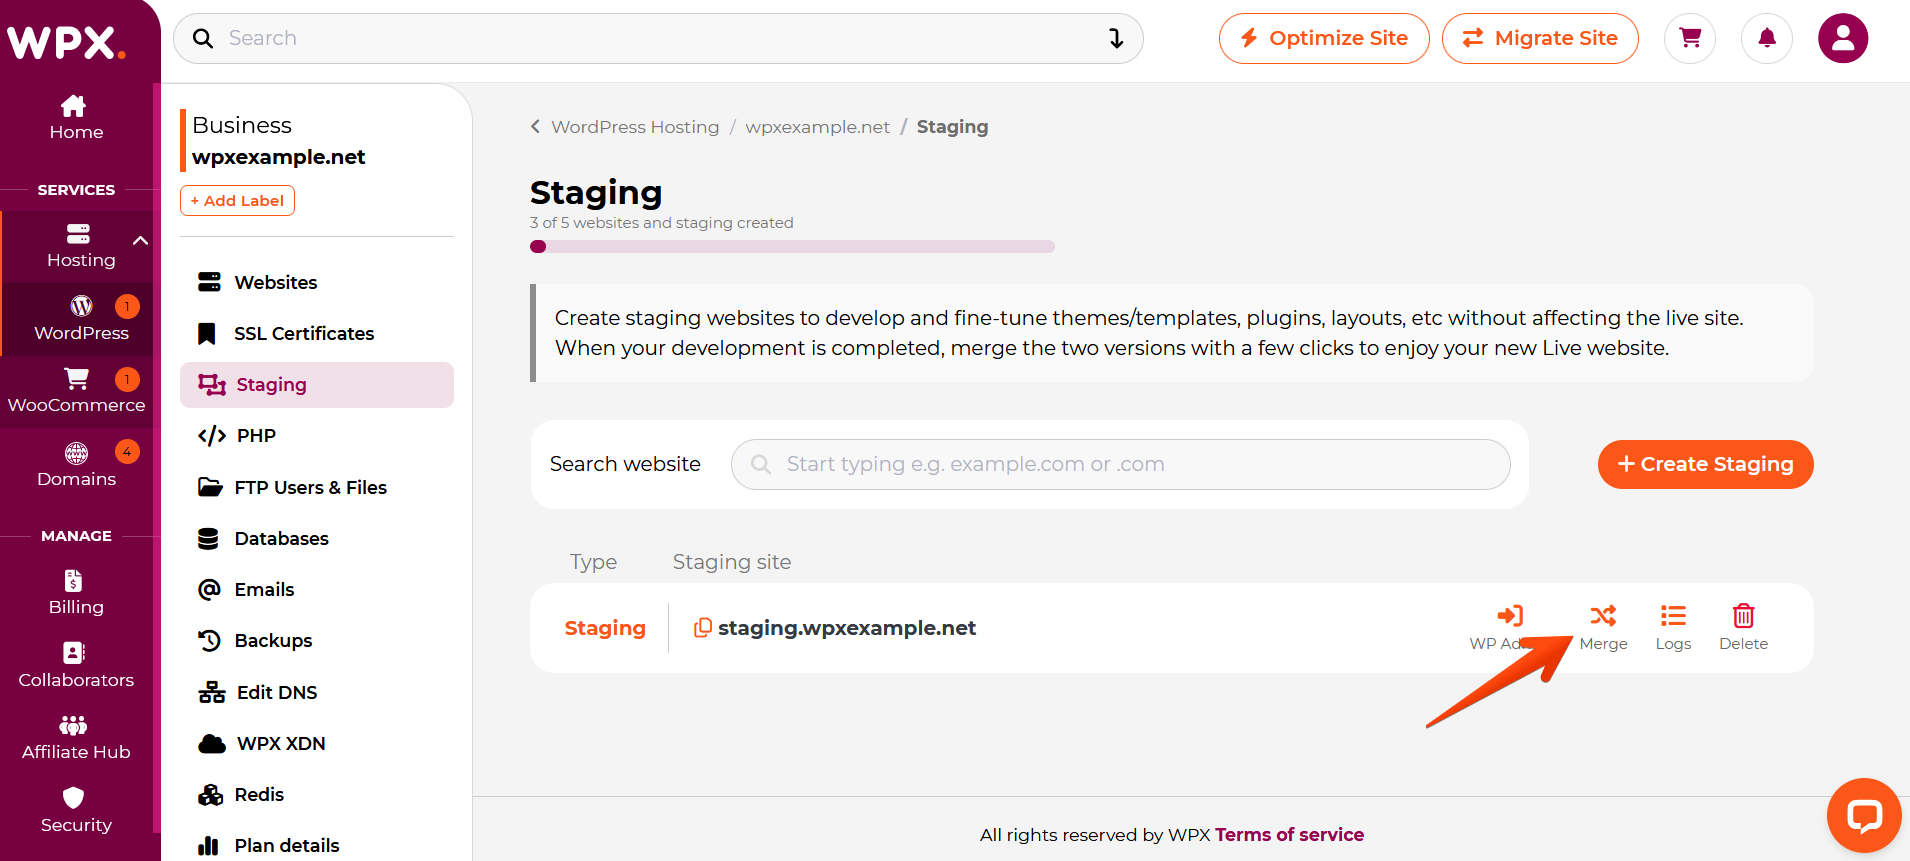
- Navigate to the Staging section in your WPX Control Panel.
- Locate the Staging site you want to merge.
- Click the Merge button next to it.
You will not need a backup of your live site because we’ve already deleted its content. You can uncheck that option and continue with merging.
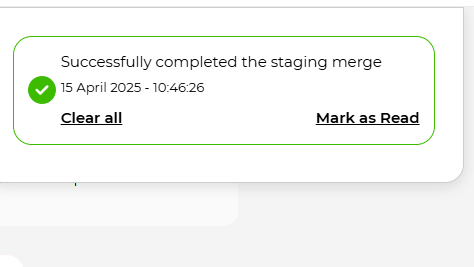
Once the merge process is complete, a pop-up notification will appear in the upper-right corner of your panel.
Have more questions? Contact the WPX Support Team through the live chat widget in the bottom-right corner, and they’ll assist you promptly, typically within 30 seconds.