A CNAME (Canonical Name) record is a DNS record that maps one domain to another, acting as an alias. For example, blog.example.com can point to example.com, ensuring it always redirects to the main site. Unlike a 301 redirect, which happens at the browser level and changes the URL, a CNAME works at the DNS level without altering the address in the browser.
More about the different types of redirects you can find here.
In this article, you will find a guideline on what steps you need to take to add a CNAME record via the WPX Control Panel.
Step 1. Log in to your WPX account
Begin by logging into your WPX account. You can do this by visiting the WPX login page.
Step 2. Go to Control Panel
Once logged in:
- Locate your hosting plan in the WPX client area.
- Click the Control Panel button next to the plan you wish to manage.

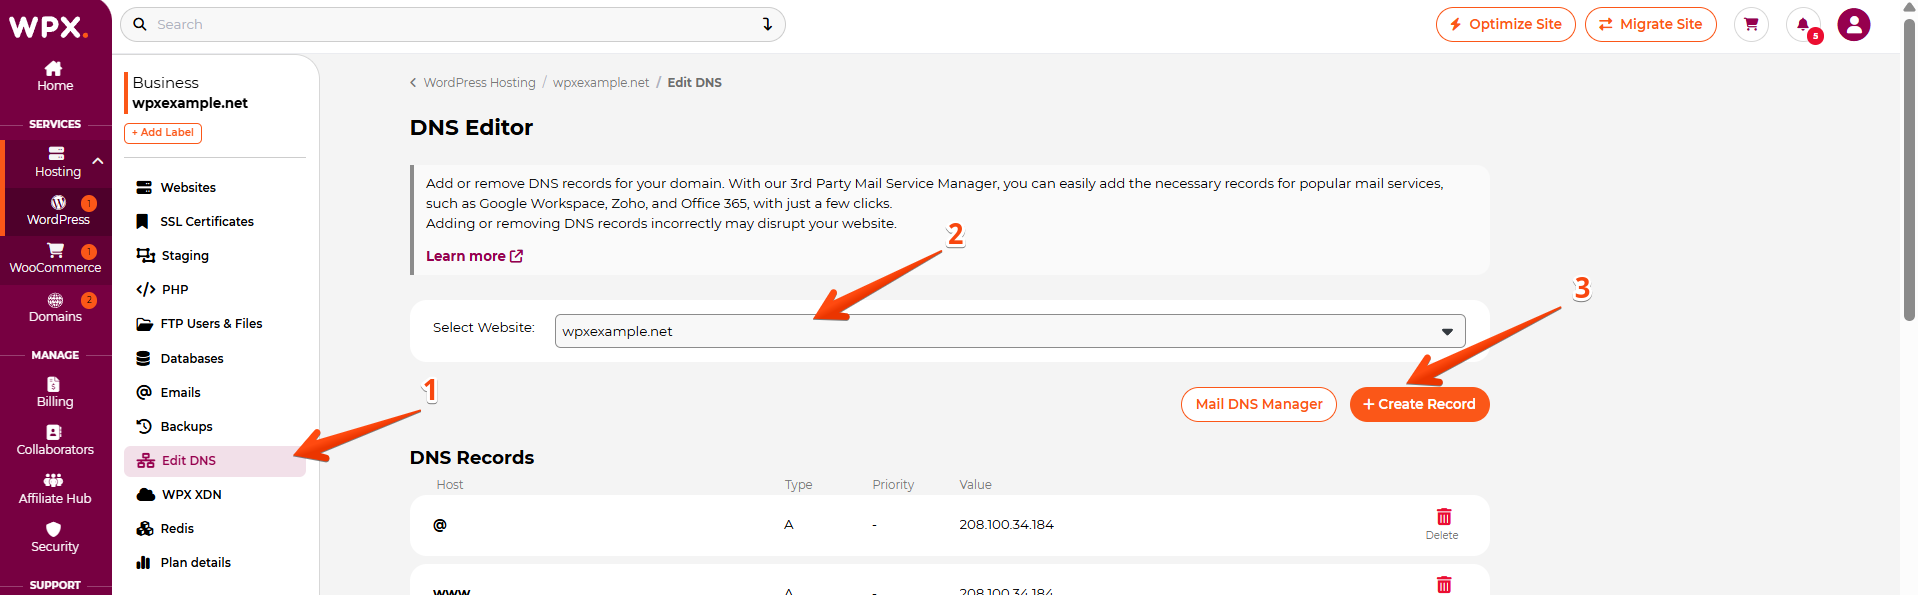
Step 3. Navigate to the DNS Editor
- Select the Edit DNS section.
- Select the website to which you want to add a CNAME record.
- Click on the +Create Record button to add a new record.
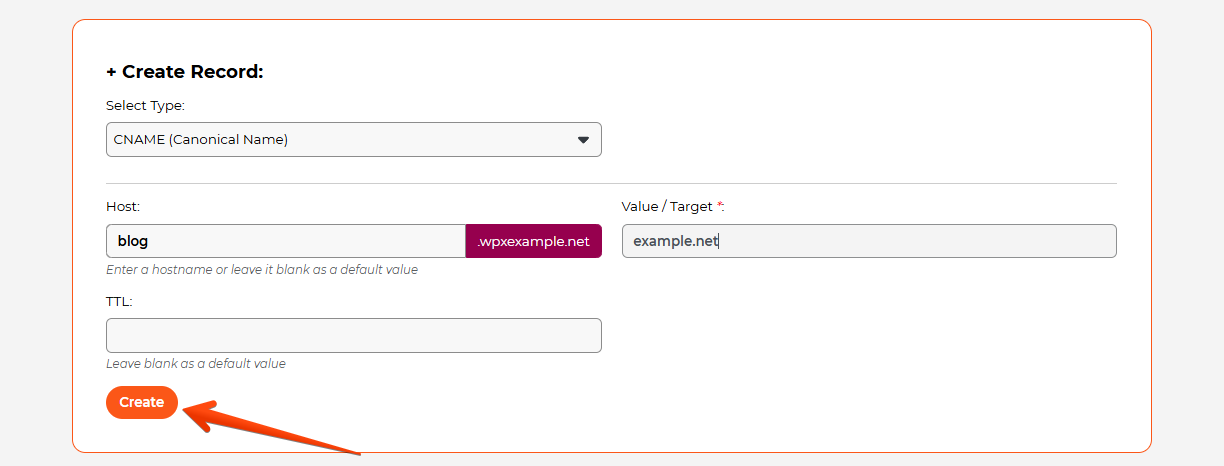
Step 4. Add the CNAME record
After clicking the +Create Record button, a new setup area will appear, allowing you to add your CNAME record.
- Select the Type of the record to be CNAME.
- Add the Host name. This would be the subdomain you want to point to (e.g., blog for blog.example.com).
- Add Value/Target for the destination domain (e.g., example.com or custom.target.com).
- Click on the Create button.

How can I check if the record I’ve added is working?
A CNAME record becomes active once it has propagated across DNS servers, which can take anywhere from a few minutes to 48 hours. You can verify the CNAME records currently in use for your domain using an online tool.
You can learn more about DNS record propagation here.
Stuck at any point? Don’t worry, just click the live chat widget in the bottom-right, and one of our support agents will assist you in under 30 seconds.