A TXT (Text) record is a type of DNS record used to store text information, most commonly for domain verification and email security.
For example, services like Google or Microsoft may ask you to add a TXT record to confirm that you own your domain. TXT records are also used for SPF, DKIM, and DMARC – email authentication methods that help prevent spam and spoofing.
Even though TXT records aren’t visible to regular visitors, they play an important role behind the scenes in keeping your domain safe and trusted.
In this guide, we’ll walk you through how to add a TXT record via the WPX Control Panel.
Step 1. Log in to your WPX account
Begin by logging into your WPX account. You can do this by visiting the WPX login page.
Step 2. Go to Control Panel
Once logged in:
- Locate your hosting plan in the WPX client area.
- Click the Control Panel button next to the plan you wish to manage.

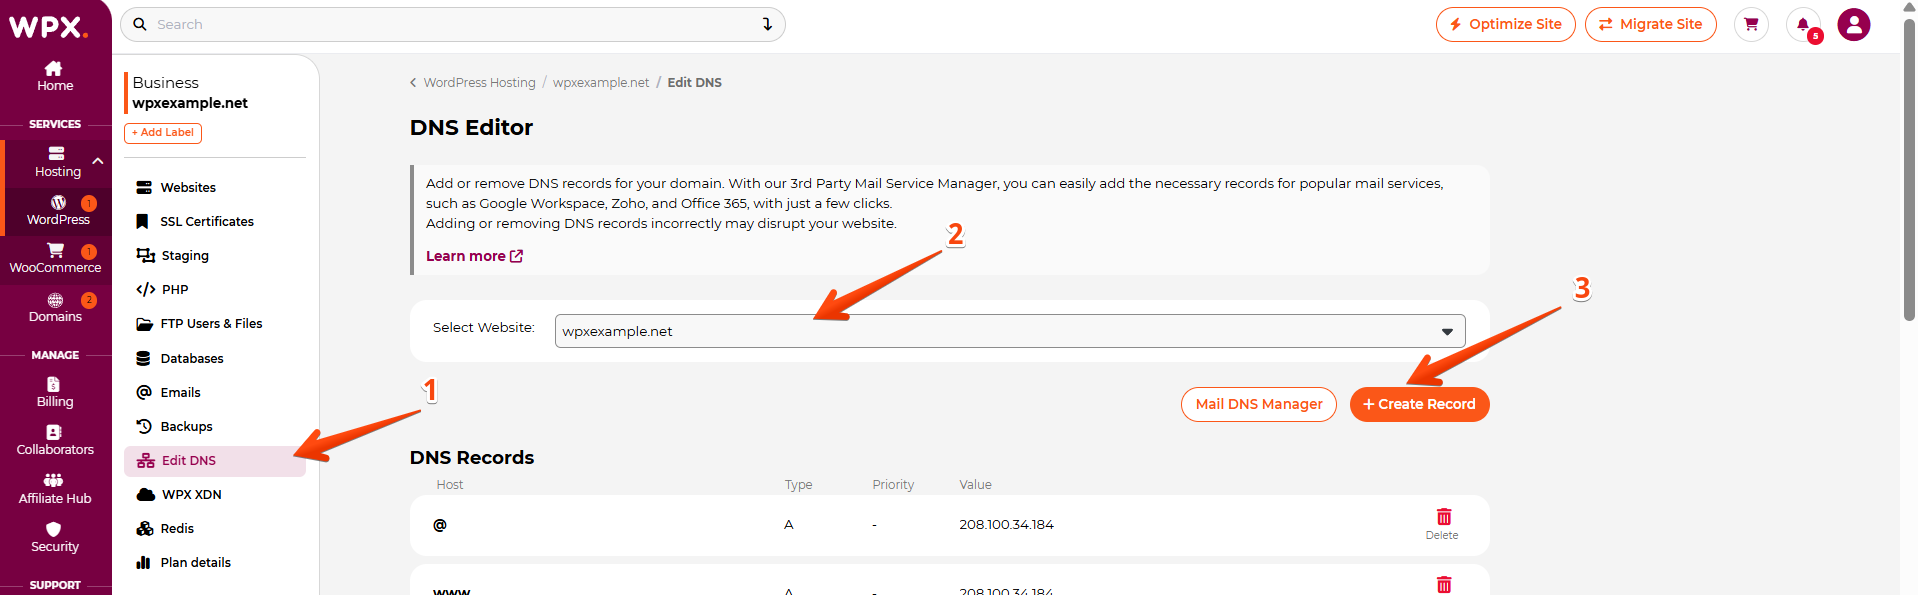
Step 3. Navigate to the DNS Editor
- Select the Edit DNS section.
- Select the website to which you want to add a TXT record.
- Click on the +Create Record button to add a new record.
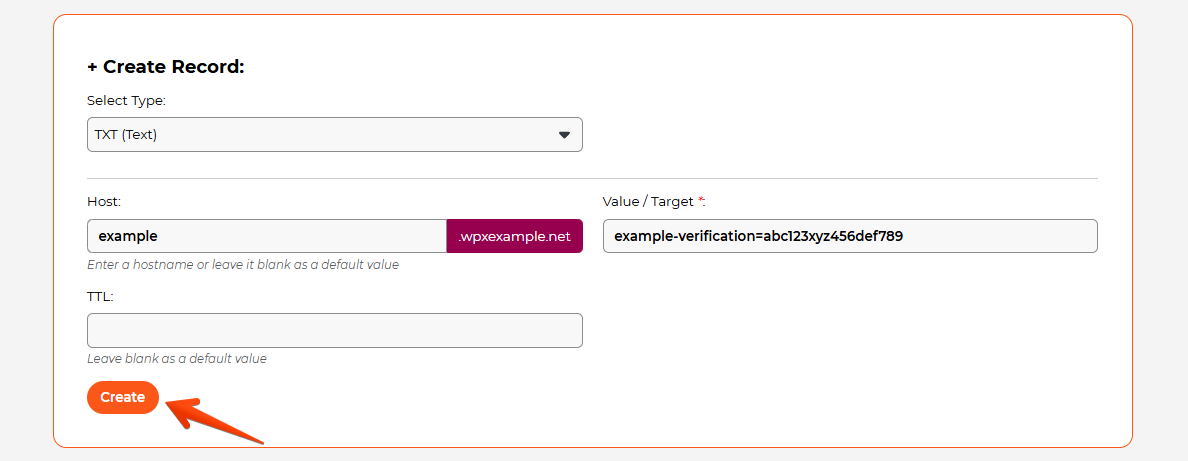
Step 4. Add the TXT record
After clicking the +Create Record button, a new setup area will appear, allowing you to add your TXT record.
- Select the Type of the record to be TXT (Text).
- Add the Host name.
– Leave it blank for the root domain (domain.com).
– For a subdomain like example.domain.com, enter “example”. - Add Value/Target for the destination domain (e.g., example.com or custom.target.com).
- Click on the Create button.
How can I check if the record I’ve added is working?
A TXT record becomes active once it has propagated across DNS servers, which can take anywhere from a few minutes to 48 hours. You can verify the TXT records currently in use for your domain using an online tool.
You can learn more about DNS record propagation here.
Have more questions? Contact the WPX Support Team through the live chat widget in the bottom-right corner, and they’ll assist you promptly, typically within 30 seconds.