In this guide, we’ll walk you through how to add an Alias via your Control Panel.
But first, let’s quickly go over what an Alias is—and why you might need one (or not).
What is a Domain Alias and why would you use it?
A domain alias allows you to point an additional domain to your main website — like giving your site a second name. For example, if your main site is mywebsite.com and you also own mynewsite.com, you can set mynewsite.com as an alias. Visitors who enter the alias in their browser will see the same content as on the main domain, even though the browser will still show the alias domain. This is also known as domain masking.
But that’s not the only use for an alias with us. There are a few other helpful ways to use it:
- Email-only use: If you want to use a domain just for email (without hosting a website), you don’t need to add it as a separate site and waste a website slot. Instead, add it as an alias to a website that already uses our email service — this way, the alias domain can also use our email features.
- Redirect to another domain: If you have a new domain and want it to redirect visitors to another domain (without showing the alias in the address bar), you can add it as an alias and set a 301 redirect in the .htaccess file of the main site. This way, you get a proper redirect without using an extra website slot.
Let’s take a look at how you can set up a Domain Alias through your control panel.
Step 1. Log in to your WPX account
Begin by logging into your WPX account. You can do this by visiting the WPX login page.
Step 2. Go to Control Panel
Once logged in:
- Locate your hosting plan in the WPX client area.
- Click the Control Panel button next to the plan you wish to manage.

Step 3. Create the Alias
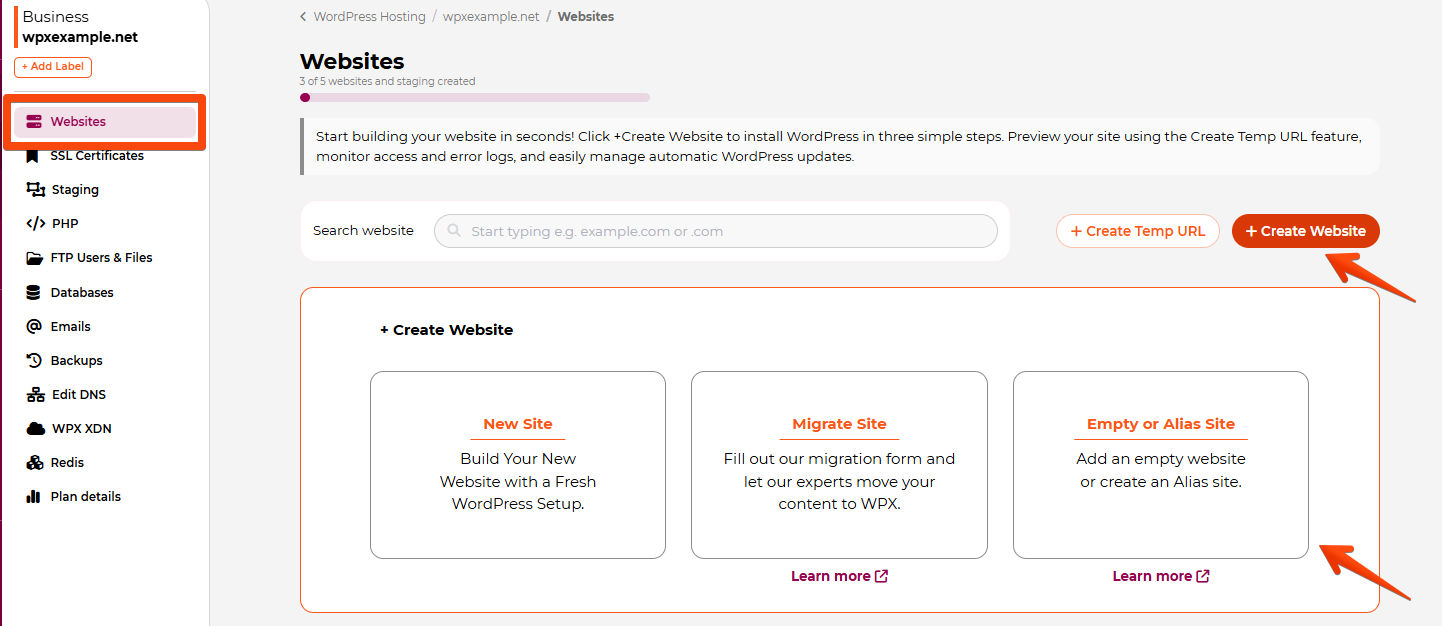
- Select the Websites menu.
- Click the +Create Website button.
- Select the Empty or Alias Site option to add your alias site.
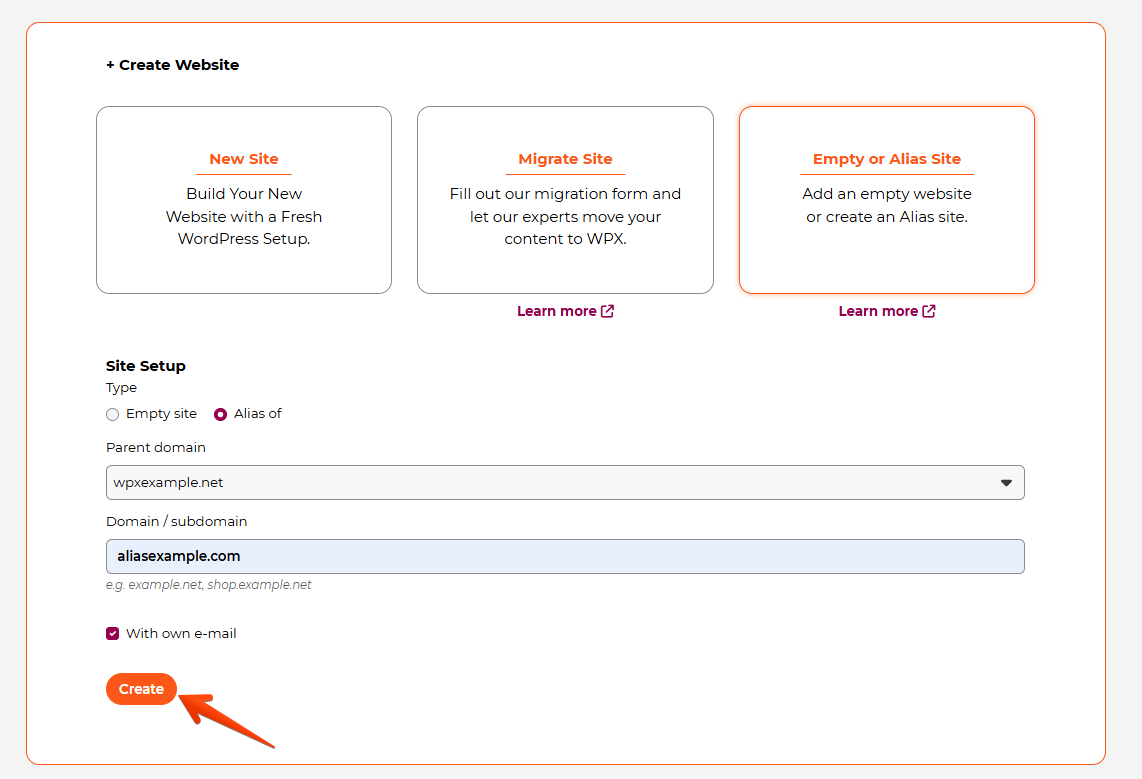
A new setup area will appear, allowing you to add your Alias site.
- Selecting the Site Setup to Alias of.
- Select a Parent domain – the domain that you want to set an Alias for (it must be already added to your account).
- Type the name of your Alias.
- Choose whether you’d like to set up the alias to have an email service.
- Click on the Create button.

A few important notes on Domain Aliasing:
- Aliased domains cannot have their own SSL certificates by default.
If you need SSL for an alias, you’ll need to install a custom SSL certificate manually. Make sure to include the alias under the “Custom” section when installing the certificate on the main site. - The alias domain must point to the same nameservers (or at least the same A record) as the primary domain it’s attached to.
- Aliases CANNOT point to specific IP addresses or individual pages on another domain.
- An Alias is not the same as a 301 redirect — it doesn’t redirect the domain by default. However, a redirect can be manually set via the main site’s .htaccess if needed.
- Alias domains CAN have their own email mailboxes.
- If you’re setting up a WordPress Multisite installation, extra domains must be added as aliases.
- Aliases DO NOT take up a website slot in your hosting plan.
Have more questions? Contact the WPX Support Team through the live chat widget in the bottom-right corner, and they’ll assist you promptly, typically within 30 seconds.