In certain cases, such as when a theme causes a critical error or your WordPress dashboard becomes inaccessible, you may need to manually switch your WordPress theme via the database.
This guide will walk you through the steps to safely change your active WordPress theme using phpMyAdmin in your WPX control panel.
Step 1. Log in to your WPX account
Begin by logging into your WPX account. You can do this by visiting the WPX login page.
Step 2. Go to Control Panel
Once logged in:
- Locate your hosting plan in the WPX client area.
- Click the Control Panel button next to the plan you wish to manage.

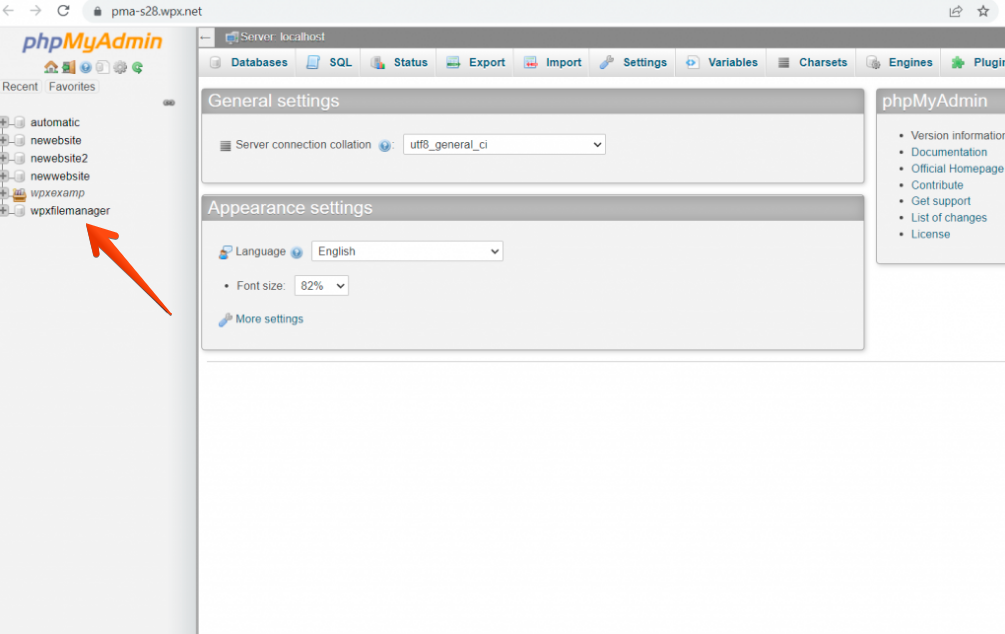
Step 3. Open phpMyAdmin
In the Control Panel:
- Select Databases.
- Then click on the phpMyAdmin button to open it.

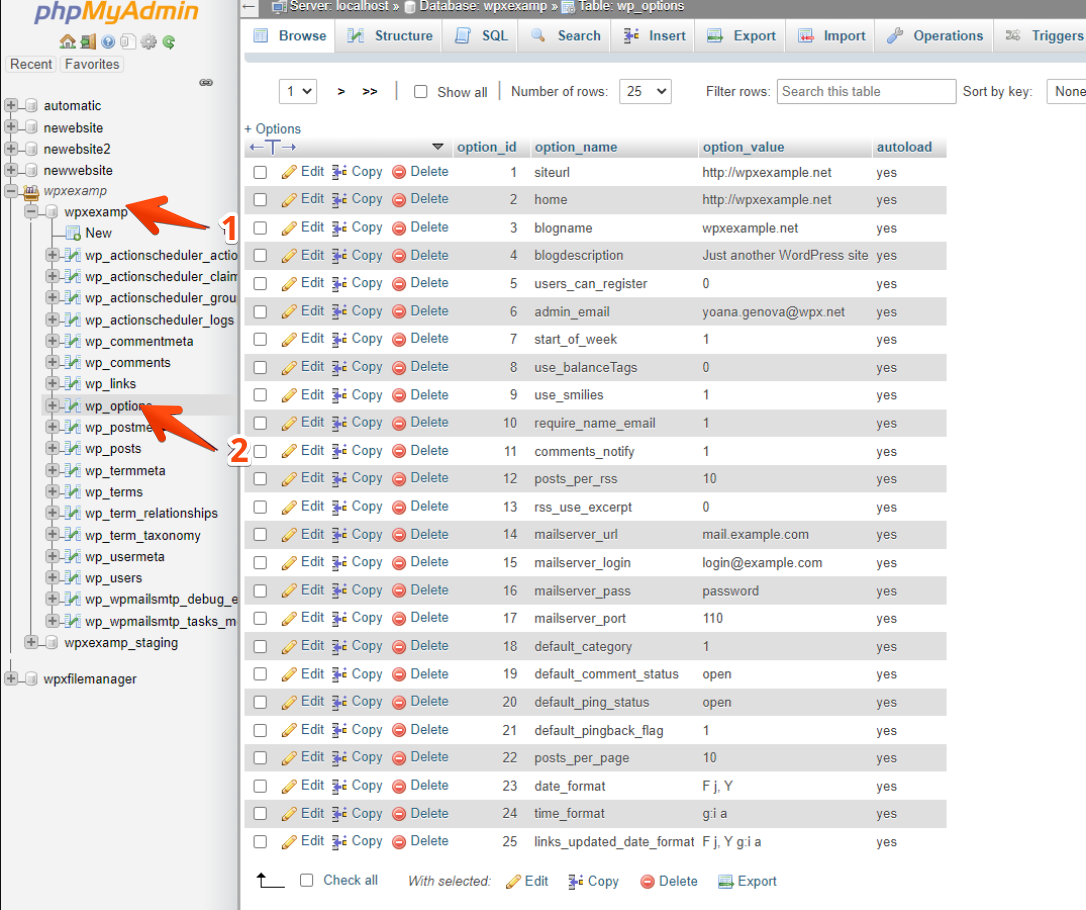
Step 4. Locate the Theme Settings in the database
In phpMyAdmin, select the database associated with the website you want to edit.
Select the database of the site. Find and click on the table ending in _options (e.g., wp_options, www_options, or subdomain_options). The prefix may vary based on your WordPress setup.
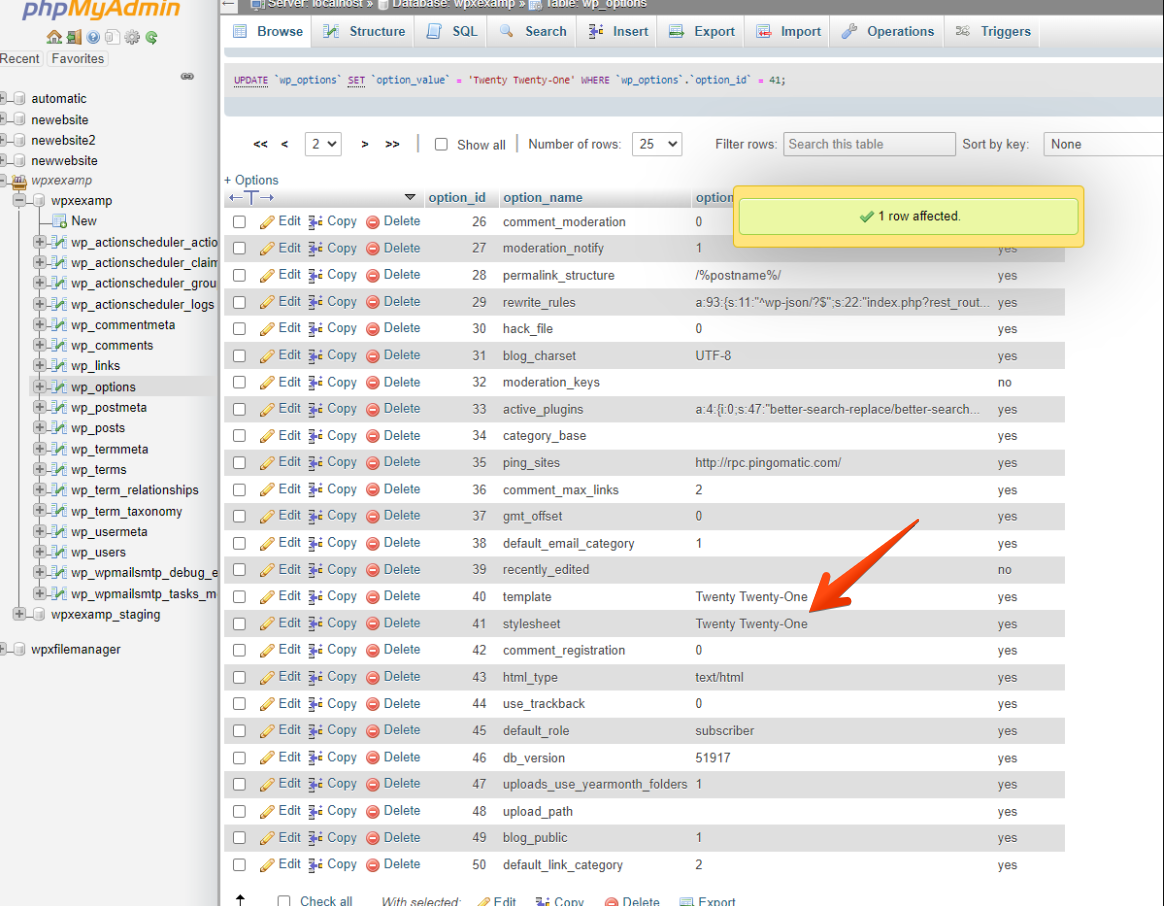
Step 5: Update the Active Theme
Within the _options table, look for the following two rows:
- template & stylesheet.
- These are usually located on page 2 of the table entries.

Once located, double-click the value in each row and replace the current theme name with the directory name of the new theme you want to activate (e.g., twentytwentyone).
Press Enter to save each change.
Stuck at any point? Don’t worry, just click the live chat widget in the bottom-right, and one of our support agents will assist you in under 30 seconds.