Managing multiple websites with different usernames can be inconvenient, and there are times when updates are required, whether for consistency, security, or personal preference.
Since WordPress does not allow username changes directly from the user dashboard, this guide will show you how to change the username using phpMyAdmin.
To begin with the first method, you’ll need to log in to your WPX account.
Step 1. Log in to your WPX account
Begin by logging into your WPX account. You can do this by visiting the WPX login page.
Step 2. Go to Control Panel
Once logged in:
- Locate your hosting plan in the WPX client area.
- Click the Control Panel button next to the plan you wish to manage.

Step 3. Open phpMyAdmin
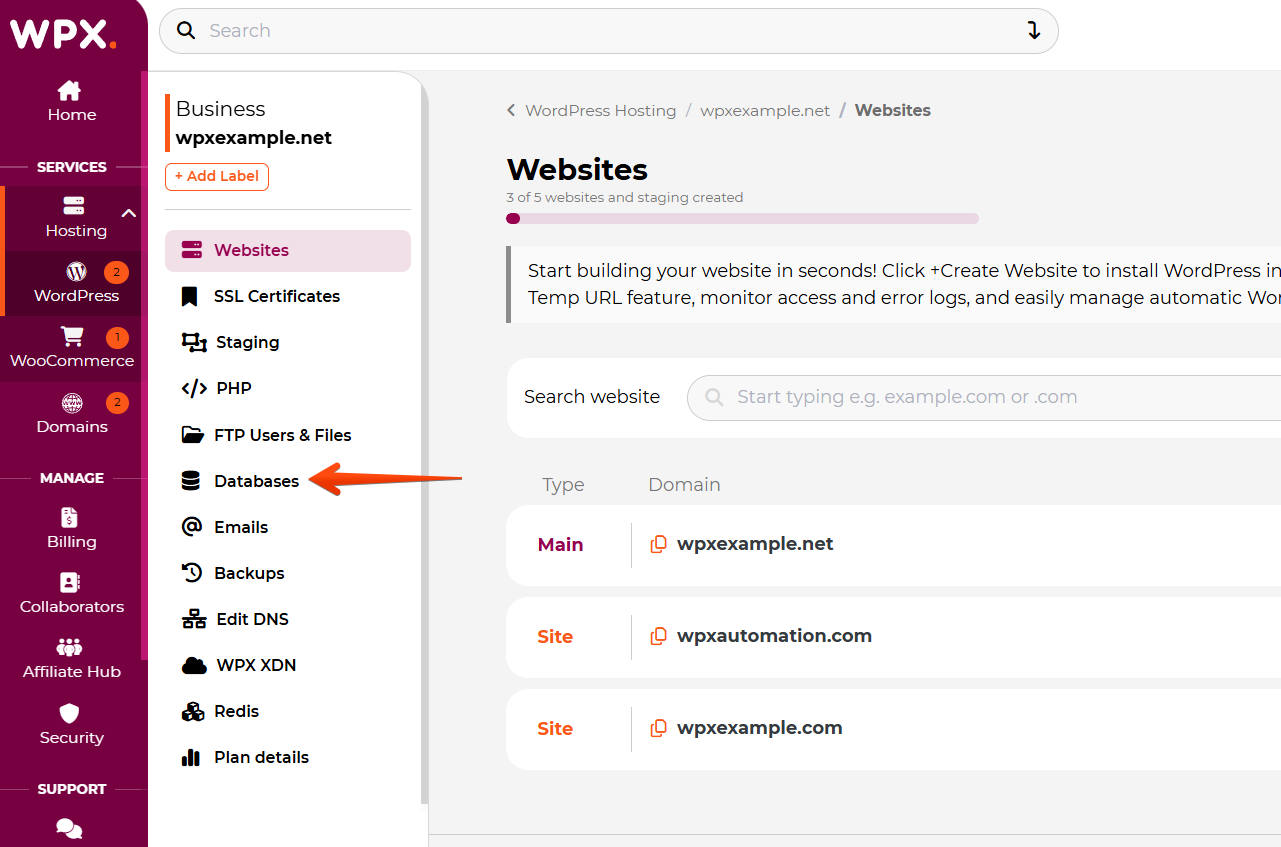
Once you are in the Control Panel, select the Databases menu (2):
When you are in the Databases menu, click on the phpMyAdmin button:

Step 4. Edit the Username
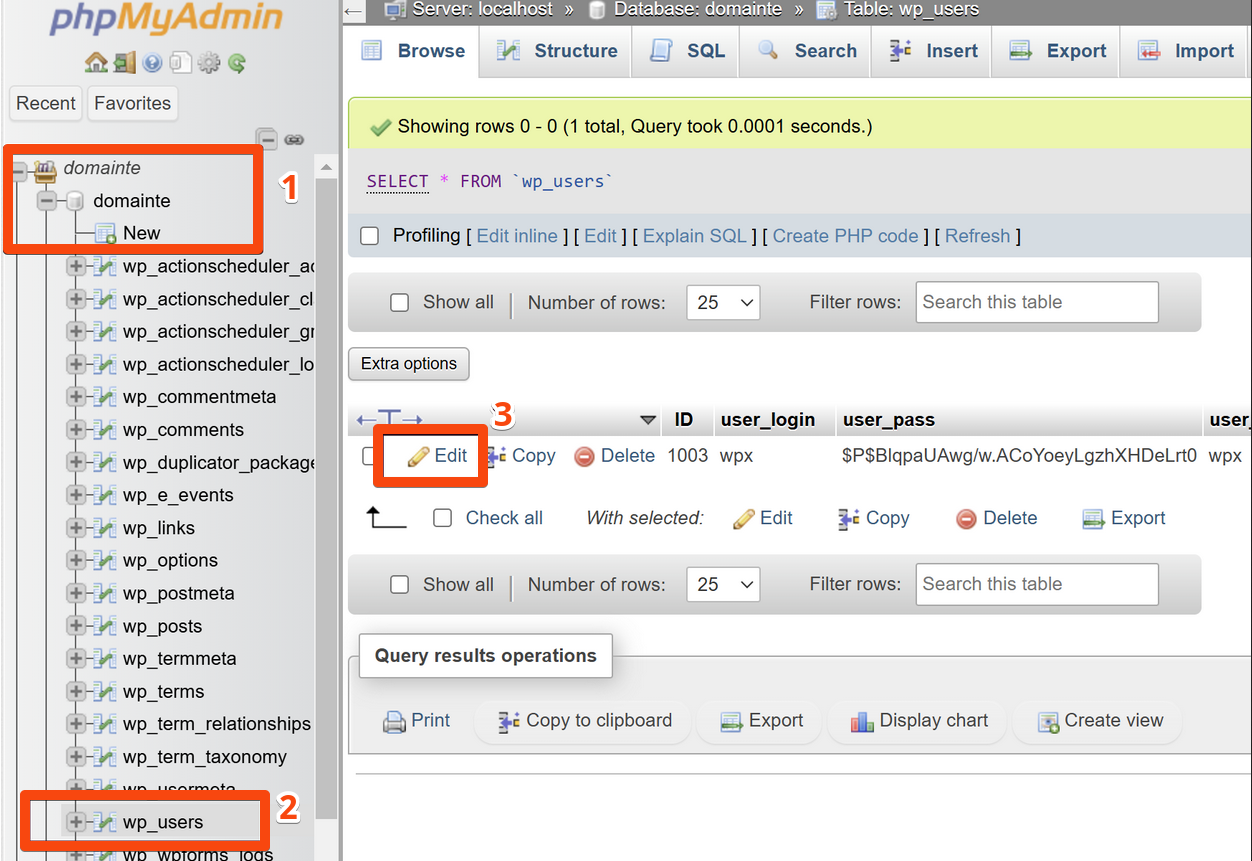
In the phpMyAdmin panel:
- Select the database of the site using the + (1) sign. This action will show all tables in the selected database.
- Locate the wp_users table.
- Select Edit for the specific username (user_login) you want to change.
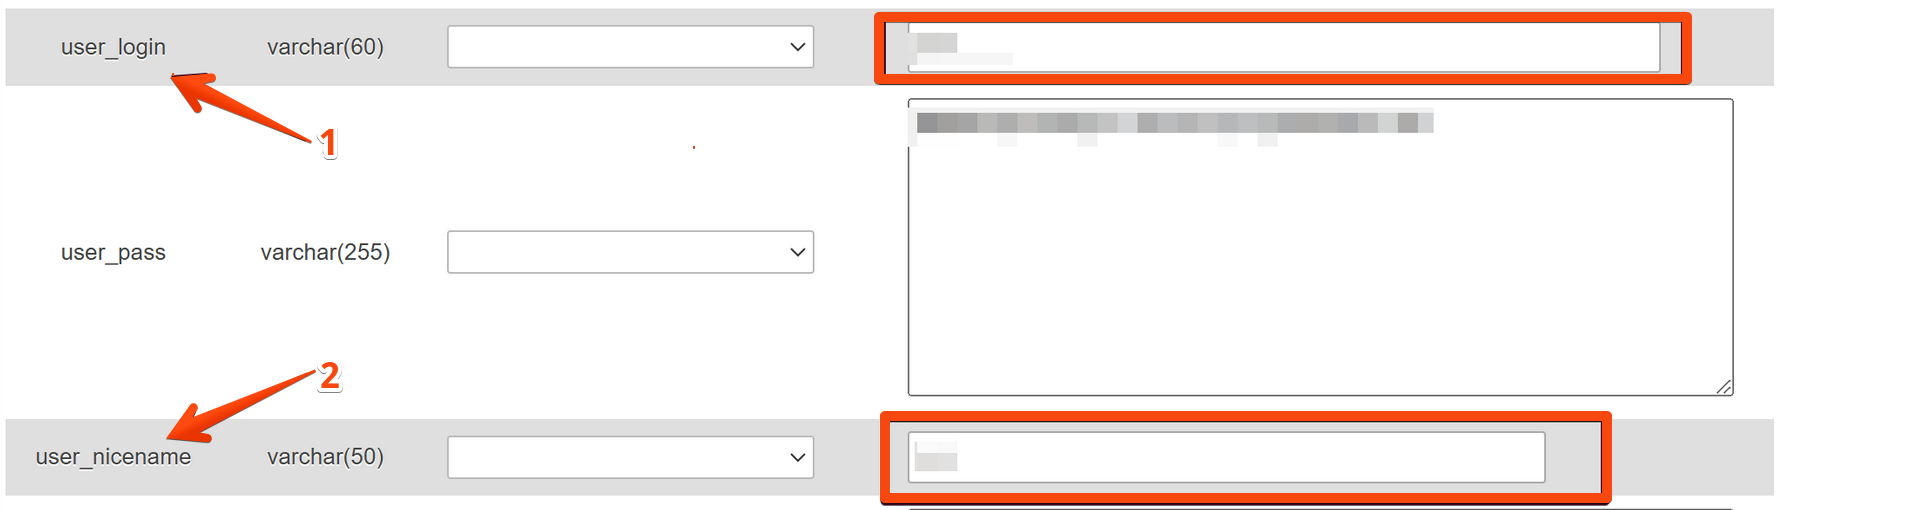
To edit the username, change it in the tables user_login (1) and user_nicename (2). Make sure that they match perfectly.
If you’d like, you can also change the last value, display_name, which refers to the name that appears next to your blog posts and profile page:

To update the username, scroll down and click the Go button:

Have more questions? Contact the WPX Support Team through the live chat widget in the bottom-right corner, and they’ll assist you promptly, typically within 30 seconds.