If you host your website with WPX and want to add Cloudflare’s CDN, security, and performance features on top of it, this guide walks you through the full process – from creating your Cloudflare account to confirming everything is live.
Step 1: Create a Free Cloudflare Account
Go to cloudflare.com and click Sign Up, enter your email address, and create a password.
Verify your email address via the confirmation link Cloudflare sends you.
Step 2: Add your website to Cloudflare
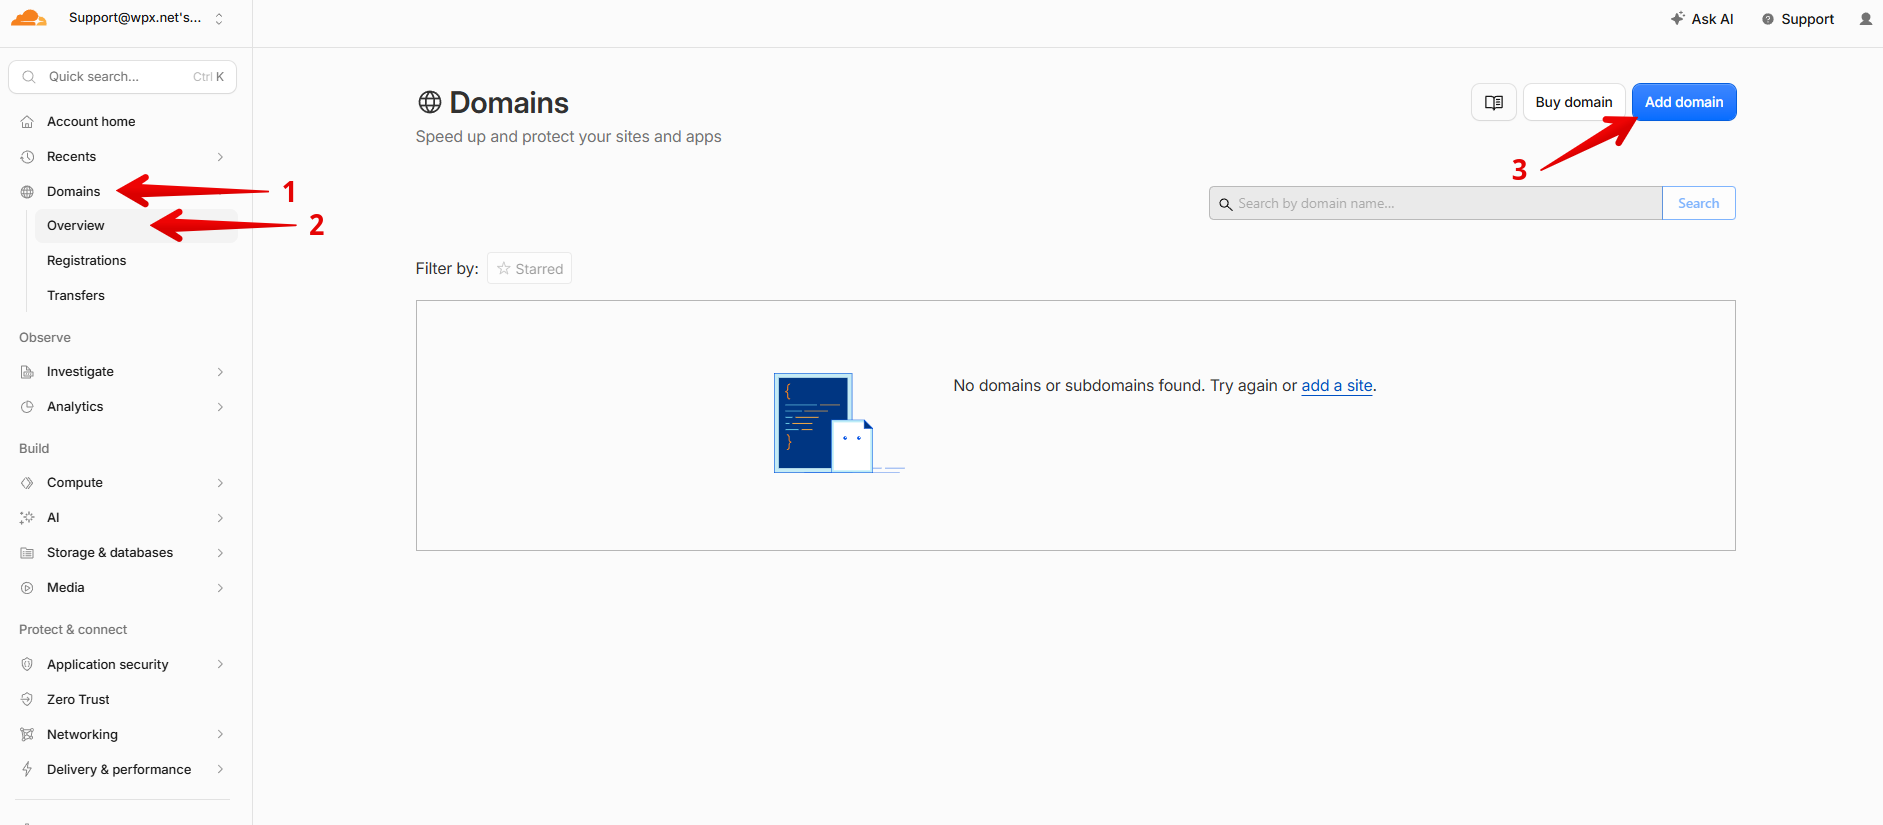
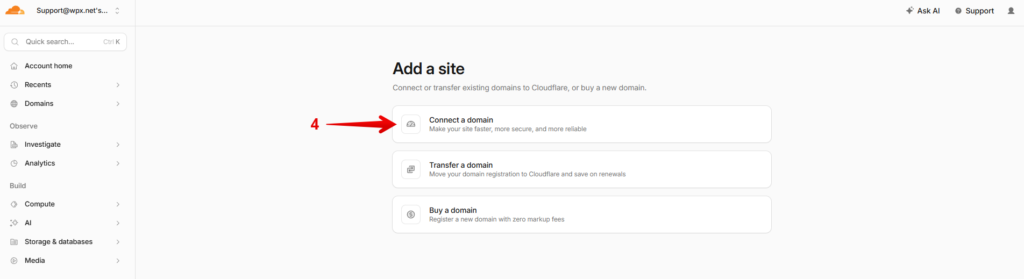
Once logged in, you’ll land on the Cloudflare dashboard. Navigate to Domains (1) and Overview (2). Next, select Add domain (3), then Connect a domain (4):
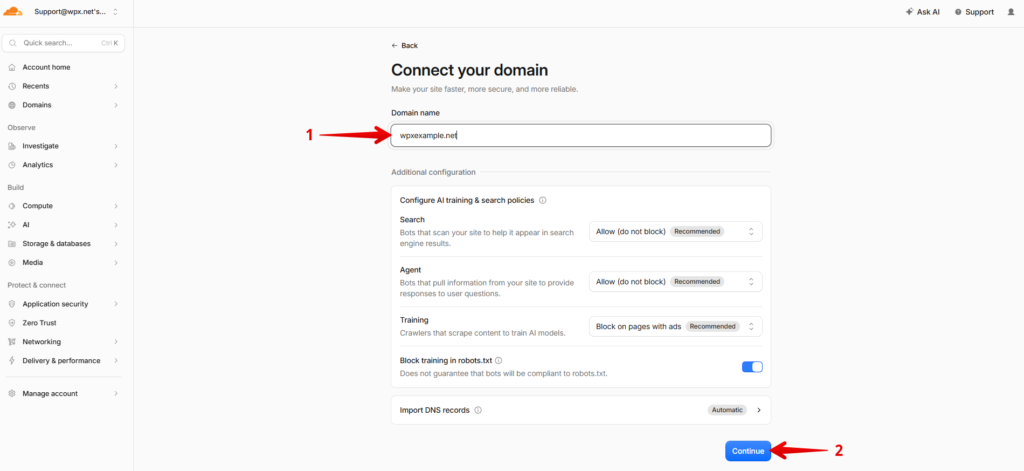
Next, you’ll be prompted to enter your domain name (1), e.g. wpxexample.net. Click Continue (2) to proceed.
Cloudflare will now automatically scan your domain, detect your existing DNS records, and add them to the Cloudflare DNS zone.
Step 3: Select your plan
After adding your WPX domain to Cloudflare, you’ll land on the plan selection screen. This is where you choose the level of service Cloudflare will provide for your domain.
Cloudflare offers four plans, billed per domain:
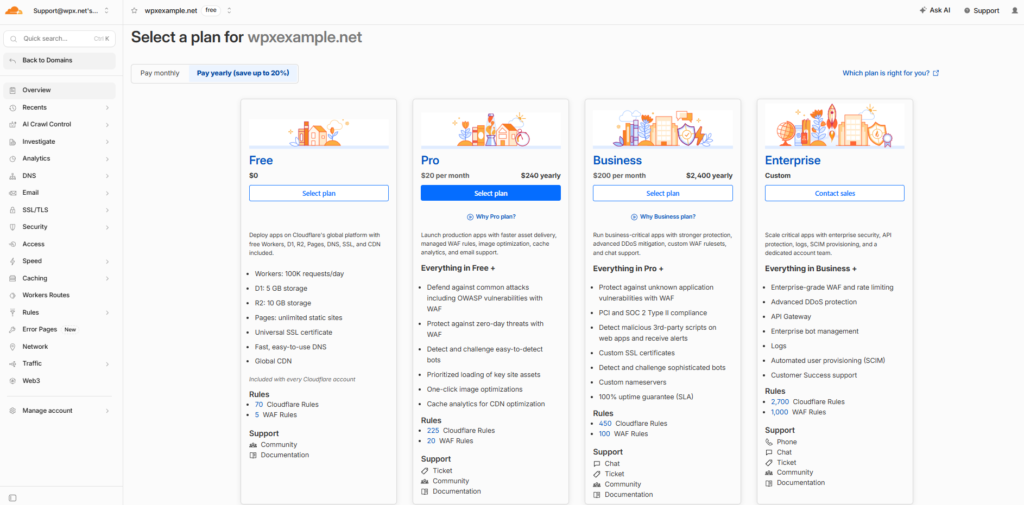
For most WPX users, the Free plan is more than enough to get started – it includes unmetered bandwidth, a global CDN, and Universal SSL, which covers the core reasons people connect their domain to Cloudflare in the first place (speed and basic protection).
Once you’ve selected a plan, click Continue to move to the DNS record review step.
Step 4: Review Your DNS Records
Cloudflare will pull in the DNS records it finds for your domain (A, CNAME, MX, TXT, etc.). This step is critical – missing or incorrect records here can take your site or email offline.
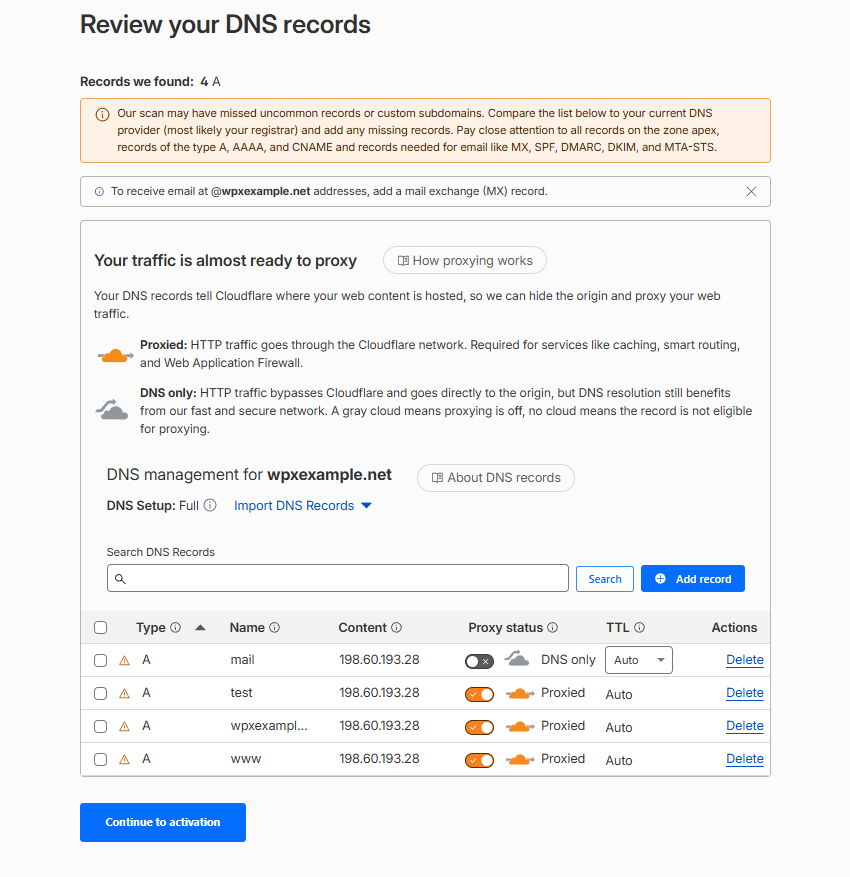
- Compare the list against what’s in your WPX control panel (Control Panel → Edit DNS) to make sure nothing important is missing – especially:
- The A record pointing to your WPX server IP
- Any MX records if you use email hosted through WPX or a third party
- Any CNAME records for subdomains
- Add any missing records manually using + Add record.
- Each record has a cloud icon next to it under Proxy Status:
- Orange cloud (Proxied) – traffic routes through Cloudflare (CDN + security active)Grey cloud (DNS only) – traffic goes directly to WPX, bypassing Cloudflare
Once everything looks correct, click Continue.
Step 5: Update Your Nameservers
This is the step that actually “connects” your domain to Cloudflare.
- Cloudflare will show you two nameservers unique to your account (something like
aida.ns.cloudflare.comandwalt.ns.cloudflare.com). - Log in to wherever your domain’s nameservers are managed:
- If your domain is registered with WPX, go to your WPX client area → Domains → Edit Nameservers (1), select Custom Nameservers (2), enter your new Cloudflare Nameservers, and Save Changes (3).
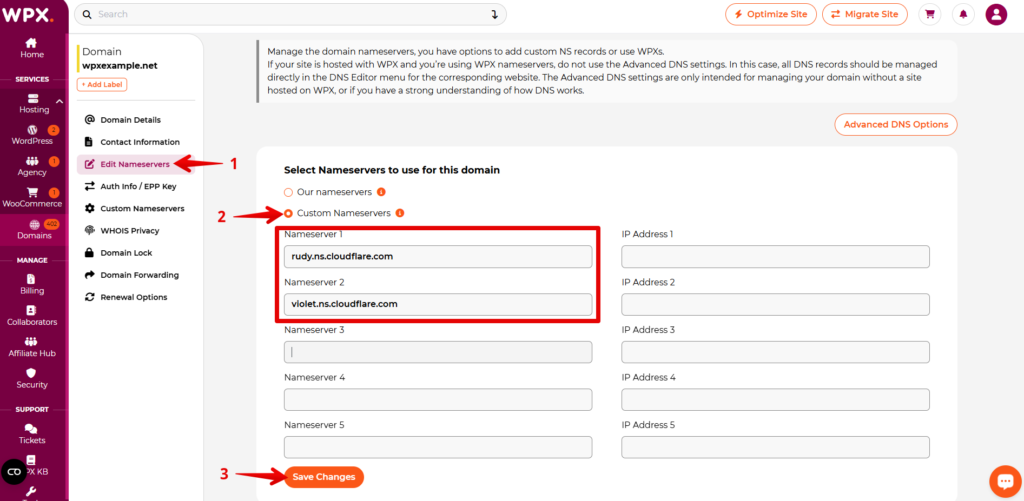
If your domain is registered elsewhere (Namecheap, GoDaddy, etc.), log in there instead – the nameservers must be changed at the registrar, not at WPX’s hosting panel – replace the existing nameservers with the two Cloudflare gave you. Remove any old ones – don’t just add Cloudflare’s alongside them.
Back in Cloudflare, click I updated my nameservers.
Step 6: Verify Everything Works
Once the propagation is finished, to check that everything works as intended:
- Visit your website in a browser and confirm it loads correctly.
- Check that the padlock icon appears (confirming HTTPS is active). Check this article to ensure your site’s SSL Certificate settings are properly configured in Cloudflare.
- Test key functionality – contact forms, login pages, checkout flows if it’s a store – since proxying traffic through Cloudflare can occasionally affect caching behavior.
- If you use WPX’s XDN (our own CDN), note that it’s compatible with Cloudflare – WPX XDN works off your A records while Cloudflare works off your nameservers, so the two don’t conflict.
Stuck at any point? Don’t worry, just click the live chat widget in the bottom-right, and one of our support agents will assist you in under 30 seconds.