This article will explain how to connect your WPX Email account with Gmail (Gmailbox). This will allow you to see emails sent to your WPX email from your Gmail inbox.
If you want to learn how to set up Google Workspace (formerly known as G-Suite/Google Apps), you can find out how in this article.
Step 1. Log in to your WPX account
Begin by logging into your WPX account. You can do this by visiting the WPX login page.
Step 2. Go to Control Panel
Once logged in:
- Locate your hosting plan in the WPX client area.
- Click the Control Panel button next to the plan you wish to manage.

Step 3. Add Forward to Gmail
Within the Control Panel:
- Select the Emails section.
- Click on Settings next to the email address.

Within the Settings:
- Select the Email Box Settings tab.
- Then fill in your Gmail email under Forward e-mail to
- Click Submit to save the changes.

The Mail Server settings can be previewed in the Mail Server Settings tab. You will need the SMTP server, your email username, and password.
Step 4. Configure your Gmail
Log in to your Google Account.
- You can find the Gmail settings on the right-hand side menu
- Select the See all settings menu to open all available settings.

Click on the Accounts and Import tab.

Click on Add another email address.
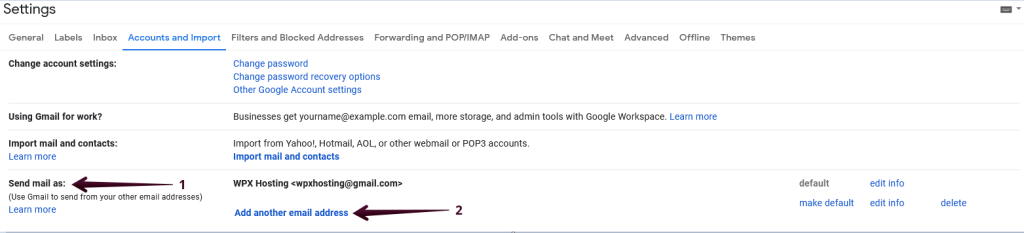
Then a new window will open.
In the Name field, add the name you want to associate with the email address you’re connecting to Gmail. In the Email address field, add the email address you want to connect to.

Keep the Treat as an alias box checked, then click on the Next Step button. Now you must configure your Gmail settings to use our server’s SMTP.
- In our example, the server hostname is s28.wpx.net.
- Fill in your email username and password (of the WPX email).
- Select Secured connection using SSL (recommended)
- SMTP Port 465;
- After you fill out the form and click Add Account, Google will email you to verify the account you have added.

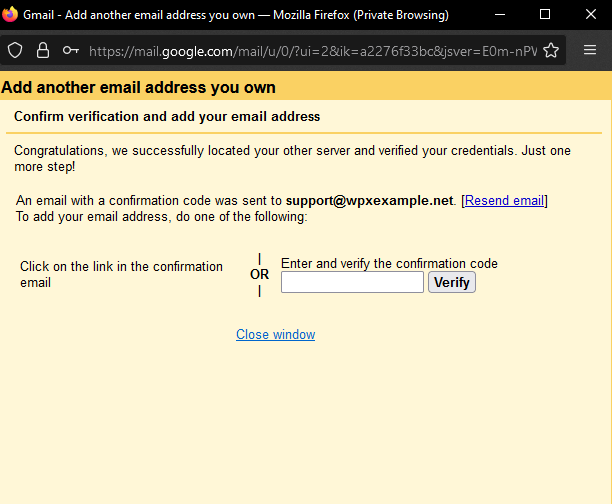
Step 5. Verify your account
In the email you received, you will find 2 options to verify the account:
- Enter the verification code in the window and click Verify.
- Click the confirmation link in the email you received from Google.
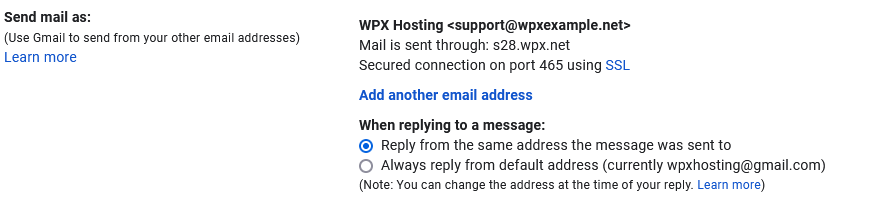
Once you’re done, the configuration window will close, and you will return to Accounts and Import. There, you will see a new option When replying to a message;
Stuck at any point? Don’t worry, just click the live chat widget in the bottom-right, and one of our support agents will assist you in under 30 seconds.