In this guide, we’ll walk you through the process of setting up your WPX email account in Microsoft Outlook 2010.
Step 1. Log in to your WPX account
Begin by logging into your WPX account. You can do this by visiting the WPX login page.
Step 2. Go to Control Panel
Once logged in:
- Locate your hosting plan in the WPX client area.
- Click the Control Panel button next to the plan you wish to manage.

Step 3. Get your Email Settings
If you’re already familiar with where to find your email settings, you can skip this step.
Otherwise:
- In the Control Panel, click on Emails.
- Then click the Settings button next to the email address you want to configure.

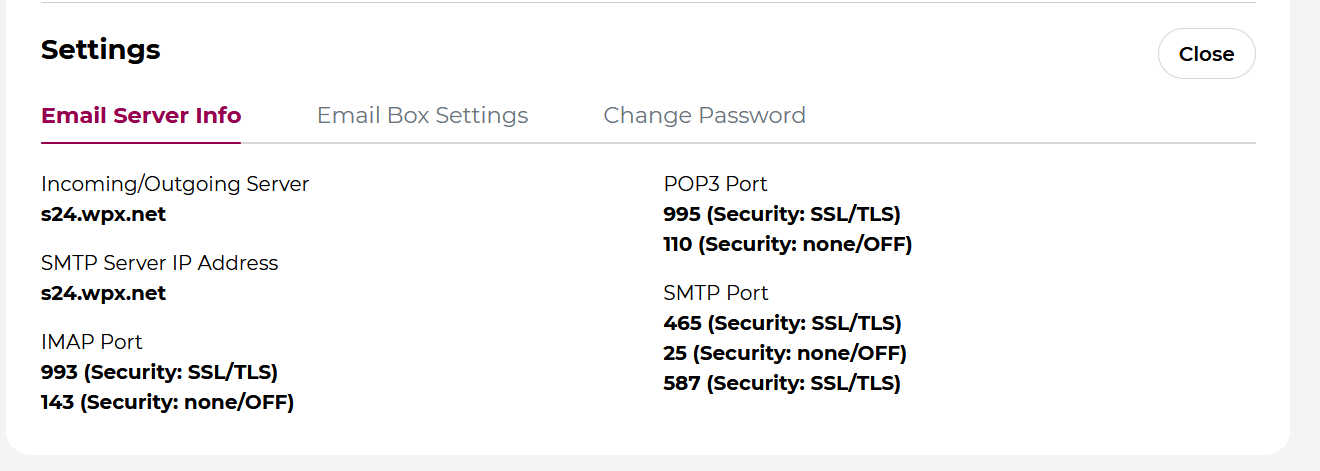
Here, you’ll find:
- Email server info (incoming/outgoing servers),
- Email login/username,
- The option to change the password (if needed).
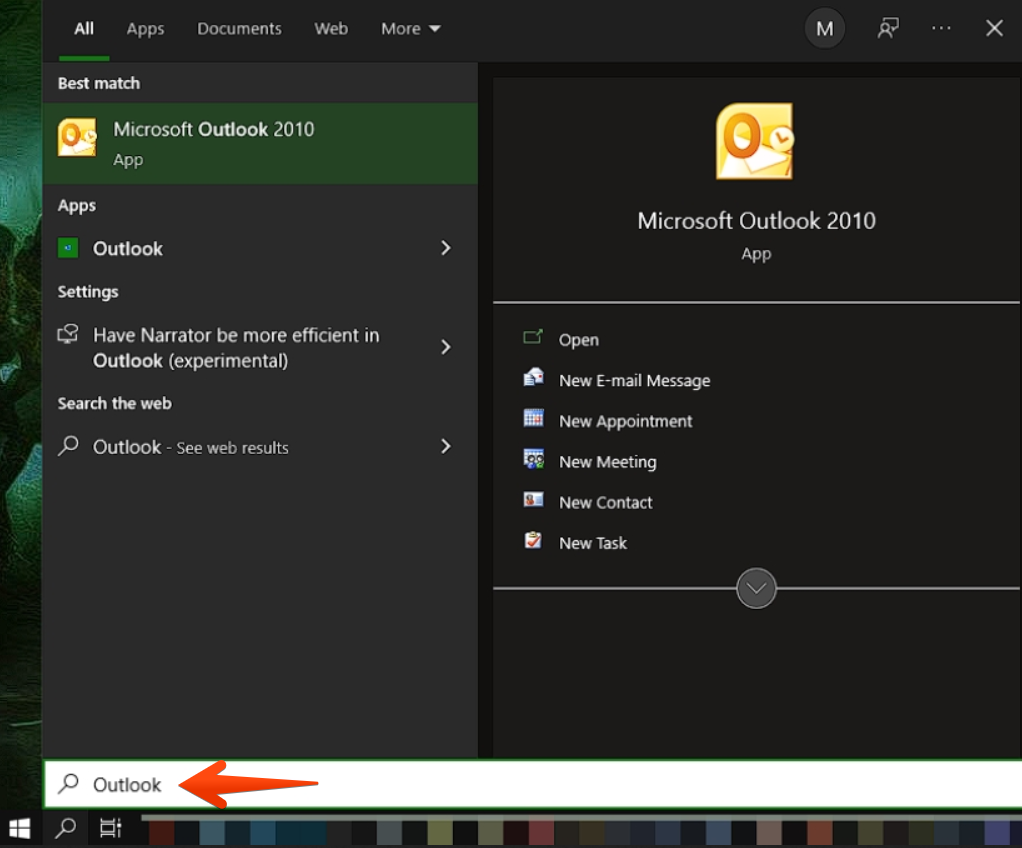
Step 4. Open Outlook 2010
Instead of using the desktop shortcut, go to the Start Menu, type Outlook, and then open Microsoft Outlook 2010.
Then follow these steps:
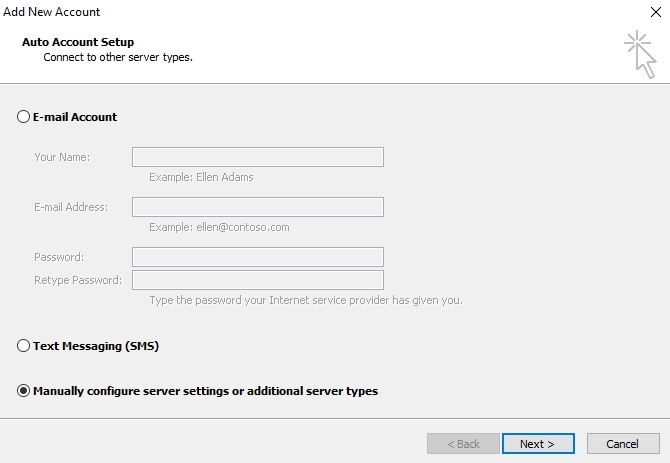
- Click on the File tab
- Select Info → Add Account
- In the setup window, choose Manually configure server settings or additional server types → Click Next
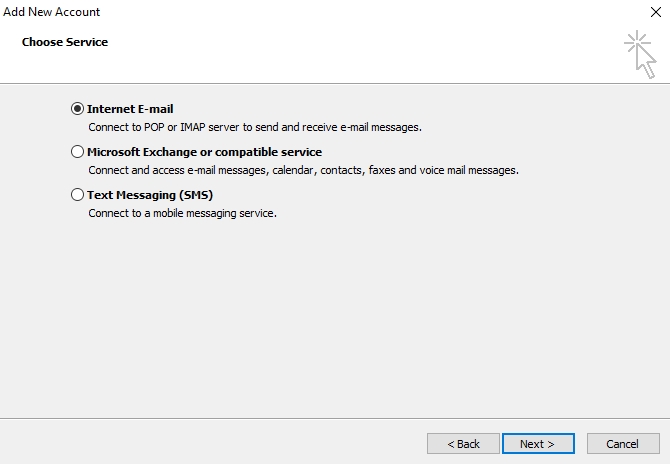
Choose Internet E-mail → Click Next
Step 5: Configure your Email account
A new window will appear. Fill in your account details as follows:
- Your Name – How you want your name to appear in sent emails
- Email Address – Your full WPX email address
- Account Type – Choose IMAP (recommended) or POP3
- Incoming Mail Server – Use the server hostname found in your WPX Control Panel
- Outgoing Mail Server (SMTP) – Same as your Incoming Mail Server
- Username – Use the exact email login/username (see Step 3)
- Password – Your WPX email passwordYour name – the name that you want to use for your email box.
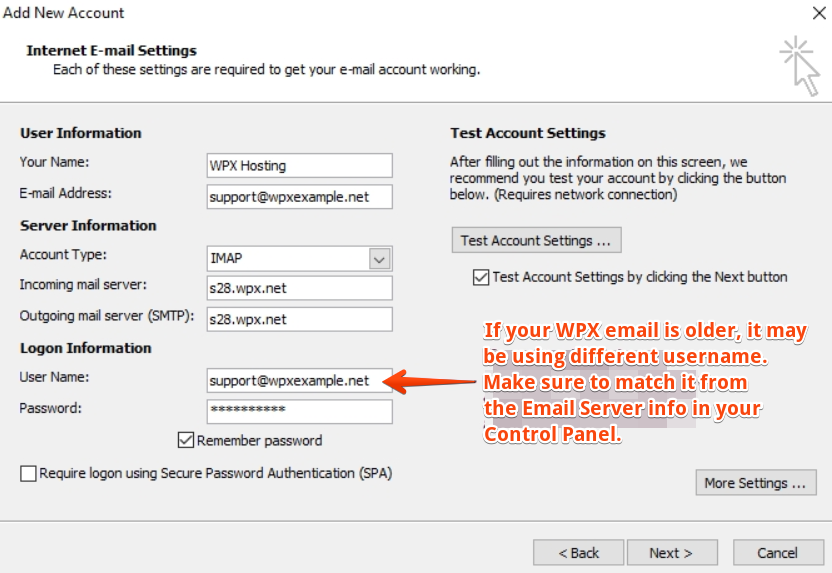
After filling in the details, click the More Settings… button.
Step 6: Configure Advanced Settings
Two tabs need your attention in the More Settings window:
Outgoing Server tab:
- Check the box: My outgoing server (SMTP) requires authentication
- Make sure Use same settings as my incoming mail server is selected

Advanced tab:
Set the following ports and encryption:
- Incoming Server:
- IMAP:
993(SSL) - POP3:
995(SSL)
- IMAP:
- Outgoing Server (SMTP):
- Preferred:
465(SSL) - Alternate:
587(TLS)
- Preferred:

Once done, click OK, then Next.
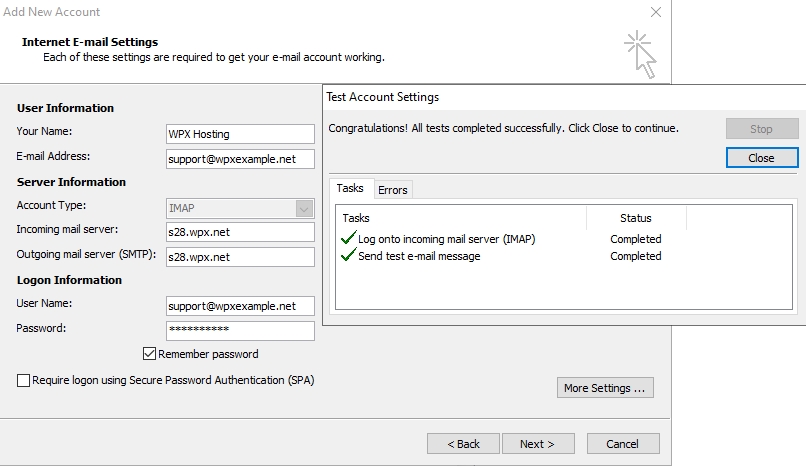
Outlook will now test your configuration. If everything is set up correctly, you’ll see confirmation messages like the example below.
Stuck at any point? Don’t worry, just click the live chat widget in the bottom-right, and one of our support agents will assist you in under 30 seconds.