This step-by-step tutorial will walk you through how to connect your WPX email with the Mozilla Thunderbird Mail Client.
Step 1. Log in to your WPX account
Begin by logging into your WPX account. You can do this by visiting the WPX login page.
Step 2. Go to Control Panel
Once logged in:
- Locate your hosting plan in the WPX client area.
- Click the Control Panel button next to the plan you wish to manage.

Step 3. Get your Email Settings
If you’re already familiar with where to find your email settings, you can skip this step.
Otherwise:
- In the Control Panel, click on Emails.
- Then click the Settings button next to the email address you want to configure.

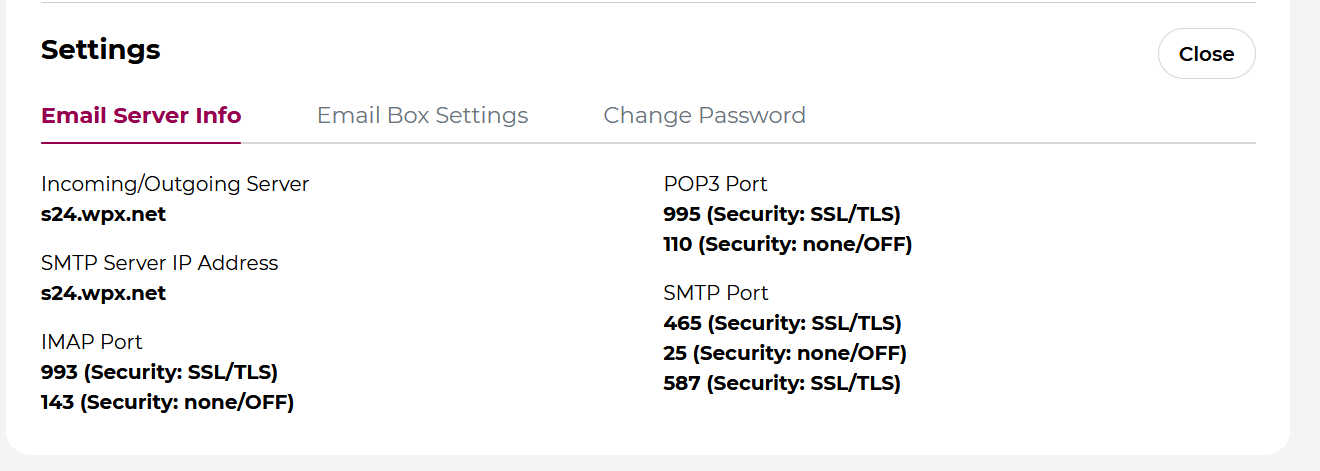
Here, you’ll find:
- Email server info (incoming/outgoing servers),
- Email login/username,
- The option to change the password (if needed).
Step 4: Launch Mozilla Thunderbird
With your settings ready, open Mozilla Thunderbird on your device.
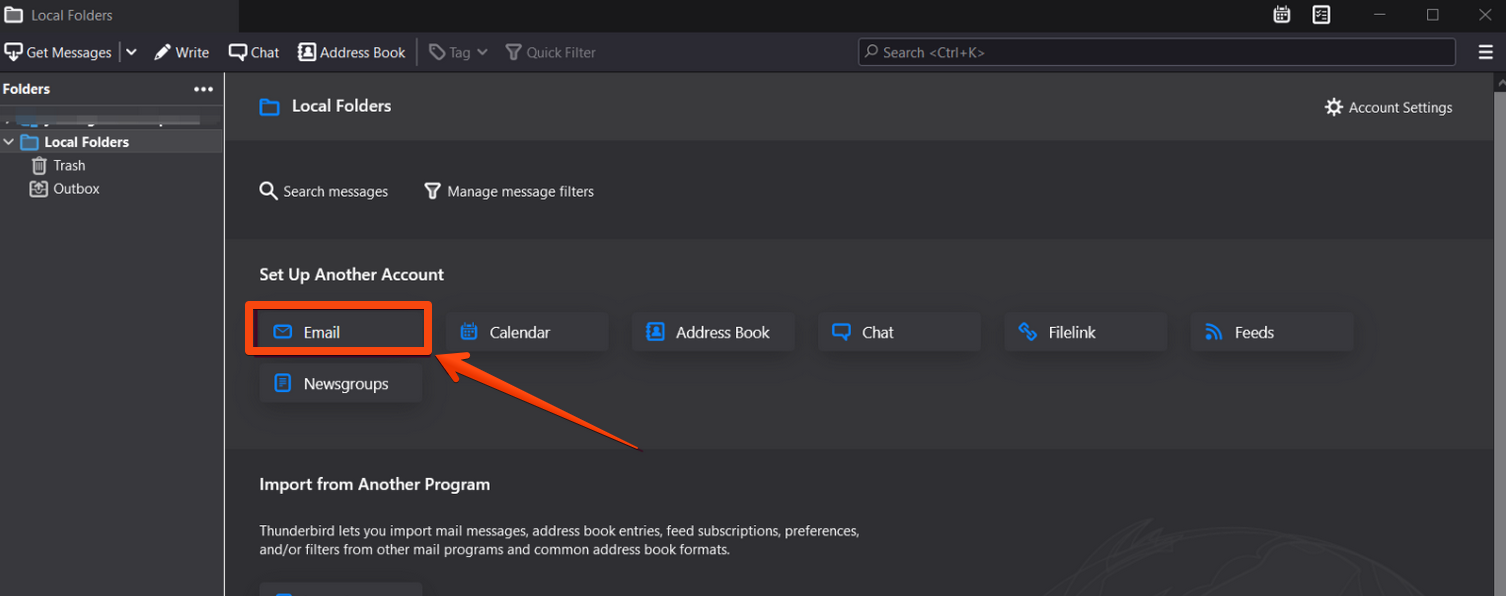
To add your WPX email account:
- Click Email under “Local Folders” or
- Go to Menu → New → Existing Mail Account
Now that you have the settings for your email box, open Mozilla Thunderbird. From the Local Folders (or another email if you have one set, select Email to create a new account;
Alternatively, you can use the right-hand side menu → New → Existing Mail Account.
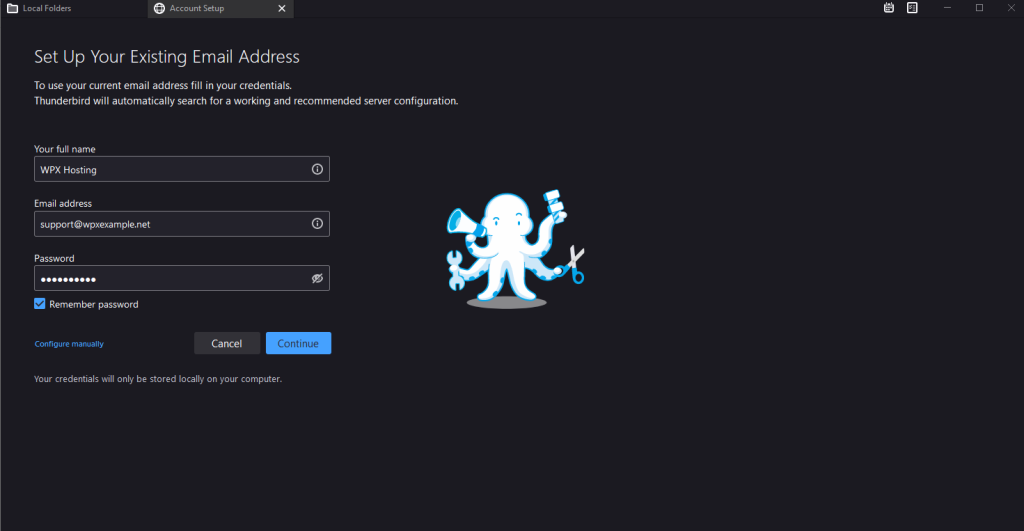
Step 5. Enter your Email account details
You’ll now be prompted to provide:
- Your Name: As you’d like it to appear in sent emails
- Email Address: Your full WPX email address
- Password: The password for this email account
Then, click Continue.
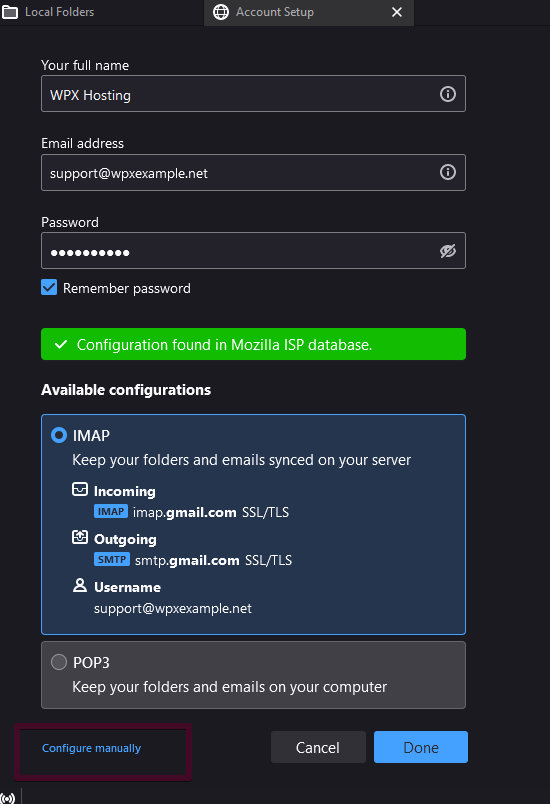
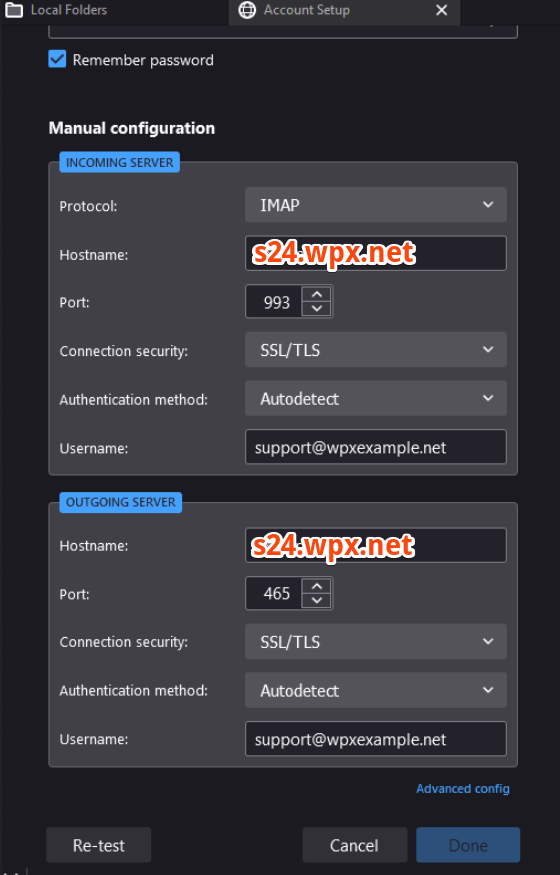
Step 6. Configure manually
Thunderbird may attempt to fill in settings automatically, but these are often incorrect. Click Configure Manually to set the details yourself.
Fill in the following information:
IMAP (Incoming)
- Server: Use the server hostname from Control Panel → Emails → Settings → Email Server Info (e.g.,
s24.wpx.net) - Port:
993 - Connection Security: SSL/TLS
- Authentication: Autodetect or Normal Password
SMTP (Outgoing)
- Server: Same as IMAP (e.g.,
s24.wpx.net) - Port:
465 - Connection Security: SSL/TLS
- Authentication: Autodetect or Normal Password
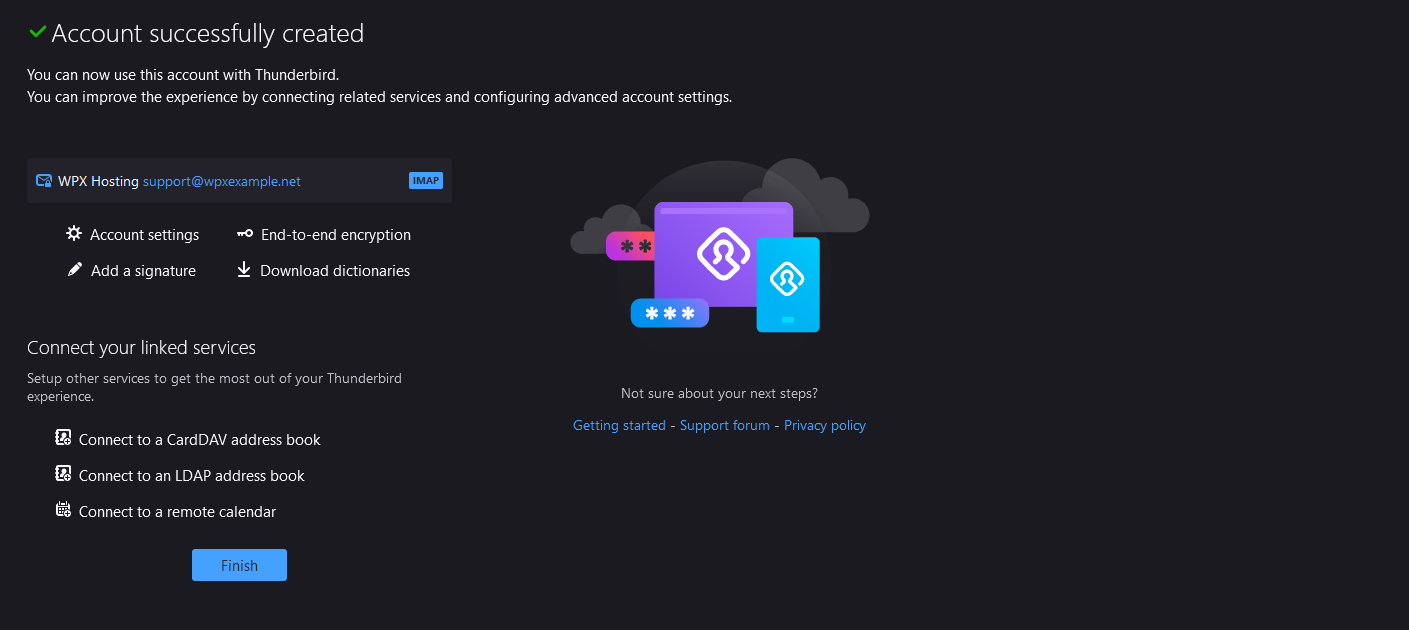
Once all fields are complete, click Re-Test. If all settings are correct, click Done to finish the setup.
Stuck at any point? Don’t worry, just click the live chat widget in the bottom-right, and one of our support agents will assist you in under 30 seconds.