In this step-by-step guide, we’ll show you how to set up your WPX Email account with the Outlook mail client.
Step 1. Log in to your WPX account
Begin by logging into your WPX account. You can do this by visiting the WPX login page.
Step 2. Go to Control Panel
Once logged in:
- Locate your hosting plan in the WPX client area.
- Click the Control Panel button next to the plan you wish to manage.

Step 3. Get your Email Settings
If you’re already familiar with where to find your email settings, you can skip this step.
Otherwise:
- In the Control Panel, click on Emails.
- Then click the Settings button next to the email address you want to configure.

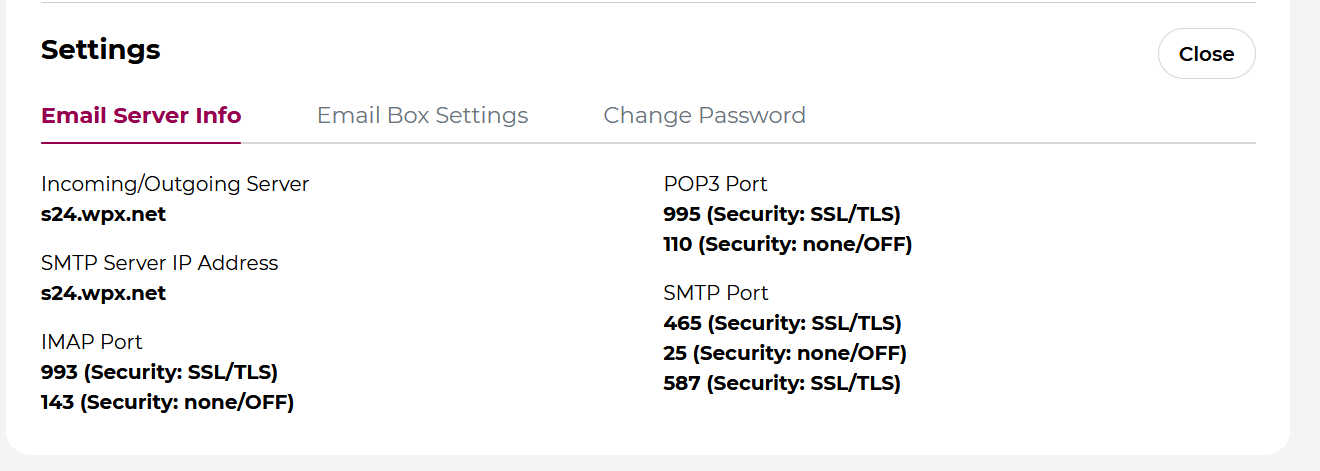
Here, you’ll find:
- Email server info (incoming/outgoing servers),
- Email login/username,
- The option to change the password (if needed).
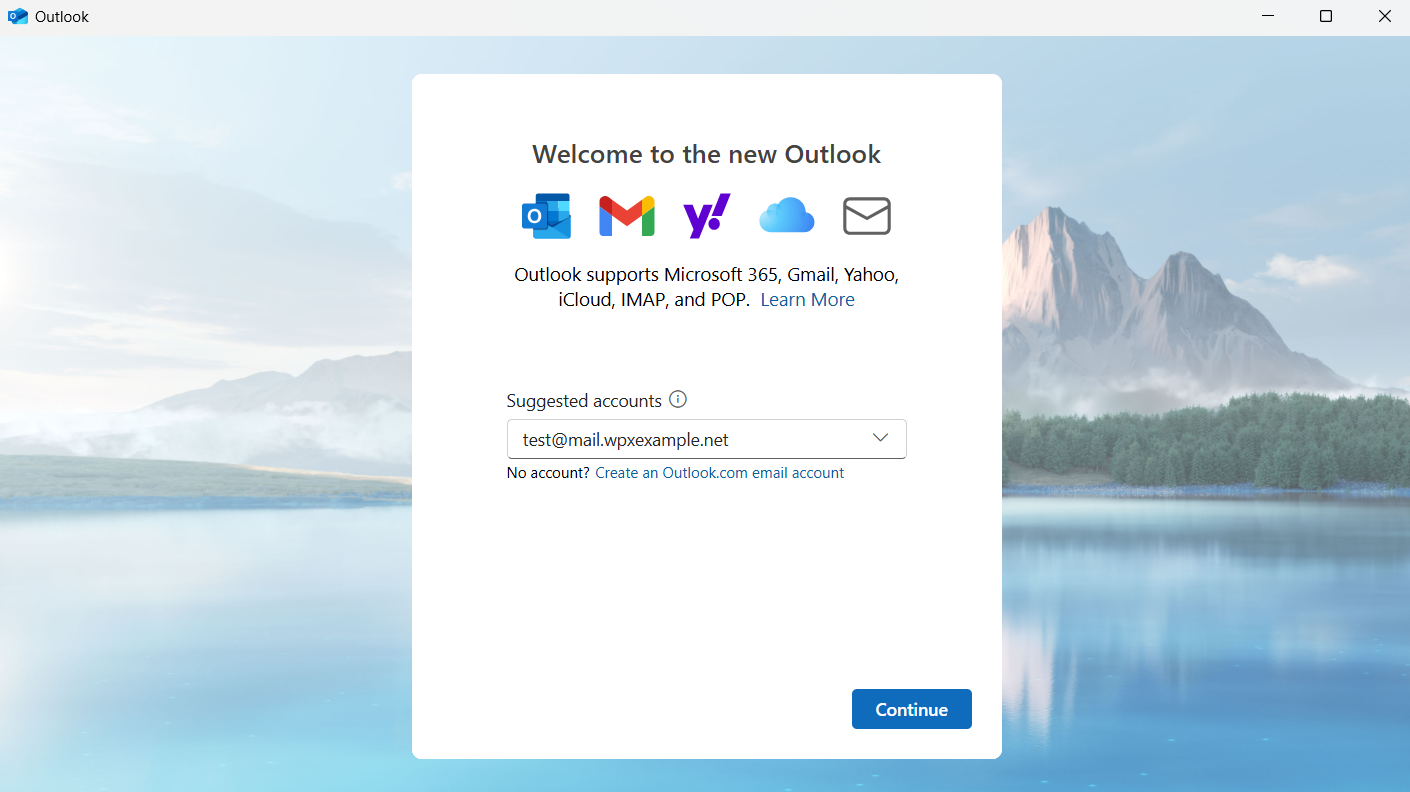
Step 4. Open Outlook
Instead of launching Outlook from the desktop icon, go to the Windows Start Menu, type Outlook, and open the app from there.

When prompted, enter your full WPX email address (e.g.,test@mail.wpxexample.com).
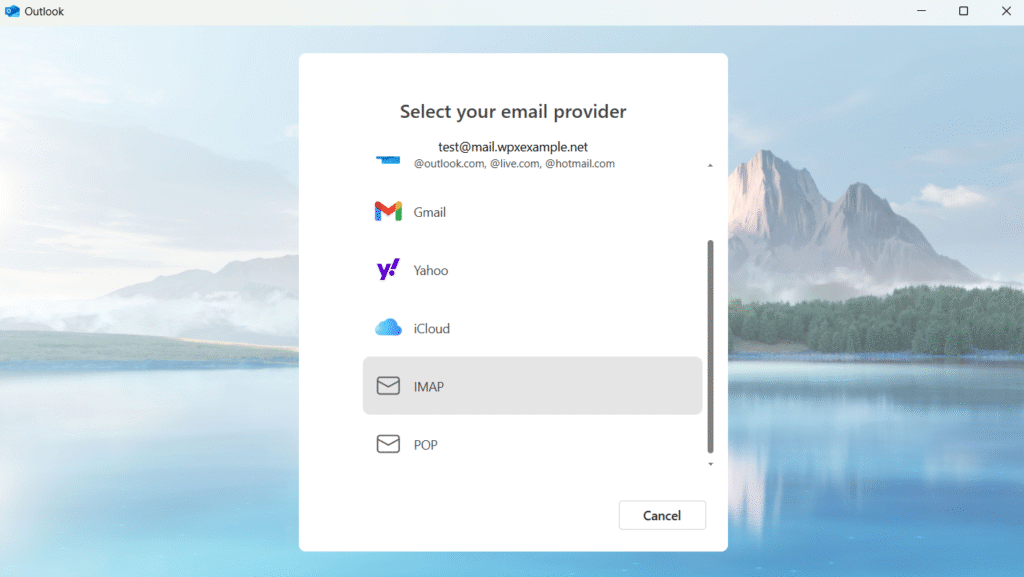
Select the IMAP option (recommended). If you specifically require POP, choose that instead.
Step 5: Enter your Email Details
Fill in your WPX email password, then click the Show More toggle to reveal the advanced settings for your IMAP (Incoming) and SMTP (Outgoing) servers.
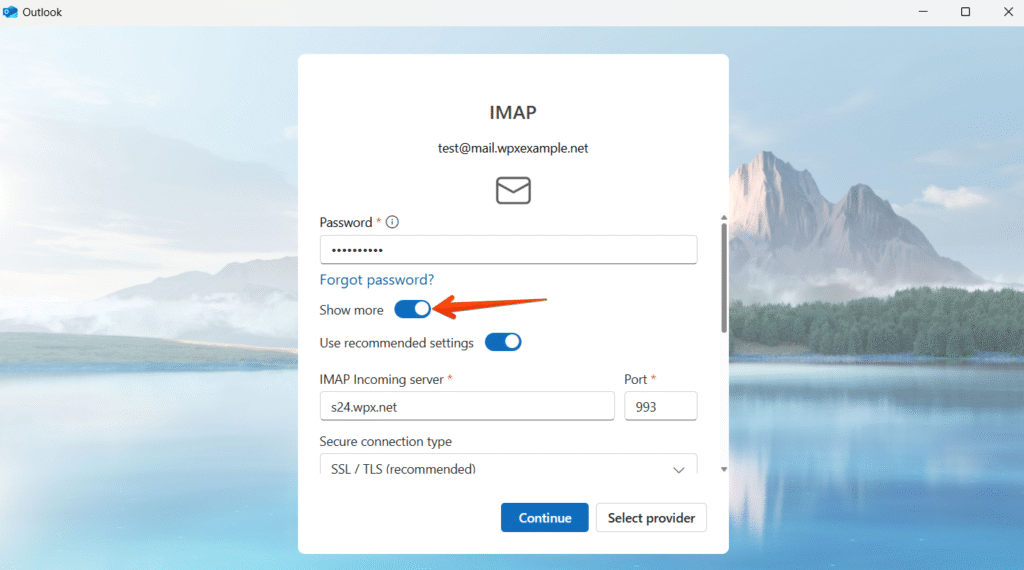
Start by entering the IMAP (Incoming) server details:
- IMAP Incoming Server: Use the hostname shown under Control Panel → Emails → Settings → Email Server Info (see Step 3).
- Port: 993
- Secure connection type: SSL / TLS (recommended)

Then, enter SMTP (Outgoing) server details.
- SMTP username: Use your email username.
- SMTP password: Use your email password.
- SMTP Outgoing server: The same as the IMAP (incoming) server, the hostname shown under Control Panel → Emails → Settings → Email Server Info (see Step 3).
- Secure connection type: SSL / TLS (recommended)
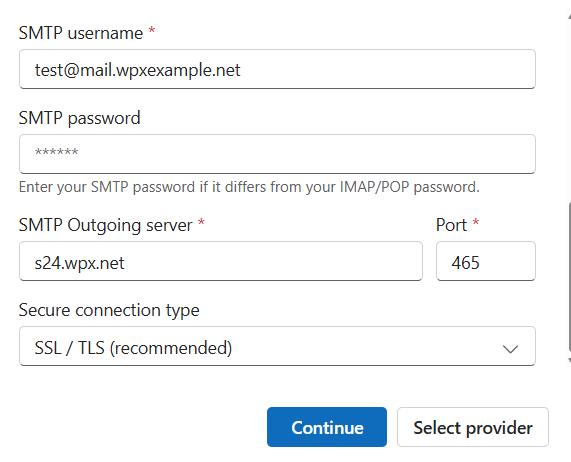
Then click the Continue button. Outlook will run a connection test. If successful, your mailbox will be added.
What If you have a different Email Username?
If your email username is different from your email address (common with some WPX servers), Outlook’s automatic setup may not work. In that case, follow these manual steps:

Open the Start Menu, type Control Panel, and open it.
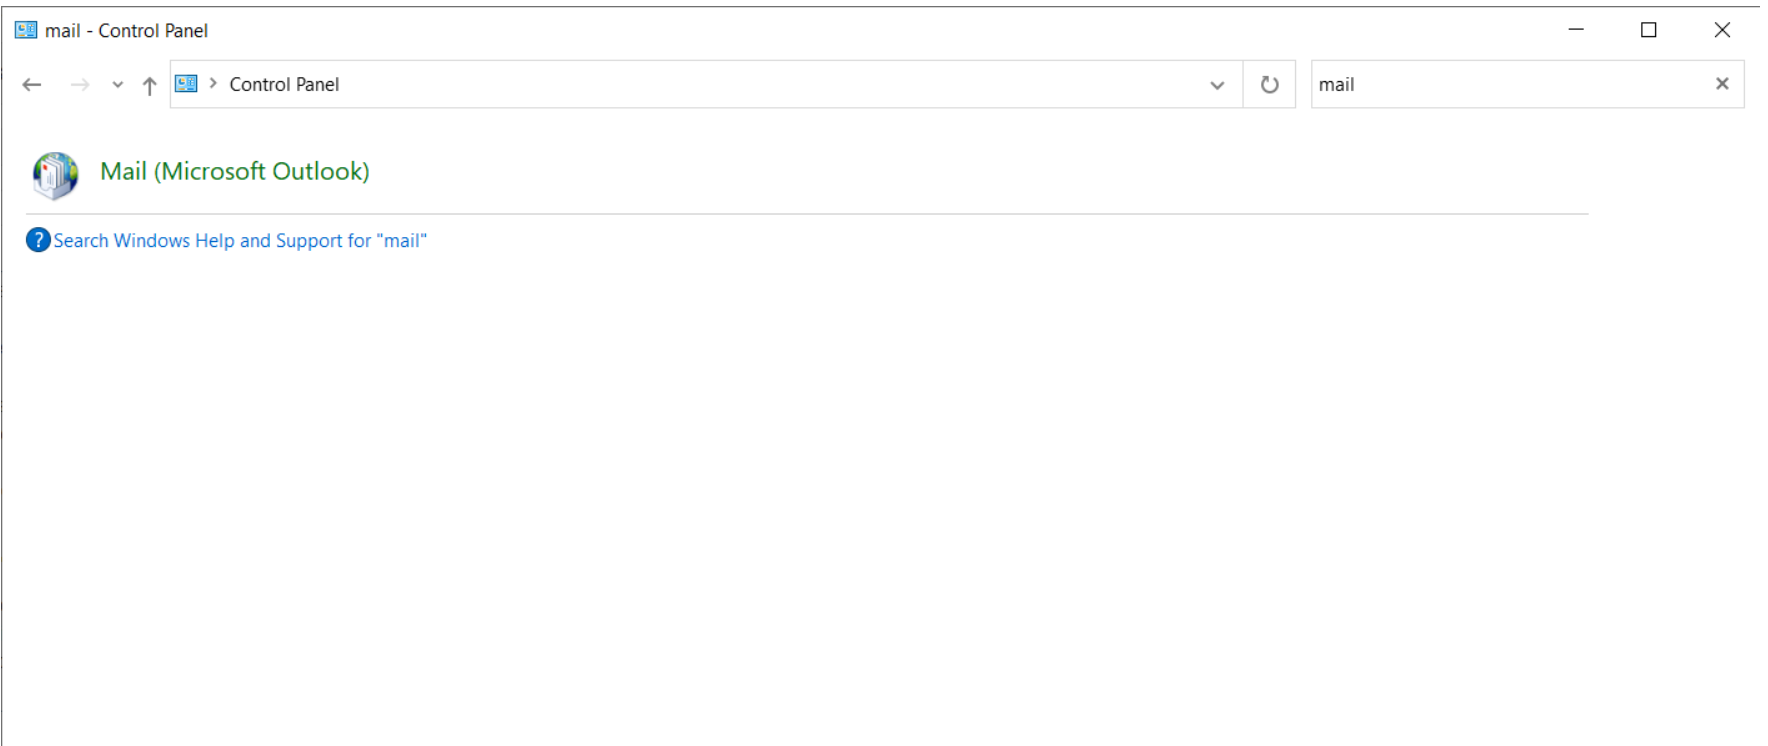
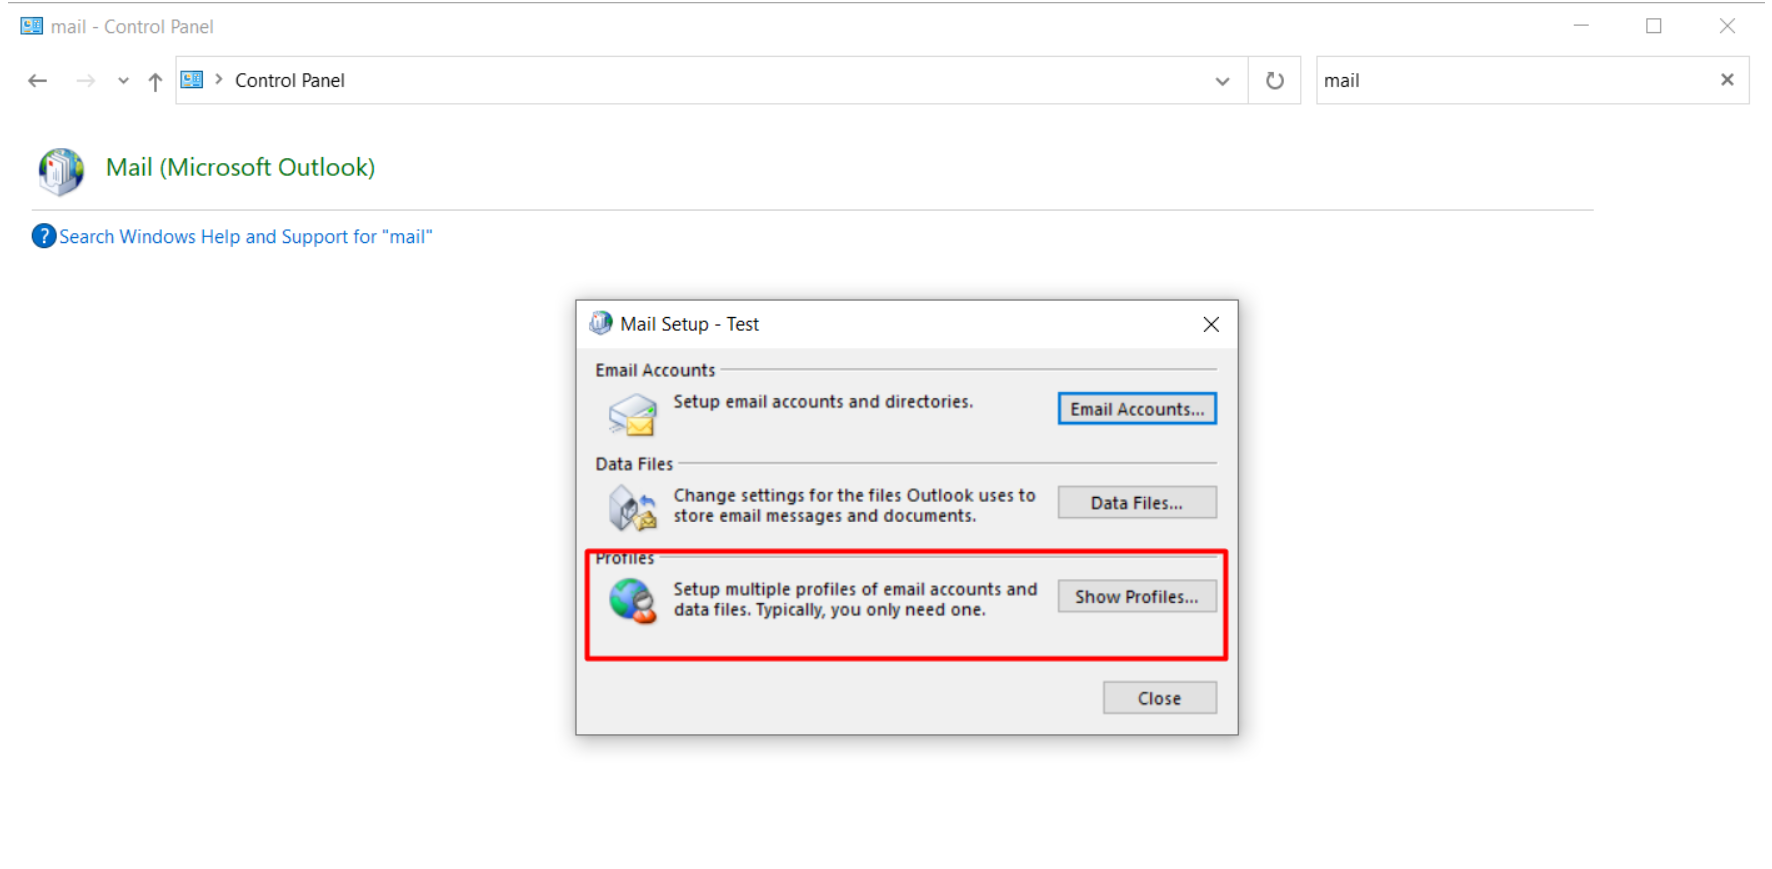
Search for Mail and click Mail (Microsoft Outlook). Choose Show Profiles, then click Add to create a new profile.
Click on the Add button:
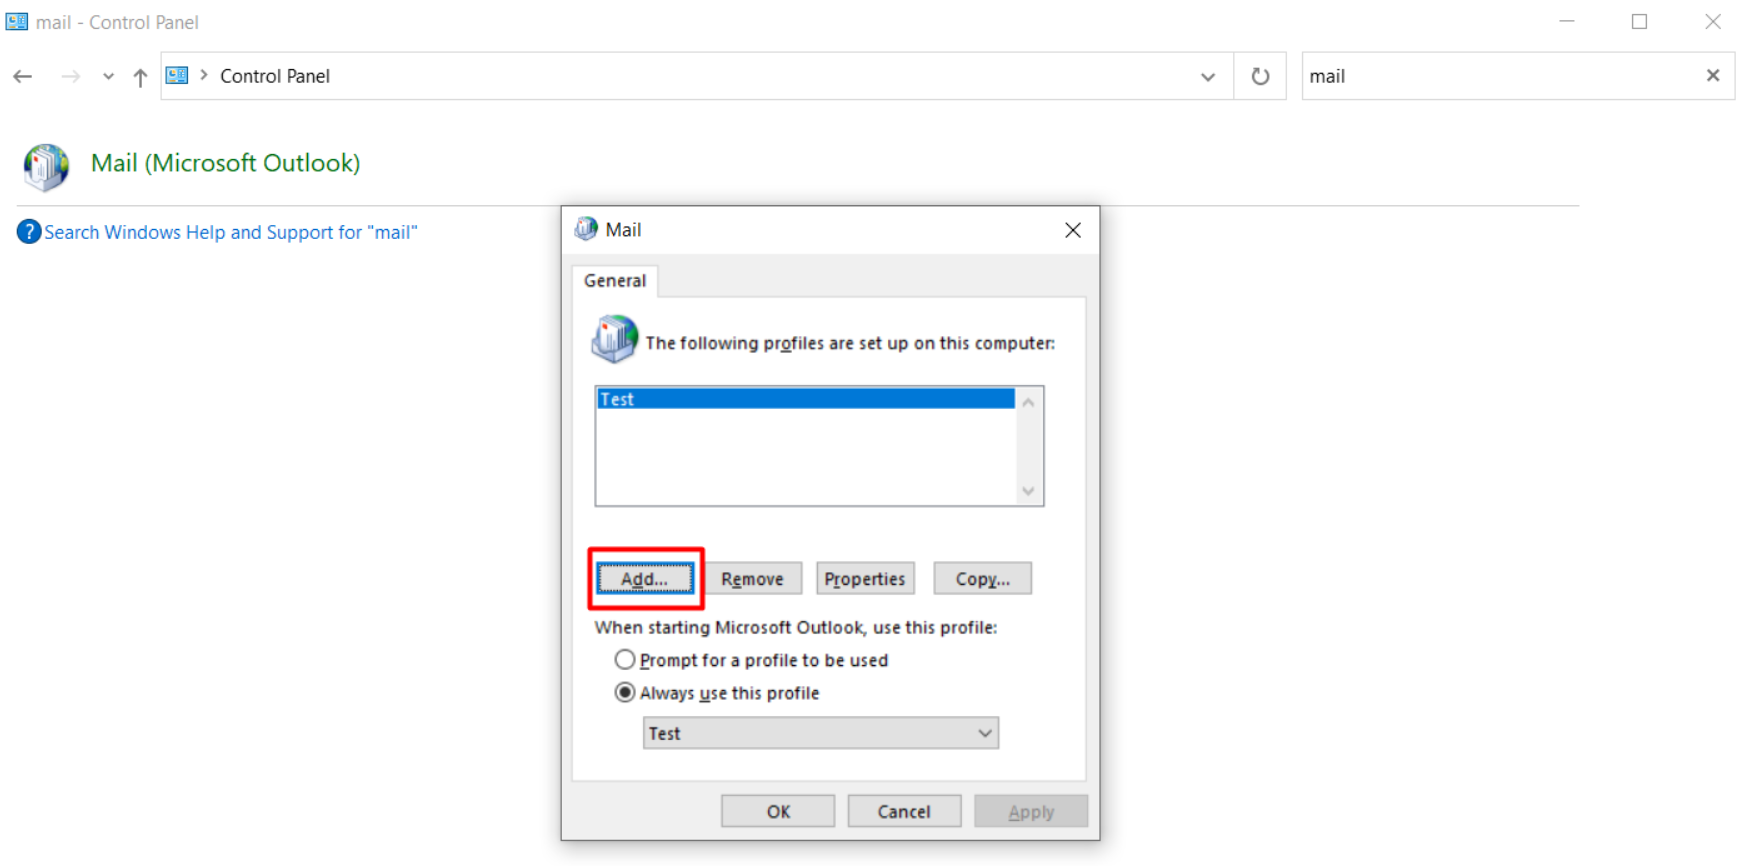
Name the profile (e.g., “WPX Email”) and choose:
- Manual Setup or Additional Server Types
- POP or IMAP

Stuck at any point? Don’t worry, just click the live chat widget in the bottom-right, and one of our support agents will assist you in under 30 seconds.