This article is a step-by-step guide to help you enable/disable Redis Cache on your websites.
Step 1. Log in to your WPX account
Begin by logging into your WPX account. You can do this by visiting the WPX login page.
Step 2. Go to Control Panel
Once logged in:
- Locate your hosting plan in the WPX client area.
- Click the Control Panel button next to the plan you wish to manage.

Step 3. Manage Redis cache
From the Control Panel:
- Select the Redis section
- Use the Toggle button to enable/disable Redis for any site.
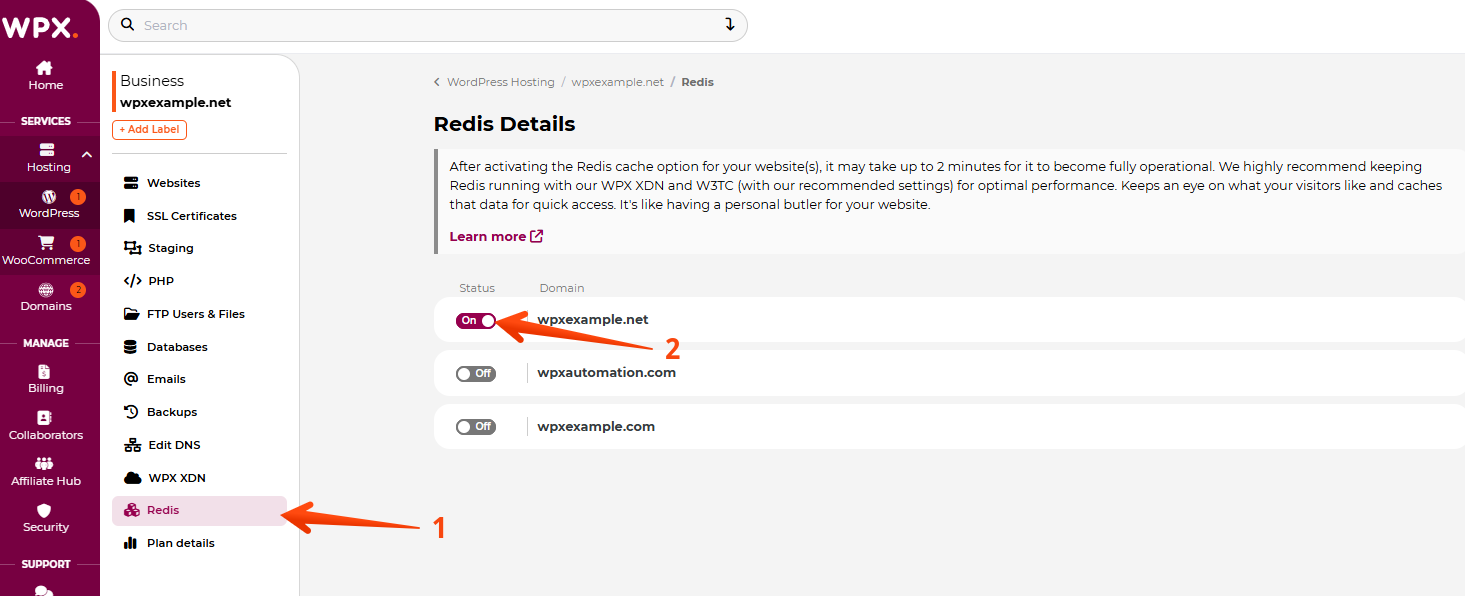
Once you do that, an automatic process for enabling the WPX Redis will begin. You will receive two notifications for starting and completing the task. You can disable the Redis cache the same way by pressing the Toggle button.
Have more questions? Contact the WPX Support Team through the live chat widget in the bottom-right corner, and they’ll assist you promptly, typically within 30 seconds.