In this article, we will guide you through the process of migrating your Shopify site to WooCommerce.
Step 1. Install WordPress
Getting started with WordPress is quick and easy. At WPX Hosting, we offer a fully automatic process. installation process, allowing you to set up WordPress with minimal effort.
Step 2. Install WooCommerce
- Select the Plugins section.
- Click the Add New Plugin button.
- Type WooCommerce into the search bar.
- Click Install Now to install the plugin on the site.
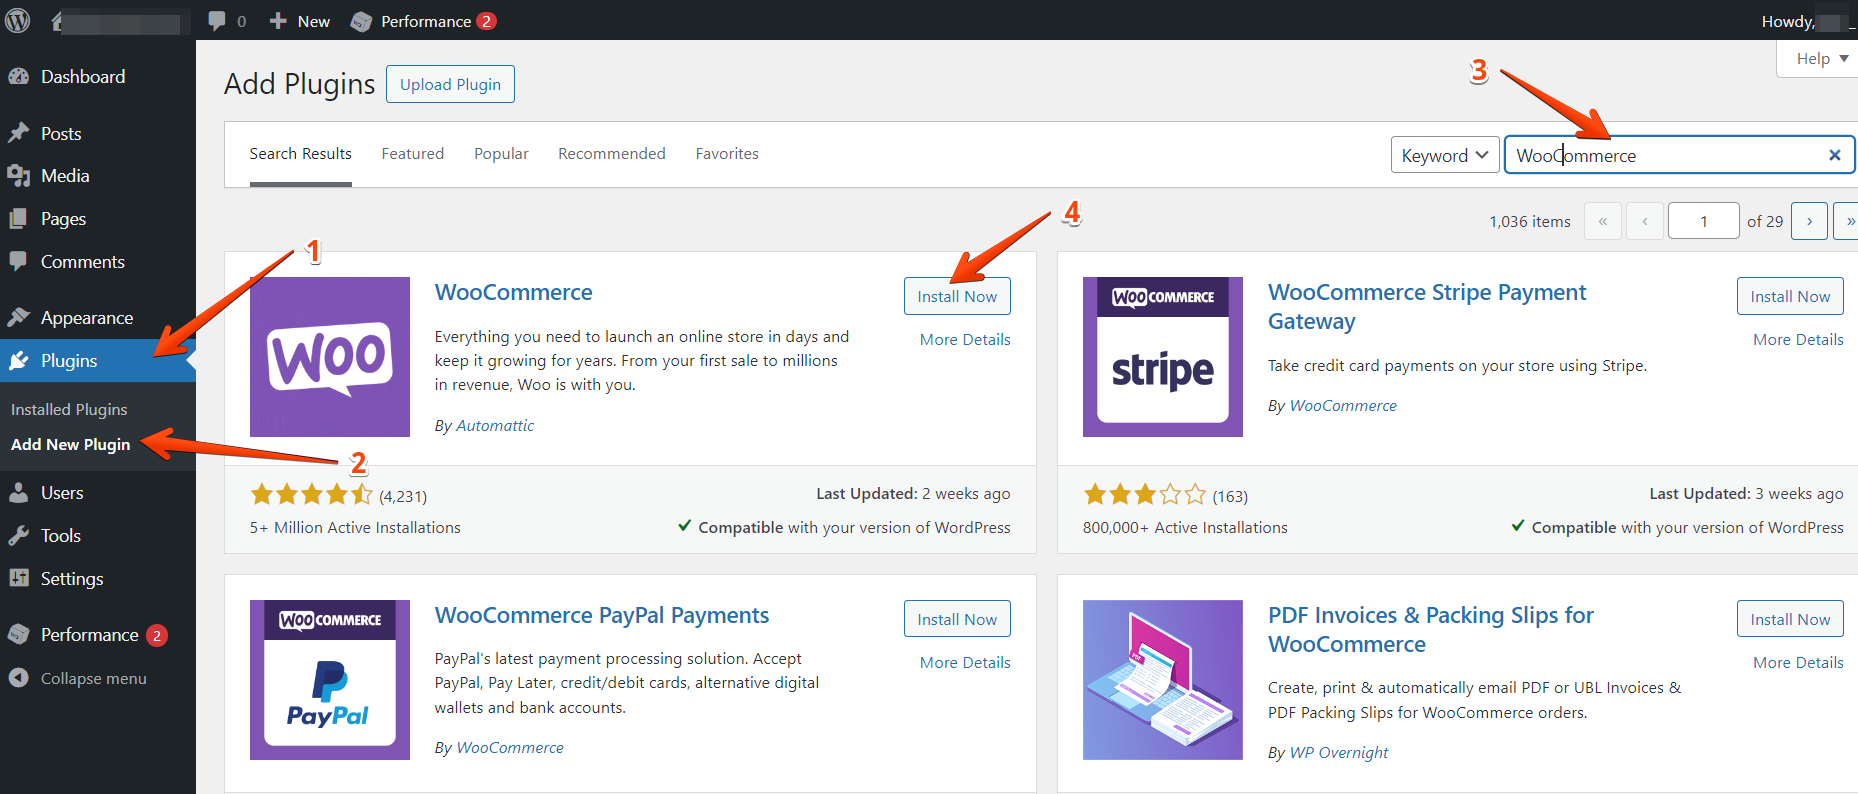
To activate the plugin, click Activate.

Step 3. Export Products From Shopify
To export your Shopify product data, go to your account and navigate to Product > All Products.
This page will show a complete list of all the products in your store. It also includes options to import and export data, and should look like this:

Select the Export button at the top of the screen, and Shopify will ask which products you want to export.
Click on All products and select the CSV for Excel, Numbers, or other spreadsheet programs option under Export as:

Once you click on Export products, Shopify will compile a CSV file including all your product data and send it to you via email.
It might take a while to arrive, depending on how large your inventory is, and will include a link to download the CSV file that contains all of your product information:

Step 4. Import Shopify Products into WordPress
There are two ways that you can import Shopify products into WooCommerce. One method is to use the built-in product importer that WooCommerce has, and the other is through a migration service.
In your WP admin dashboard:
- Select Tools
- Choose the Import option from the dropdown
- Click the Run the Importer button below WooCommerce products (CSV).

To import the file click the Choose File button, select the CSV file that you exported from Shopify, and click on Continue:
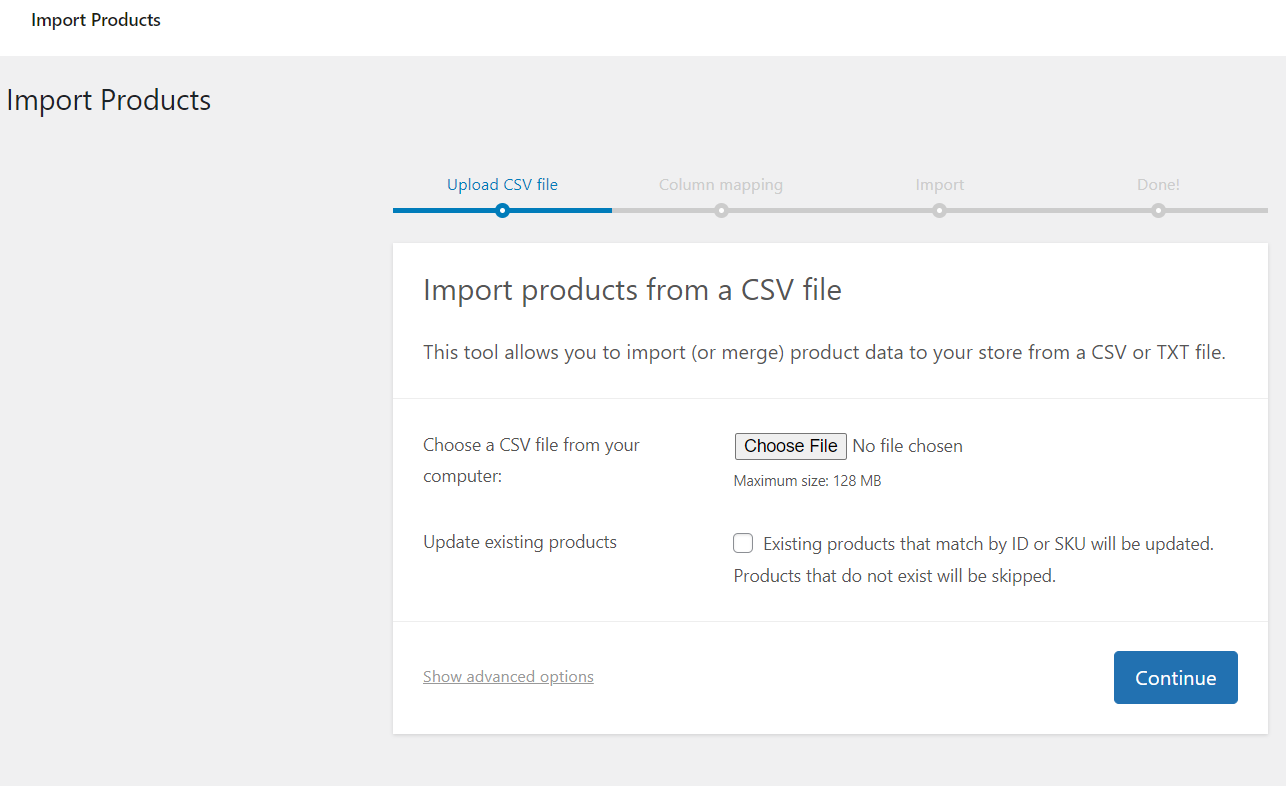
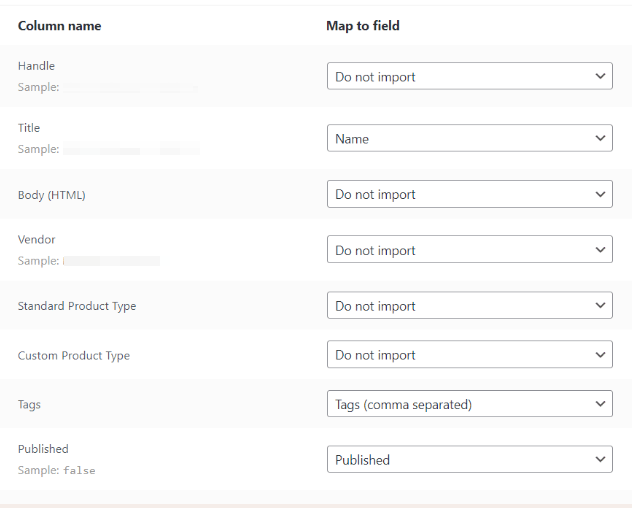
The next screen includes a couple of options for matching product data from the CSV file to WooCommerce fields. You can go through that list of options and decide which data you want to import into WooCommerce and which you’re comfortable leaving out.
To complete the import, click on the Run the Importer button.
WooCommerce will take a minute (or more) to import your Shopify product data. When the process is over, you’ll see a success message.
Step 5. Configure WordPress Permalinks
WordPress enables you to decide your URL structure, including for WooCommerce products. The default WordPress URL structure is usually not very user-friendly, and it’s also not SEO-friendly.
To change your store’s URL Structure, go to Settings > Permalinks > Product permalinks and select the option that you prefer:

The option that is recommended is the Standard structure.
Step 6. Update your Site’s design
At this point, you’re still using one of the default WordPress Themes. Now you can choose if you want to:
- Recreate the style of your Shopify store
- Start over with a new WooCommerce template
Step 7. Configure WooCommerce settings
Importing products into WooCommerce and customizing your store’s style is just the beginning. Before you can start selling products via WooCommerce, you still need to configure a variety of settings, such as:
- Security settings
- Payment and shipping options
- Email notification options
- Product settings
- Tax options
The official WooCommerce documentation includes a complete guide on how to configure its settings.
Step 8. Point your Domain to WooCommerce
You should already have a fully working WooCommerce store that includes all of your Shopify products. However, there are still a couple of things left to do, including updating your domain records since currently, your domain is still pointing to your Shopify store.
The process for changing which site a domain points to varies depending on which service you use to manage it. If you use a domain registrar, you’ll need to update your records there.
If you registered a domain directly through Shopify, you’d need to edit your DNS settings using the platform. Alternatively, some web hosts, such as WPX, enable you to update your domain records from your hosting control panel.
Stuck at any point? Don’t worry, just click the live chat widget in the bottom-right, and one of our support agents will assist you in under 30 seconds.