If you previously used a third-party email service by applying our automatic DNS configuration tool (explained here), you can easily revert to WPX’s email service in just a few clicks. This will automatically restore the default WPX DNS records for your email.
Step 1. Log in to your WPX account
Begin by logging into your WPX account. You can do this by visiting the WPX login page.
Step 2. Go to Control Panel
Once logged in:
- Locate your hosting plan in the WPX client area.
- Click the Control Panel button next to the plan you wish to manage.

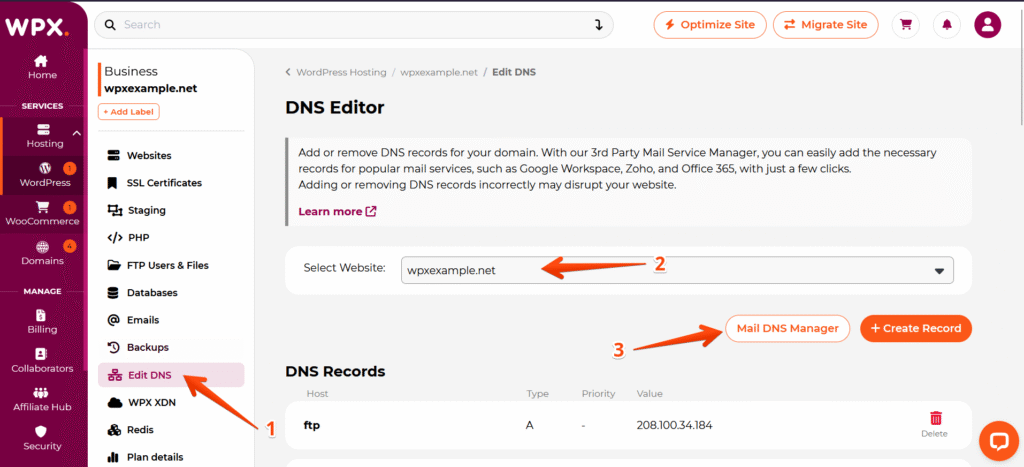
Step 3: Open the Edit DNS Menu
Inside your hosting panel:
- Click Edit DNS.
- Select the website you want to configure.
- Click the Mail DNS Manager button.
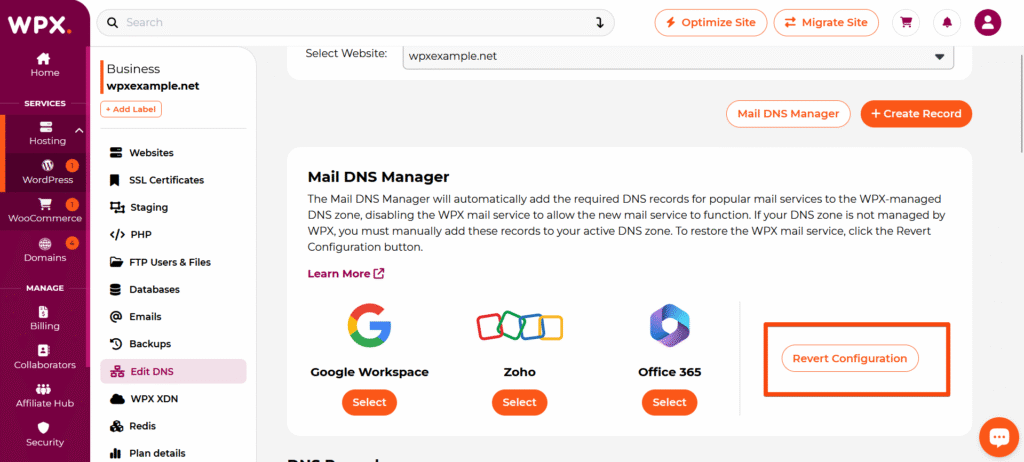
Step 4: Revert to WPX Default Email Configuration
Click the Revert Configuration button. This will:
- Remove any existing third-party DNS email records.
- Add the default WPX DNS records.
- Reactivate WPX’s email service for your domain.
Stuck at any point? Don’t worry, just click the live chat widget in the bottom-right, and one of our support agents will assist you in under 30 seconds.