Enhancing the security of your WPX account is essential, and implementing IP security restrictions is an effective measure. Here’s a complete guide to setting up these restrictions:
Step 1: Access Security Settings in Your WPX Account
- Log in to your WPX account here.
- After logging in, navigate to the Security menu on the left-hand side to access your security settings.

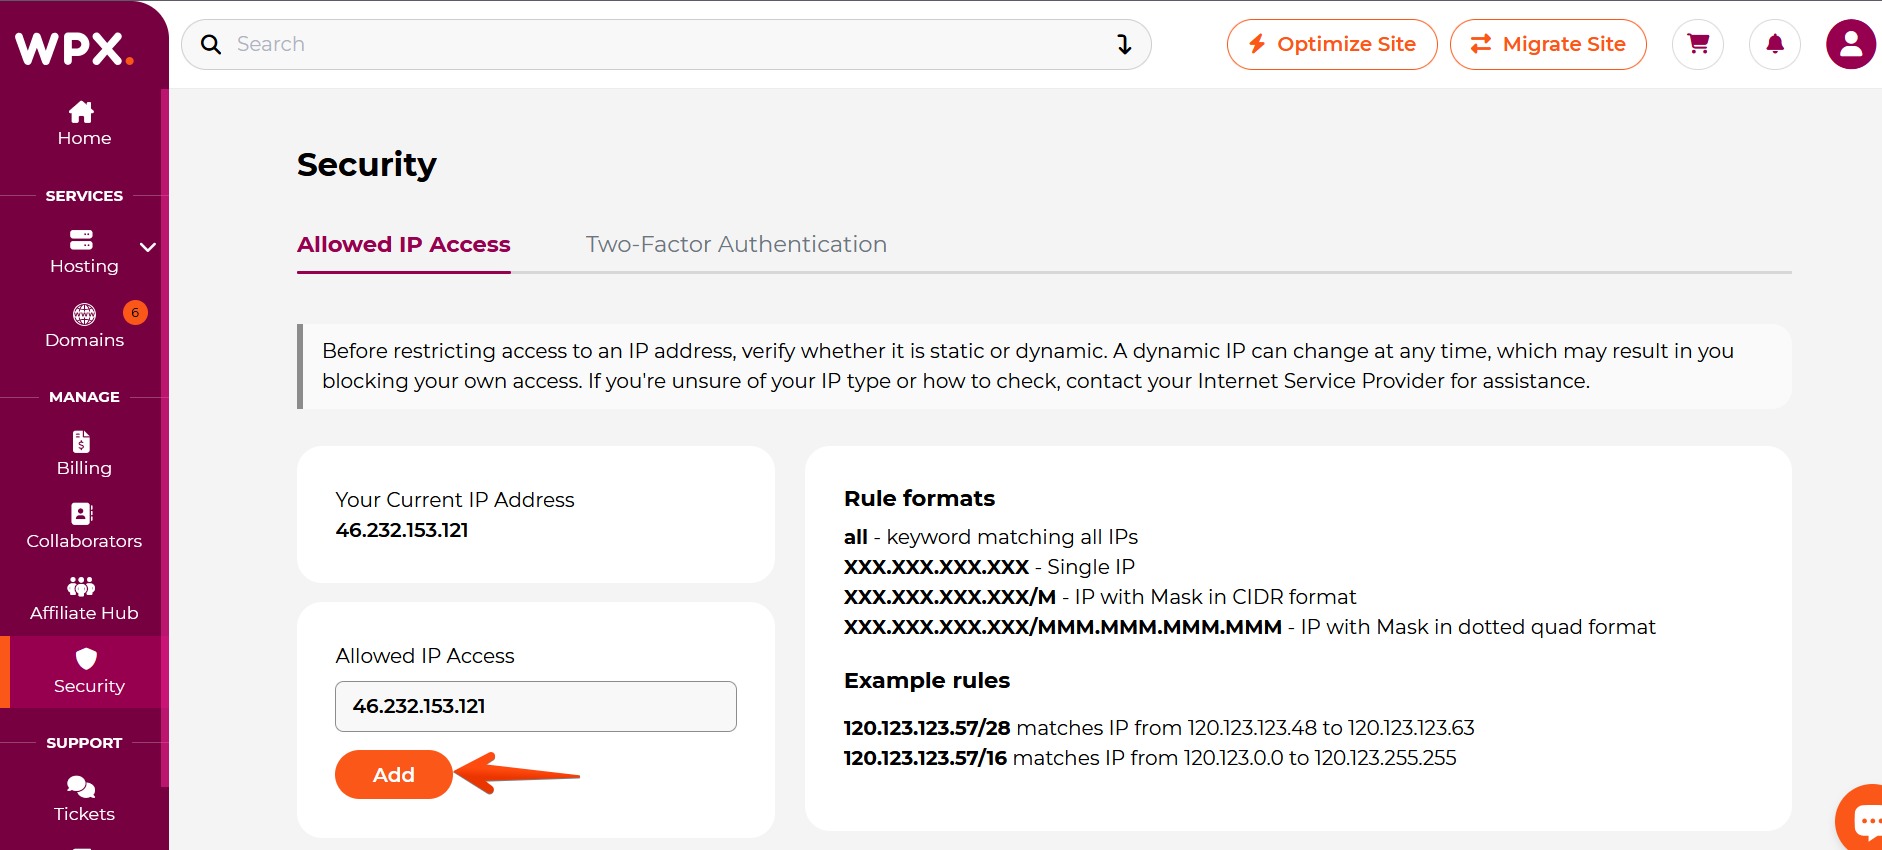
Step 2: Configure IP Address Access
Within the Security section, you’ll find options to manage IP Addresses that can access your WPX account.
- The Allowed IP Addresses menu will show you your current IP address on the left.
- Below your IP Address, you will find the Allowed IP Access menu which allows you to add new IP Addresses or subnets to permit access to your WPX account.
- On the right, there are Rule Formats & Examples to help you input acceptable formats for setting IP restrictions.

Step 3. Add your IP Address
To restrict account access exclusively to your IP address, place your IP Address under Allowed IP Access and click on the Add button.
After adding your IP, a list will appear below displaying all allowed IP Addresses and subnets with access to your WPX account.
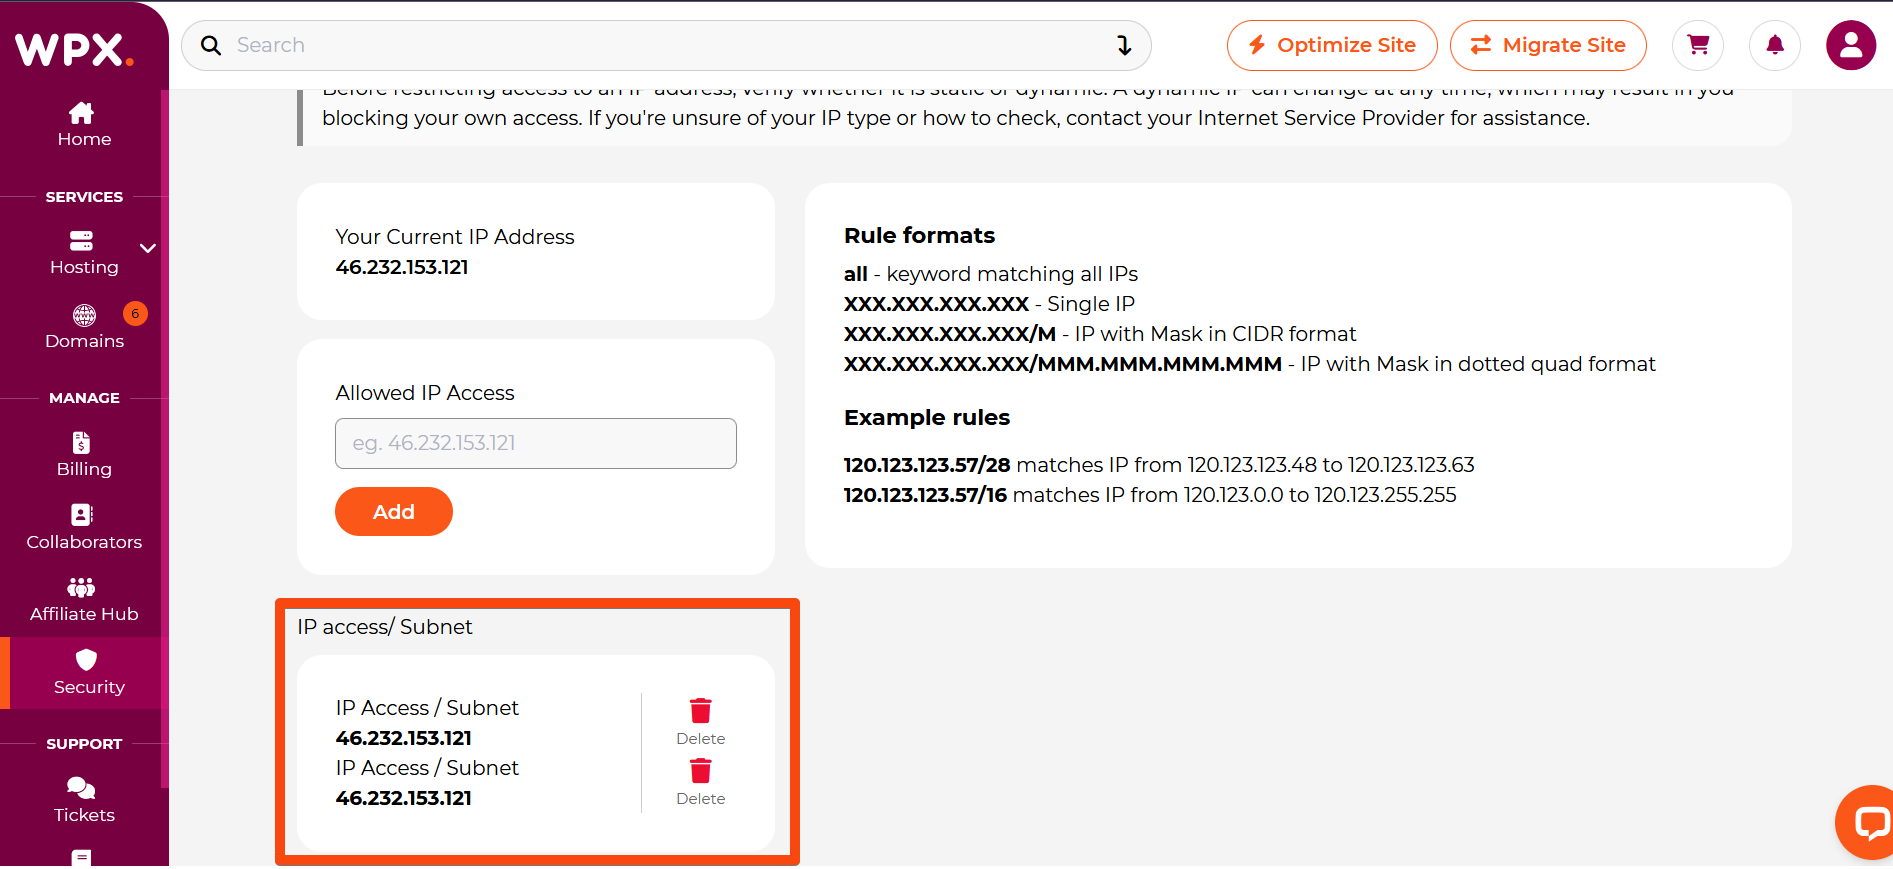
To remove an IP Address from your access list, simply click the Delete button next to it.
Stuck at any point? Don’t worry, just click the live chat widget in the bottom-right, and one of our support agents will assist you in under 30 seconds.