In this step-by-step guide, we’ll walk you through the process of setting up your WPX email account in the Apple Mail application on macOS Mojave (version 10.14.6).
Step 1. Log in to your WPX account
Begin by logging into your WPX account. You can do this by visiting the WPX login page.
Step 2. Go to Control Panel
Once logged in:
- Locate your hosting plan in the WPX client area.
- Click the Control Panel button next to the plan you wish to manage.

Step 3. Get your Email Settings
If you’re already familiar with where to find your email settings, you can skip this step.
Otherwise:
- In the Control Panel, click on Emails.
- Then click the Settings button next to the email address you want to configure.

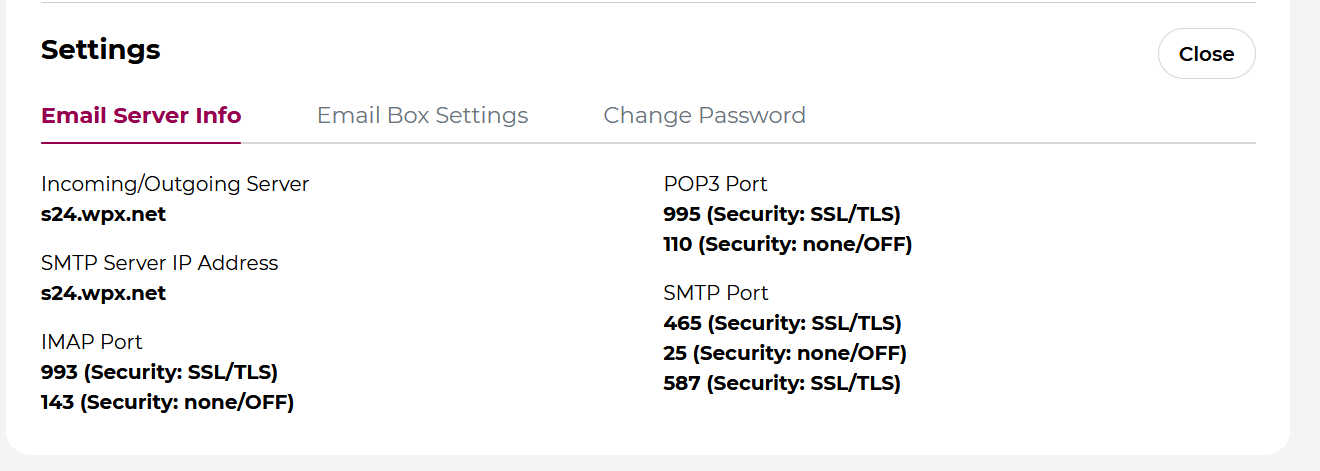
Here, you’ll find:
- Email server info (incoming/outgoing servers),
- Email login/username,
- The option to change the password (if needed).
Step 4: Add a New Account in macOS
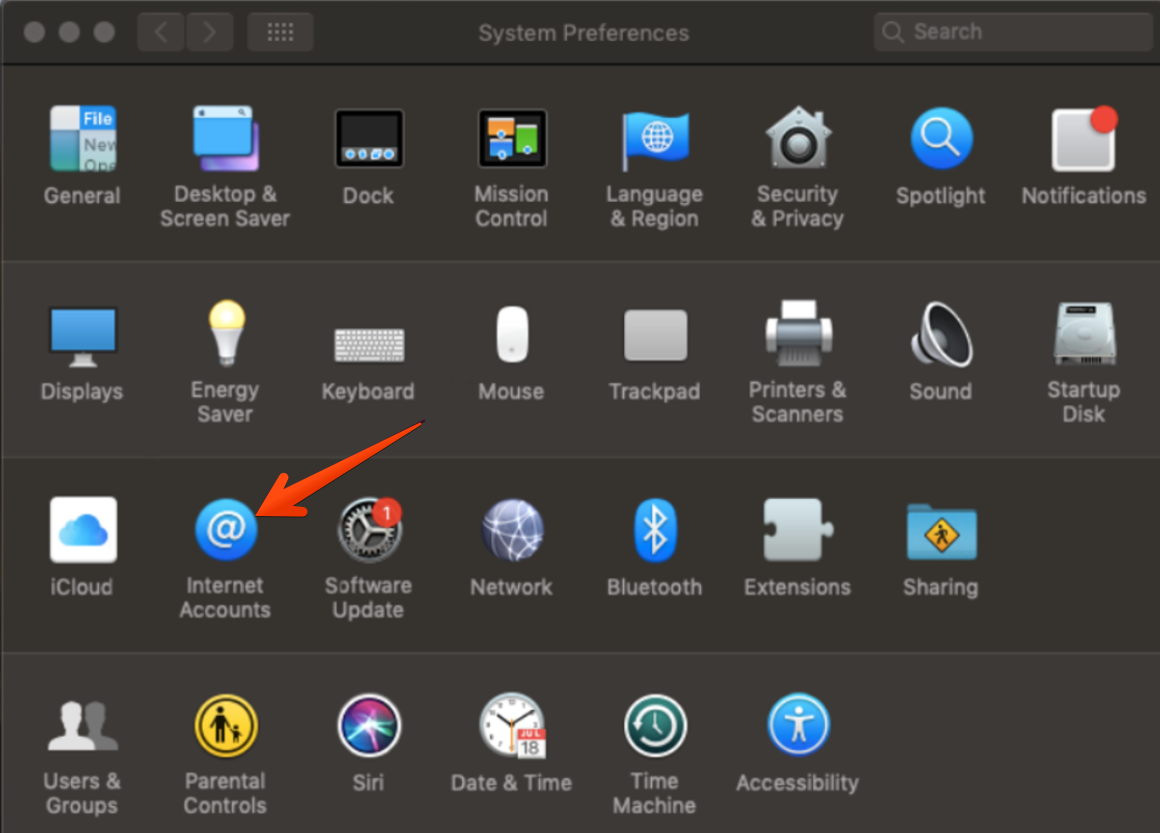
Now, open System Preferences from your Mac’s dock or Apple menu. Select the Internet Accounts to proceed.
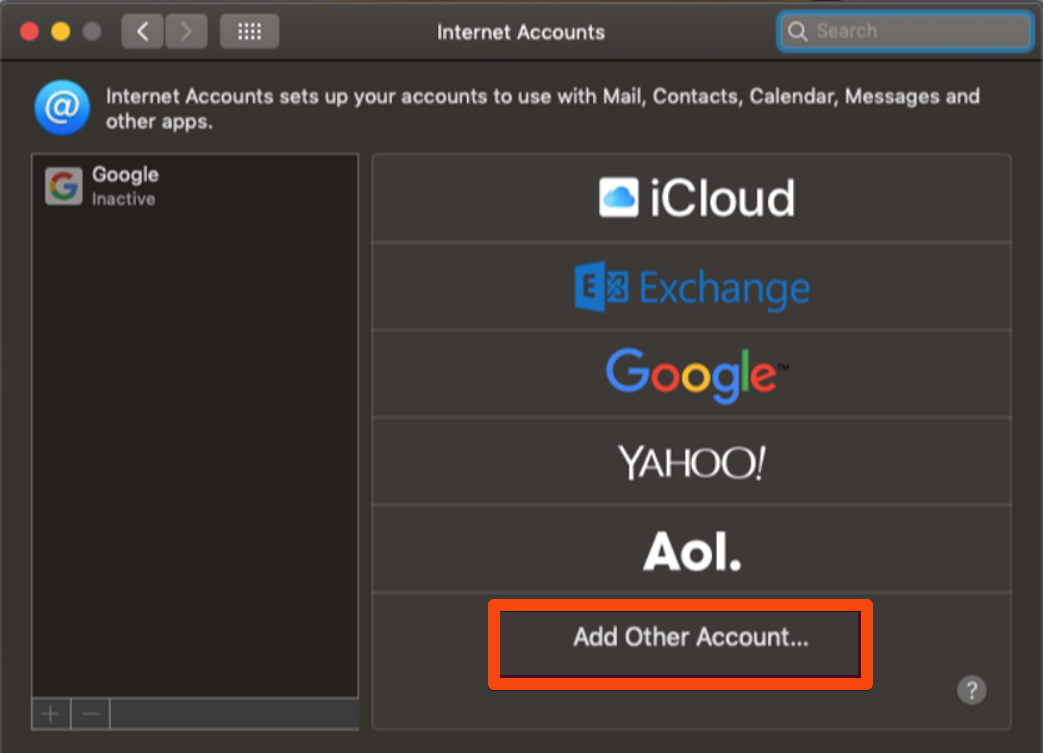
Scroll to the bottom of the list and click Add Other Account. Then choose Mail Account.
Step 5. Enter your Email details
A setup window will appear. Enter the following:
- Full Name – How you want your name to appear in emails you send.
- Email Address – Your full WPX email (e.g. yourname@yourdomain.com).
- Password – The password for this email account.
- Click Sign In.
macOS may not be able to auto-configure the settings and will display:
Account must be manually configured.
Click Next to continue.

Step 6. Manually configure Incoming & Outgoing Mail Servers
In the manual setup window:
- Enter the Email Username and Password again (from Step 3).
- Add the correct Incoming and Outgoing Mail Server Hostnames.
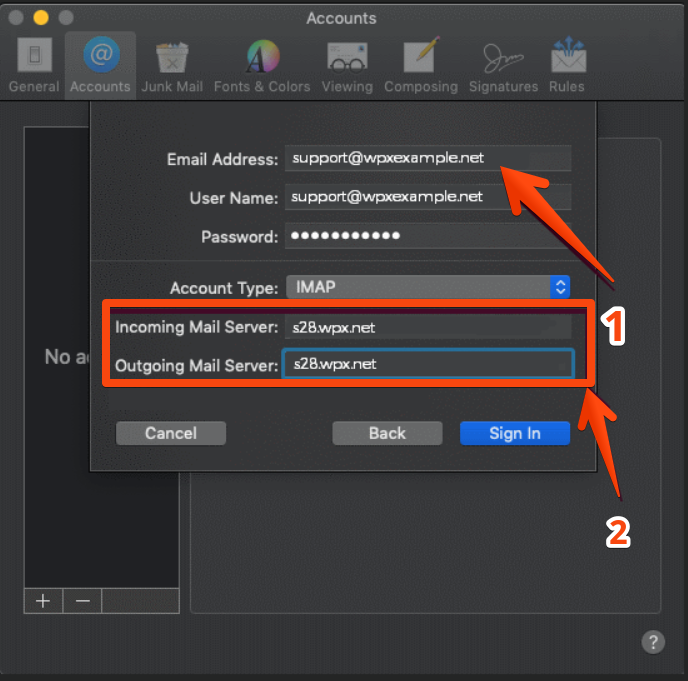
Once you’ve entered all required fields, click Sign In.
Stuck at any point? Don’t worry, just click the live chat widget in the bottom-right, and one of our support agents will assist you in under 30 seconds.