If WPX’s built-in email service doesn’t fully meet your business needs, you can easily switch to a third-party email provider like Google Workspace, Zoho, or Microsoft Office 365 directly from your WPX Control Panel.
To make the process seamless, we’ve created DNS presets for each of these providers. This means you can configure them with just a few clicks.
Important Pre-Setup Notes
Active DNS Zone Must Be with WPX: For the automatic DNS feature to work, your domain’s active DNS zone must be managed by WPX. This means your domain’s nameservers (NS records) should be pointing to WPX.
Learn more about active DNS zones
How to point your domain to WPX
Using External DNS (e.g., Cloudflare)? No problem! You can still use this feature to generate the correct records, then manually copy and paste them into your external DNS manager.
Only One Mail Service Per Domain: WPX Mail will be disabled automatically upon activating a third-party service. Running two mail services simultaneously for the same domain is not possible.
Step 1. Log in to your WPX account
Begin by logging into your WPX account. You can do this by visiting the WPX login page.
Step 2. Go to Control Panel
Once logged in:
- Locate your hosting plan in the WPX client area.
- Click the Control Panel button next to the plan you wish to manage.

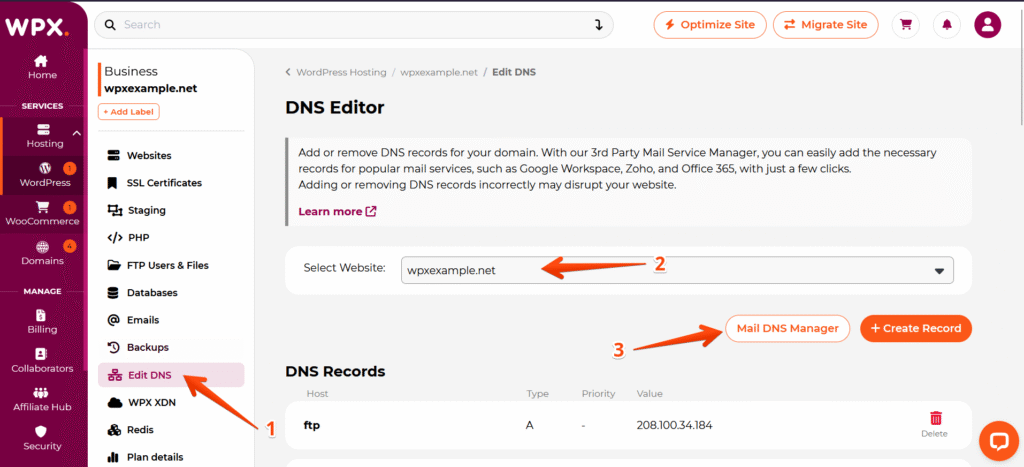
Step 3. Go to the Edit DNS menu
In the Control Panel:
- Click Edit DNS.
- Select the domain name you want to configure.
- Click the Mail DNS Manager button.
Step 4: Choose the 3rd-Party Mail Service
From the dropdown window, choose one of the following mail services:
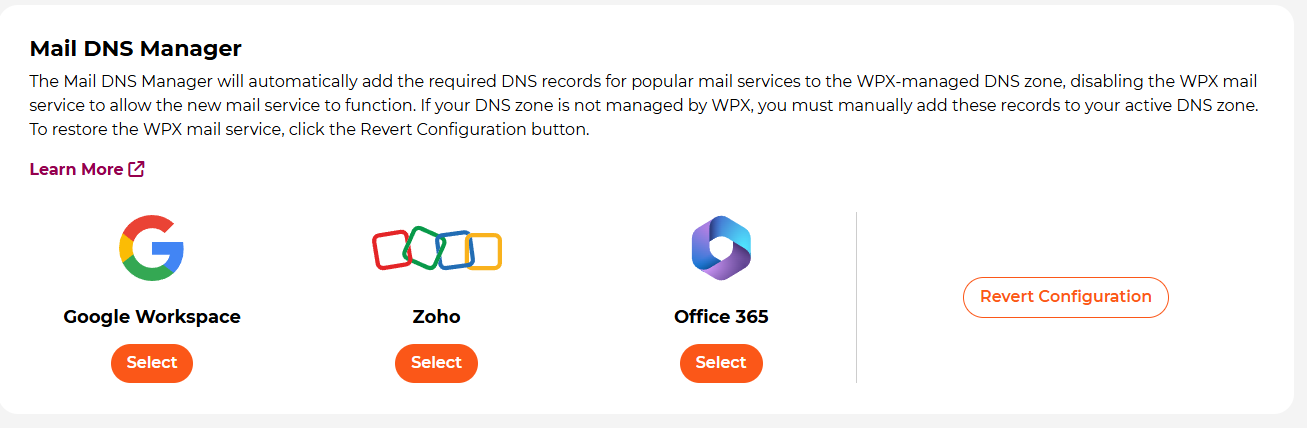
Google Workspace
- Click the Select button below Google Workspace.
- Confirm the action in the pop-up by clicking Yes.
This will:
- Automatically insert all required DNS records.
- Disable WPX Mail to avoid conflicts.
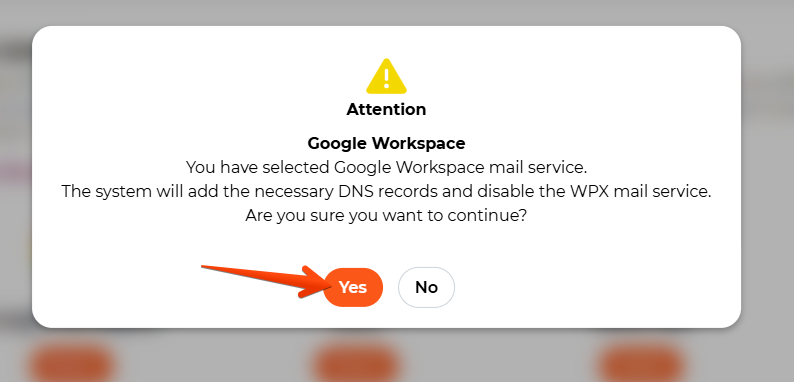
You’ll receive a confirmation message once the setup is complete.
Zoho
- Click the Select button below to Zoho.
- Choose the appropriate MX record type:
- US-based
- EU-based
- AU-based
Make sure to select the type based on the Zoho region your account is hosted in. After confirmation, the system will apply the DNS records, and you’ll get a success message.

Office 365
- Click the Select button below Office 365.
- Enter your unique MX record (domain-key) from your Office 365 account.
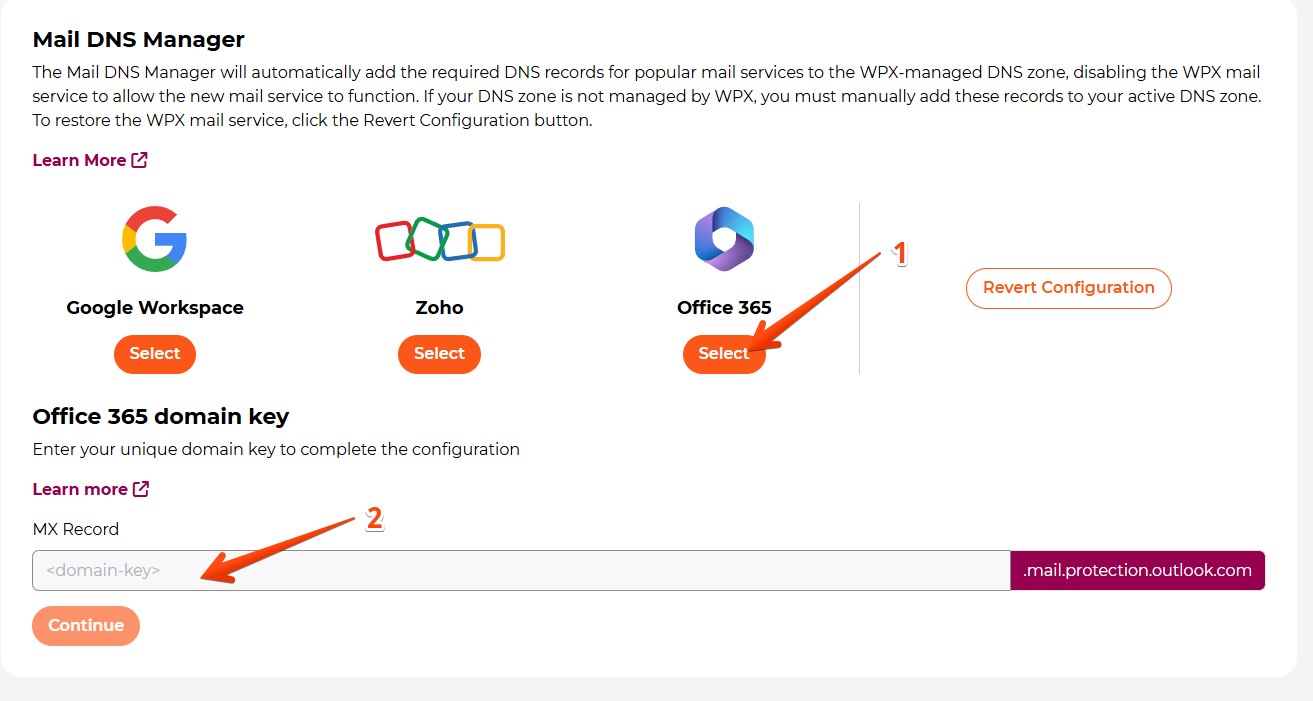
Once entered, click Continue, and WPX will apply the necessary DNS records.
Want to Revert to WPX Mail?
If you were just testing or need to switch back to WPX Mail, you can do that with just a few clicks. Here’s how to revert to WPX Mail.
Stuck at any point? Don’t worry, just click the live chat widget in the bottom-right, and one of our support agents will assist you in under 30 seconds.