Setting up Two-Factor Authentication (2FA) is a great way to add extra security to your WPX account. In this guide, we’ll show you how to set up 2FA using the Google Authenticator app on your Android device.
Step 1. Activate Two-Factor Authentication
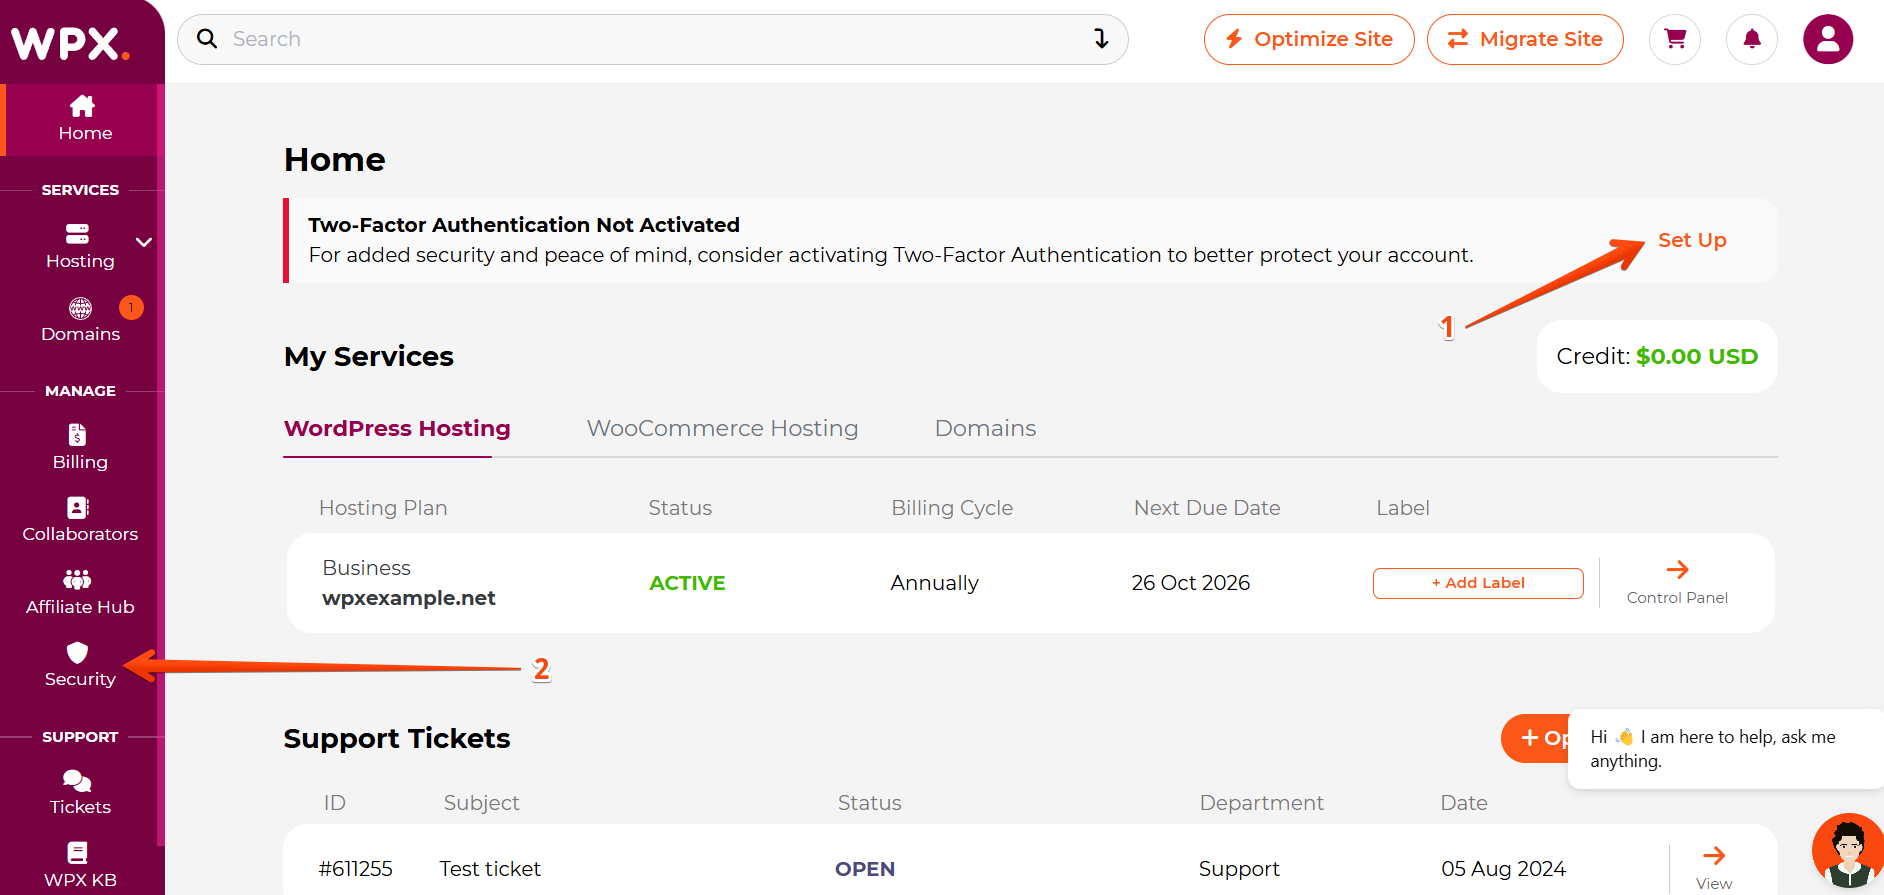
Log in to your WPX account.
If 2FA is not yet enabled, a notification in the Home menu will inform you that Two-Factor Authentication (2FA) has not been set up. To activate it, click the Set Up button (1) or go to the Security menu(2) and configure 2FA from there:
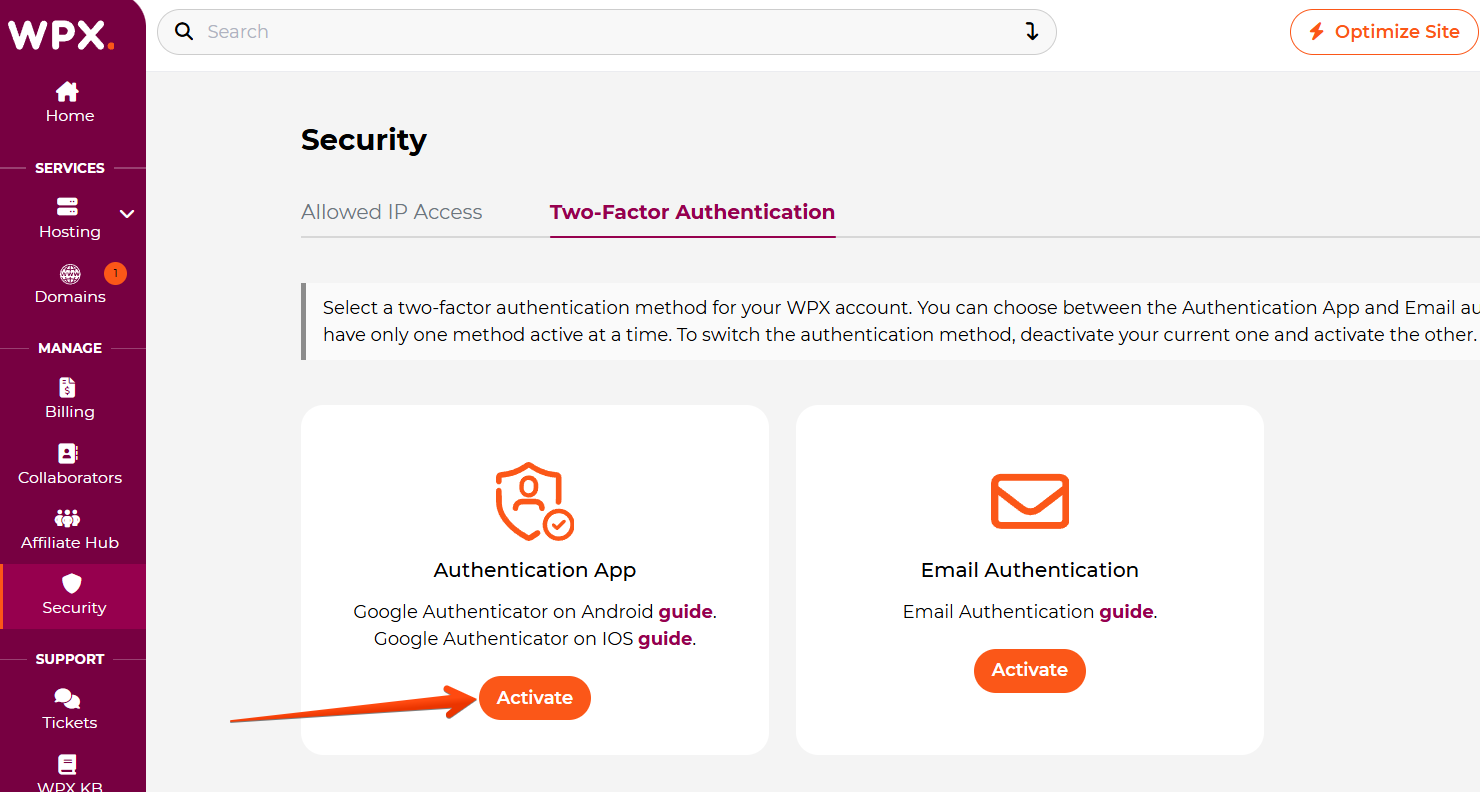
Next, you will see two 2FA methods: Authentication App and Email Authentication.
Click the Activate button under the Authentication app method to continue:
Step 2. Download Authentication App
Download the Authentication App of your choice on your device.
In this example, we’ll set up Google Authenticator.
When you have the app on your phone, click the Continue button.

Step 3. Scan the QR code
You will see the 2FA setup menu which will provide you with the QR Code (1) to scan for your mobile phone.
If your camera is not working, you can use the Setup Key (2) to complete the setup.

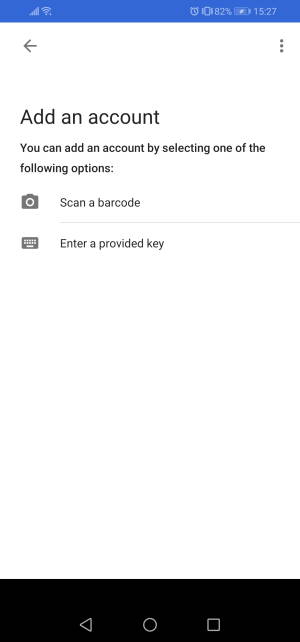
On your phone then open up the Google Authenticator app and follow these steps:
- Tap Begin
- Tap Scan a barcode, your camera will activate.
- Scan the QR code shown on your WPX setup page.
- If your camera doesn’t work, manually enter the Setup Key above the barcode:

Step 4. Save Recovery Codes
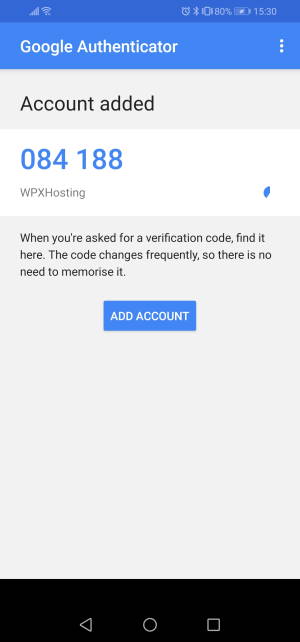
Once you have scanned your QR Code and completed the setup on your mobile device, you need to finish the setup by choosing Continue:

Make sure to save your Recovery codes and click on the Complete button.

Next time you log in to your account, you will be asked for a 6-digit authentication code that you can find in your Google Authenticator application.

Stuck at any point? Don’t worry, just click the live chat widget in the bottom-right, and one of our support agents will assist you in under 30 seconds.