W3 Total Cache (W3TC) is one of the most powerful and flexible caching plugins available for WordPress—and it’s our top recommendation for WPX customers. With features like page caching, object and database caching, browser caching, CDN integration, and more, it’s designed to significantly improve your website’s speed and performance.
This guide will walk you through the full installation and setup process using WPX’s recommended settings.
Step 1. Install W3 Total Cache
Before you install W3TC, make sure to deactivate and remove any other caching plugins to avoid conflicts or performance issues.
W3 Total Cache can be found in the WordPress directory.
To install W3 Total Cache:
- Log in to your WordPress dashboard.
- Go to Plugins > Add New.
- In the search bar, type W3 Total Cache.
- Click Install Now, then click Activate once the installation completes.

Step 2. Log in to your WPX account
To download these recommended settings, firstly log in to your WPX account. You can log in to your WPX account here.
Step 3. Download WPX pre-configured settings
Once you’re logged into WPX:
- Go to Tools.
- Click on W3 Total Cache.
- Download the WPX Recommended Settings file (approx. 5 KB).
This file contains a tailored configuration that’s optimized for our hosting environment.

Step 4. Unzip (extract) the zipped file
After downloading the file to your device, unzip it using your system’s archive utility or a tool like WinRAR or 7-Zip.

Step 5: Import the сettings into W3 Total Cache
- Go back to your WordPress dashboard.
- Hover over the Performance menu in the top admin bar and click on General Settings.
- Scroll down to the Import/Export Settings section near the bottom.
- Click Choose File and select the unzipped
.jsonfile, and click Upload to import the settings.
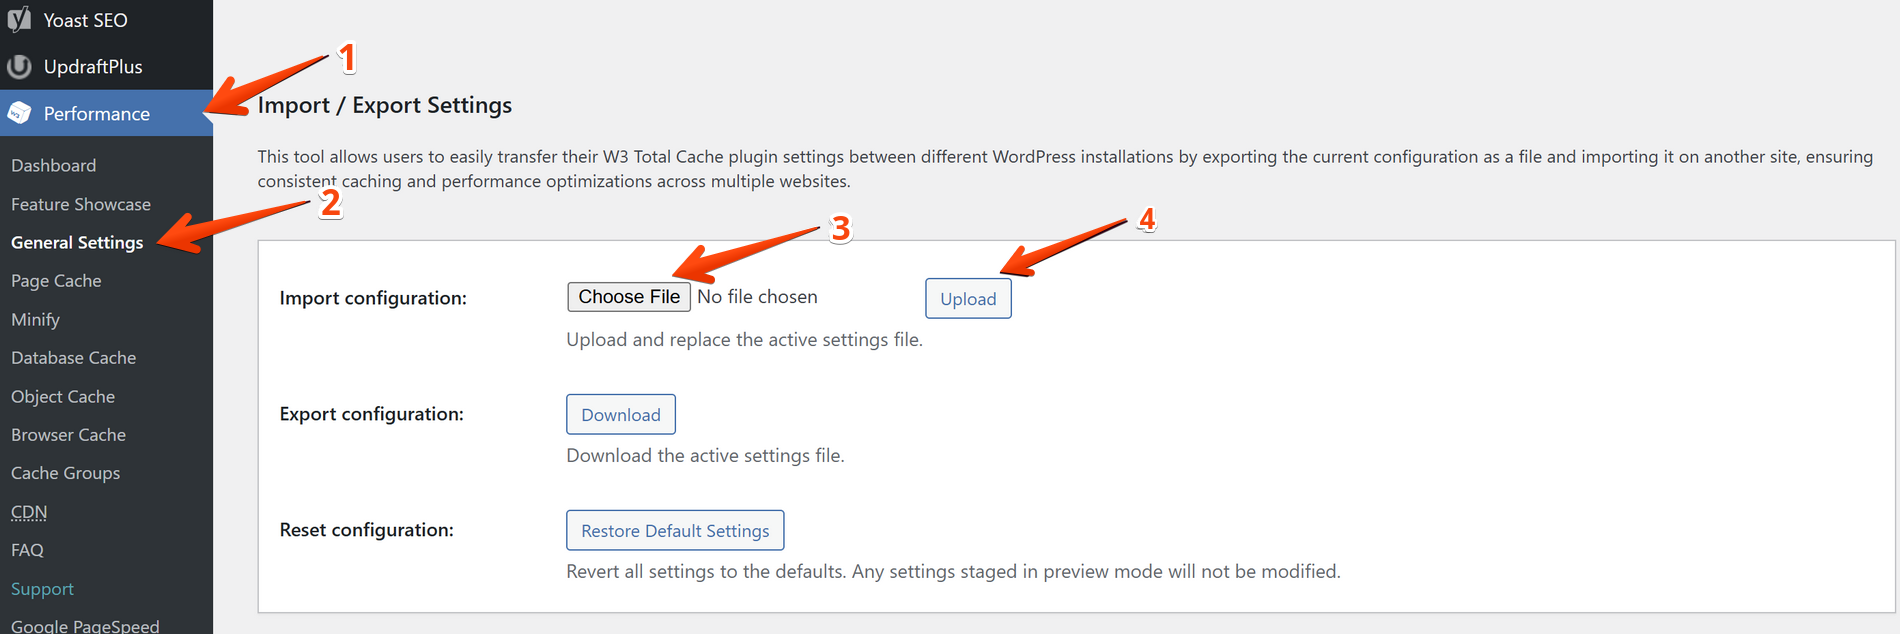
Once imported, the page will reload, and a confirmation message will appear at the top of your screen.

While these settings are optimized for WPX, they may not be ideal for every website. Feel free to review and tweak the configuration to better suit your specific needs.
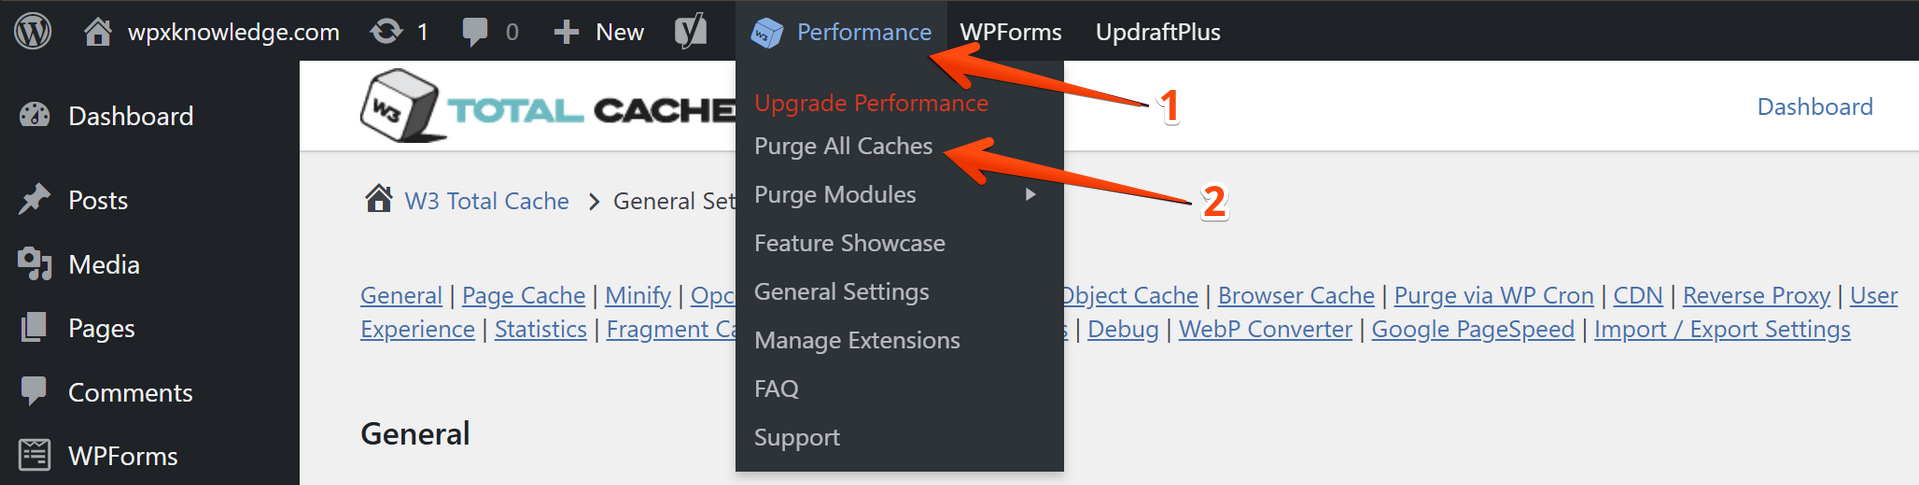
How to clear the Cache?
To manually purge your cache:
- Hover over Performance in the admin bar.
- Click Purge All Caches.
This is helpful after making content or design changes to ensure visitors see the most recent version of your site.
Stuck at any point? Don’t worry, just click the live chat widget in the bottom-right, and one of our support agents will assist you in under 30 seconds.