At WPX, our migration experts will transfer your website within 24 hours of your migration request approval. The entire process is seamless, with no downtime or disruption to your site’s functionality.
Here’s how it works
To start, fill out the migration form and submit the request. Your migration request will be added as a ticket to our Migration Team. They will keep you updated throughout the process—when the migration starts and when it’s complete. Once the migration is finished, you must point your domain to WPX, and your site will be fully operational. If you need assistance with this step, we’re here to help every step of the way.
To avoid any confusion, please note that a separate migration form is required for each website.
More information regarding migrations to WPX can be found in our Migration Policy.
Step 1. Log in to your WPX account
Begin by logging into your WPX account. You can do this by visiting the WPX login page.
Step 2. Open a new Migration Form
To request a regular migration, an express one, or a migration with a domain name change, fill out our migration form. You can access it directly here: Here!
Otherwise, to find the migration form in your WPX account, look for the Migrate Site button in the navigation bar -it’s always visible, no matter which menu you’re in.

Once you open the Migration Form, you will be able to choose your migration type.
Step 3. Select a Migration Type
The WPX Migration team can transfer your site at no cost. However, if you require faster service, we also offer Express migration options. Additionally, if you’d like to change your website’s URL, we provide domain name change migrations as well. Below are the three options available to you through the migration form:
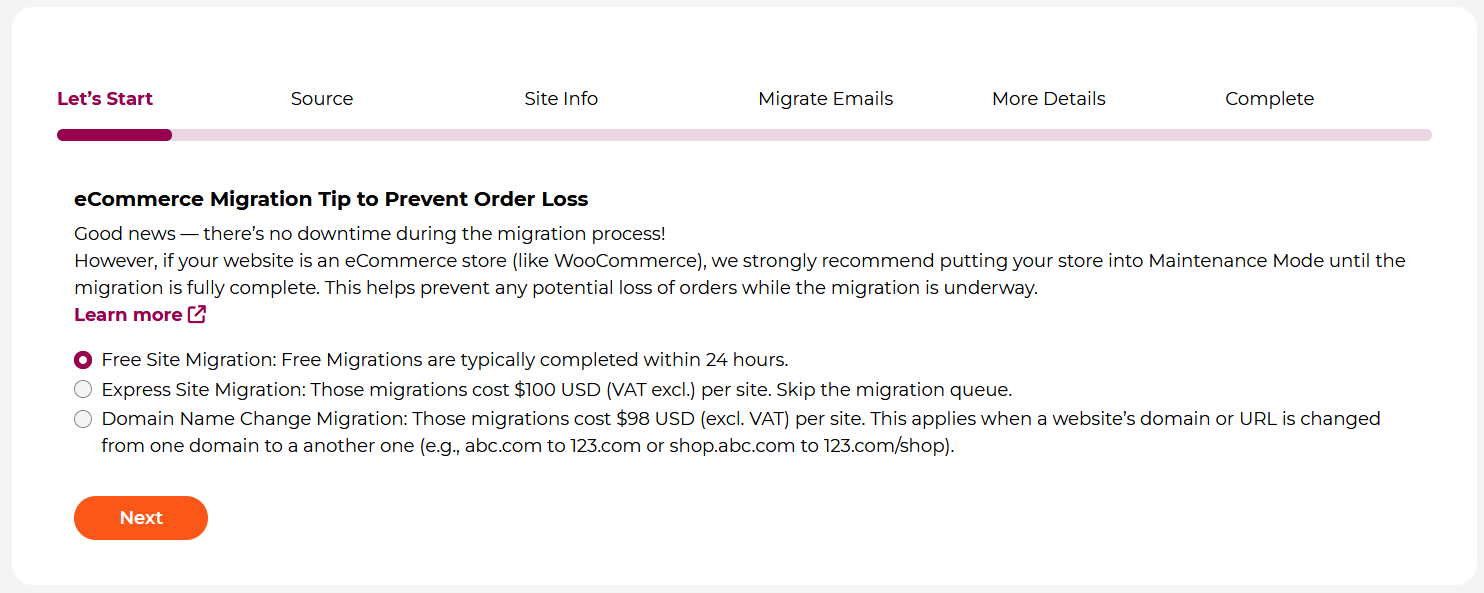
Select the type of migration and click Next.
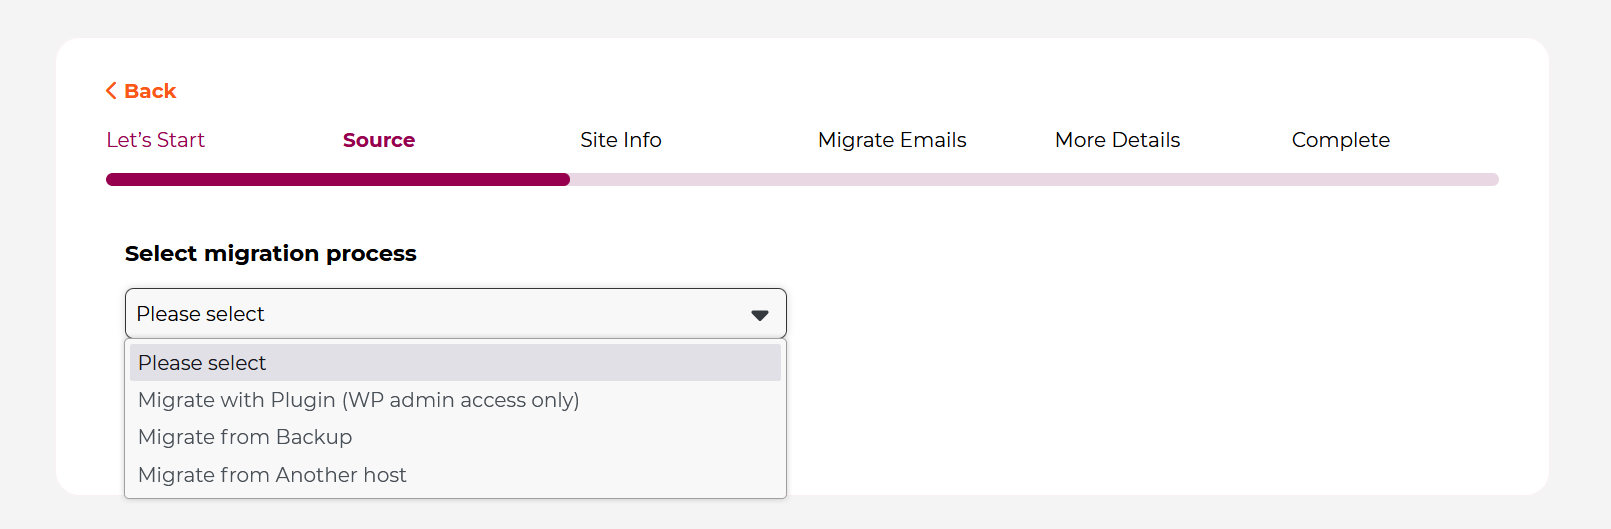
Step 4. Select the Migration Source
Select the method through which you can provide us with your website(s), files, and databases.
- Using a Plugin – If you only have access to your WordPress Admin dashboard, this is the option to choose for requesting the migration.
- With a Full Backup – If you prefer to provide us with a complete backup of your website’s files and database, select this option.
- From Another Host – Provide us with direct access to your previous host, select if you can provide us with access to your Hosting/Control Panel, FTP/SFTP, SSH, and a database backup or phpMyAdmin access.
Migrate with a Plugin
To complete the migration with a plugin, we’ll need WordPress Admin Login credentials. Select Migrate with Plugin, then click Next to continue and skip to Step 5 from this guide.
Migrate with a Backup
Copy and paste the link that contains a complete backup of your website files and database(s). You can use platforms such as Dropbox, WeTransfer, or any other file-sharing service. Simply paste the download link in the provided field.
Then click Next to continue and skip to Step 5 from this guide.

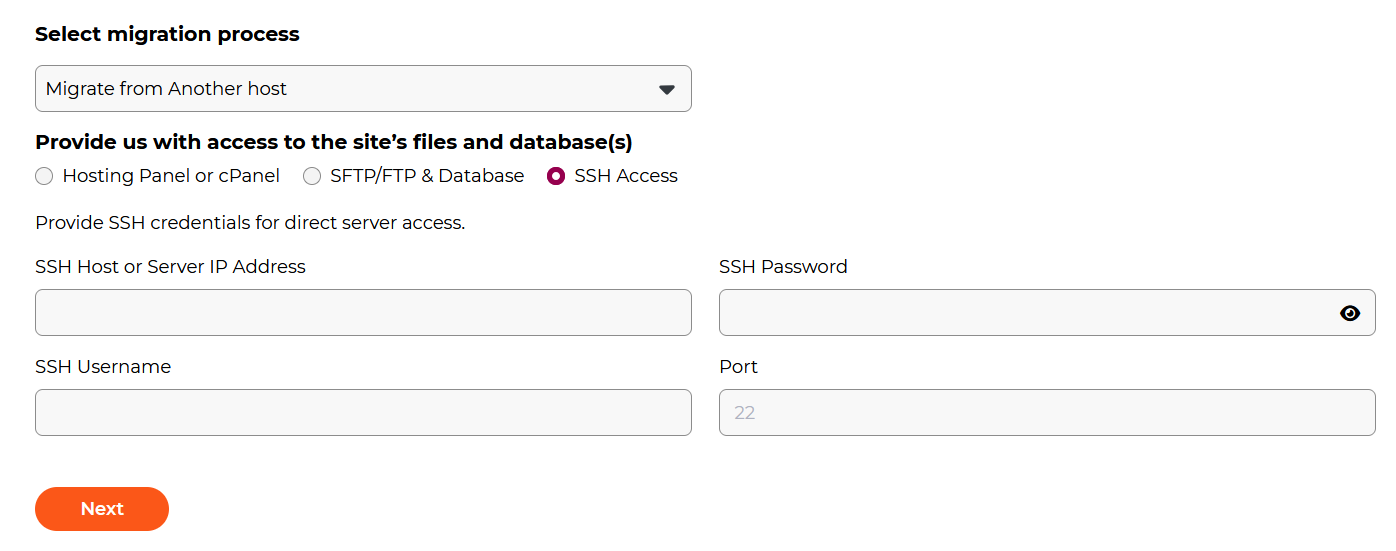
Migrate from Another Host
Provide us with direct access to your previous host, select if you can provide us with access to your Hosting/Control Panel, FTP/SFTP, SSH, and a database backup or phpMyAdmin access.
On the next page, we have three available options to provide us with access to your website:
Select the option that is best for you and fill in the information.
Hosting Panel or cPanel Access
We’ll need your old hosting or cPanel login URL, username, and password.

Then click Next to continue and skip to Step 5 from this guide.
SFTP/FTP & Database
Provide the FTP/SFTP credentials to access your website files. Include the database access details via phpMyAdmin.
- Website Files – we’ll need SFTP/FTP host, username, and password;
- Database – we’ll need phpmyadmin login URL, username, and password. Alternatively, export the database and include the export file within the website files.
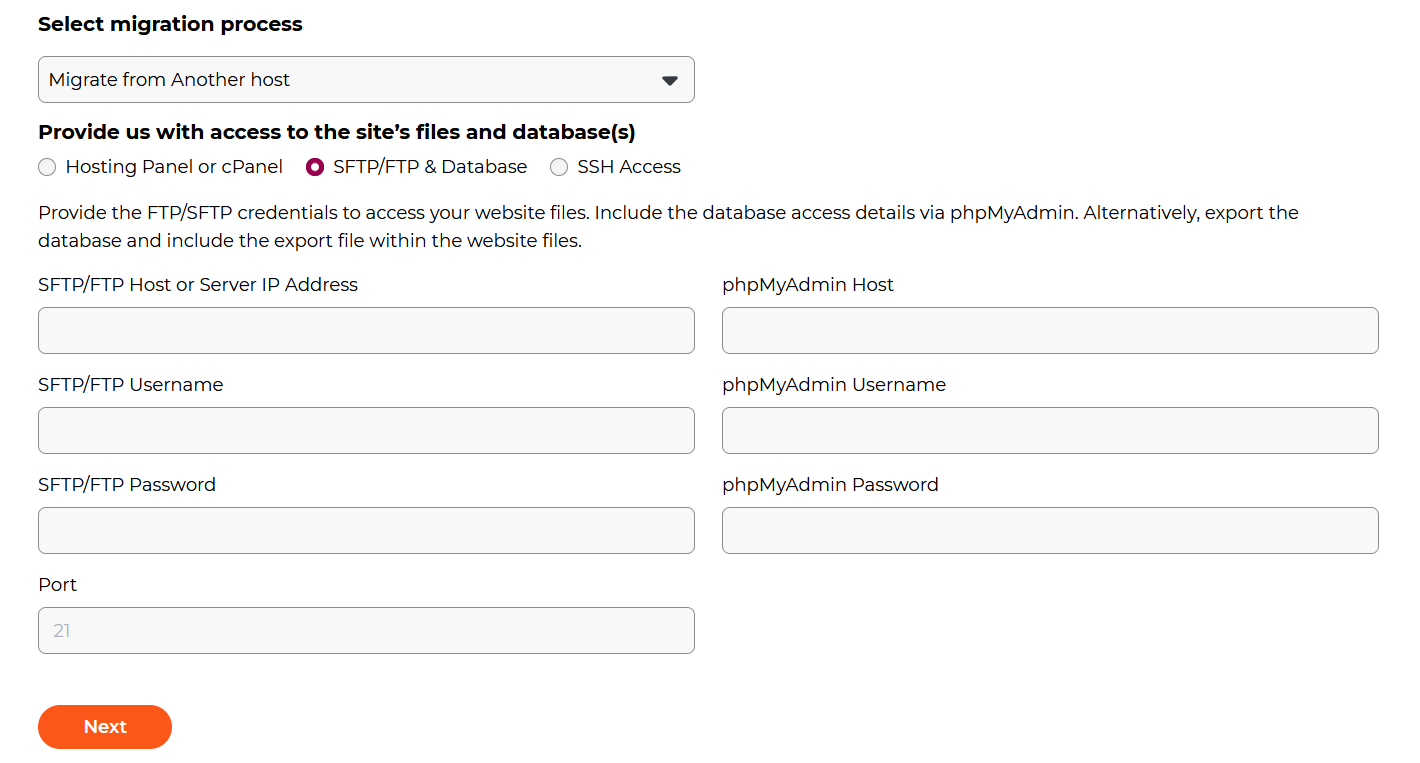
Then click Next to continue and skip to Step 5 from this guide.
SSH Access
For SSH access, provide the host or IP address, port, and login credentials – username and password or SSH key. Make sure we have the necessary permissions to access your website files and database.
Then click Next to continue and skip to Step 5 from this guide.
Step 5. Site Information
Fill in the site information required for the migration.
- Select the plan that you want your site to be hosted under. Make sure that there is a website spot available in this plan and enough disk space for your new site.
- Next, enter the website URL you want us to migrate. If you’ve chosen a domain name change migration, please provide both the current site URL and the new destination URL.
- Fill out the WordPress Admin information.
- Let us know if your site is a multisite installation, whether it loads over HTTPS, and if any additional subfolders or databases need to be included in the migration.

Next, choose if you’d like us to install and configure a caching plugin on your site.
By selecting a caching plugin, we will disable your current one and configure the new plugin with our recommended settings to ensure the best performance. If you’re already using WP Rocket, we can fine-tune it to work seamlessly with our servers.

Step 6. Migrate Emails to WPX
- If you don’t need any mailboxes migrated and you are not using a mail service, you can select the option No, I don’t need any mails transferred over, and click Next.
- If you are using 3rd third-party mail service provider like Zoho, Google Apps, Office 365, etc, just select that option in the menu, enter which mail service you are using, and what records it needs to work.

If you have mailboxes that you need to migrate, then choose the first option in the menu.
Enter your email address and password, along with your incoming and outgoing mail server details. To migrate additional email accounts, click the Add another email button.

When you’re ready with the email information, click Next.
Step 7. More Details (Optional)
If you would like to, then you can provide us with a few specifics for your website in the last menu of the migration form.
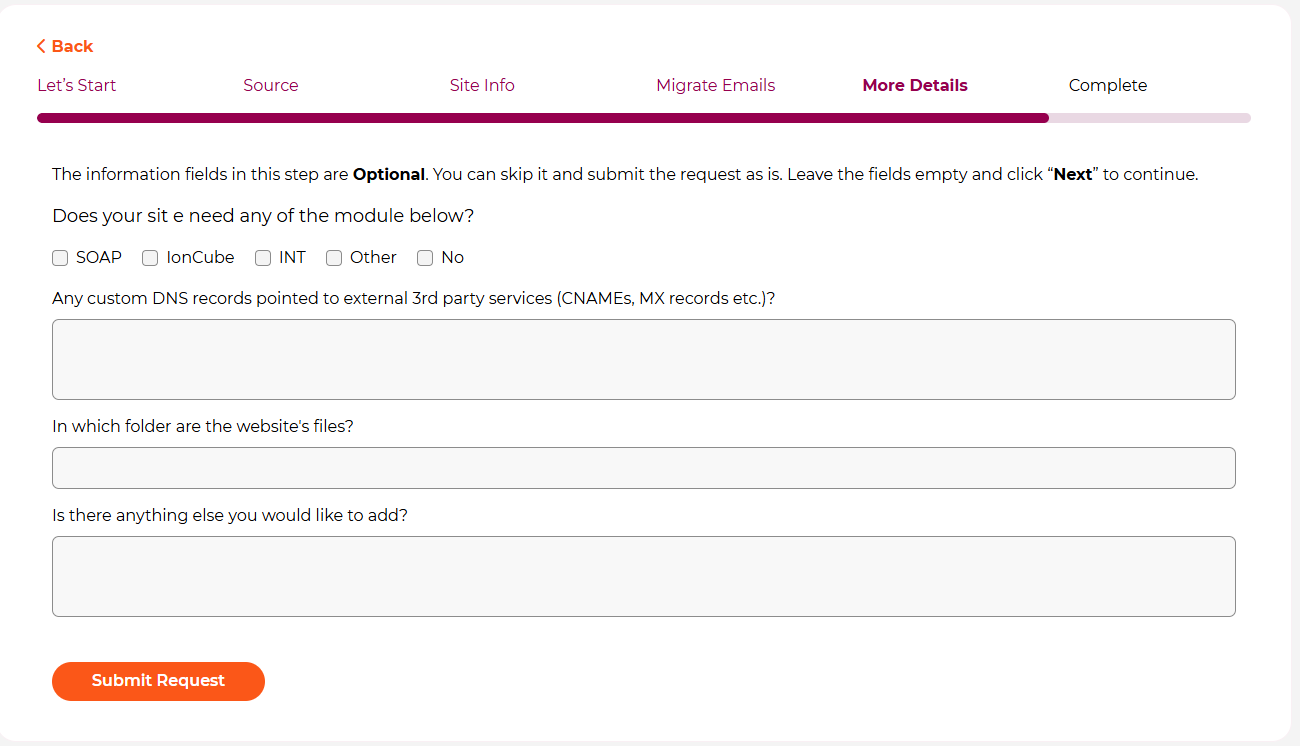
Let us know if your website requires any modules to be activated during the migration process, or if any custom DNS records need to be added.
If there’s anything else you’d like to share, feel free to provide additional information, and we’ll be happy to assist!
If you get stuck with any function discussed here, please contact WPX Support via live chat (use the bottom right-hand widget!) and we will usually respond and help within 30 seconds or less.