Do you need extra Disk Space or website slots? Are you trying to find a way to upgrade your plan? Here’s a guide on how to do that by following a couple of simple steps.
Before you begin:
If a due invoice has already been generated for your plan, please complete the payment first. Once that’s done, you can proceed with the upgrade steps. The cost of the upgrade will be automatically adjusted based on your billing cycle and any prior payments.
Step 1. Log in to your WPX account
Begin by logging into your WPX account. You can do this by visiting the WPX login page.
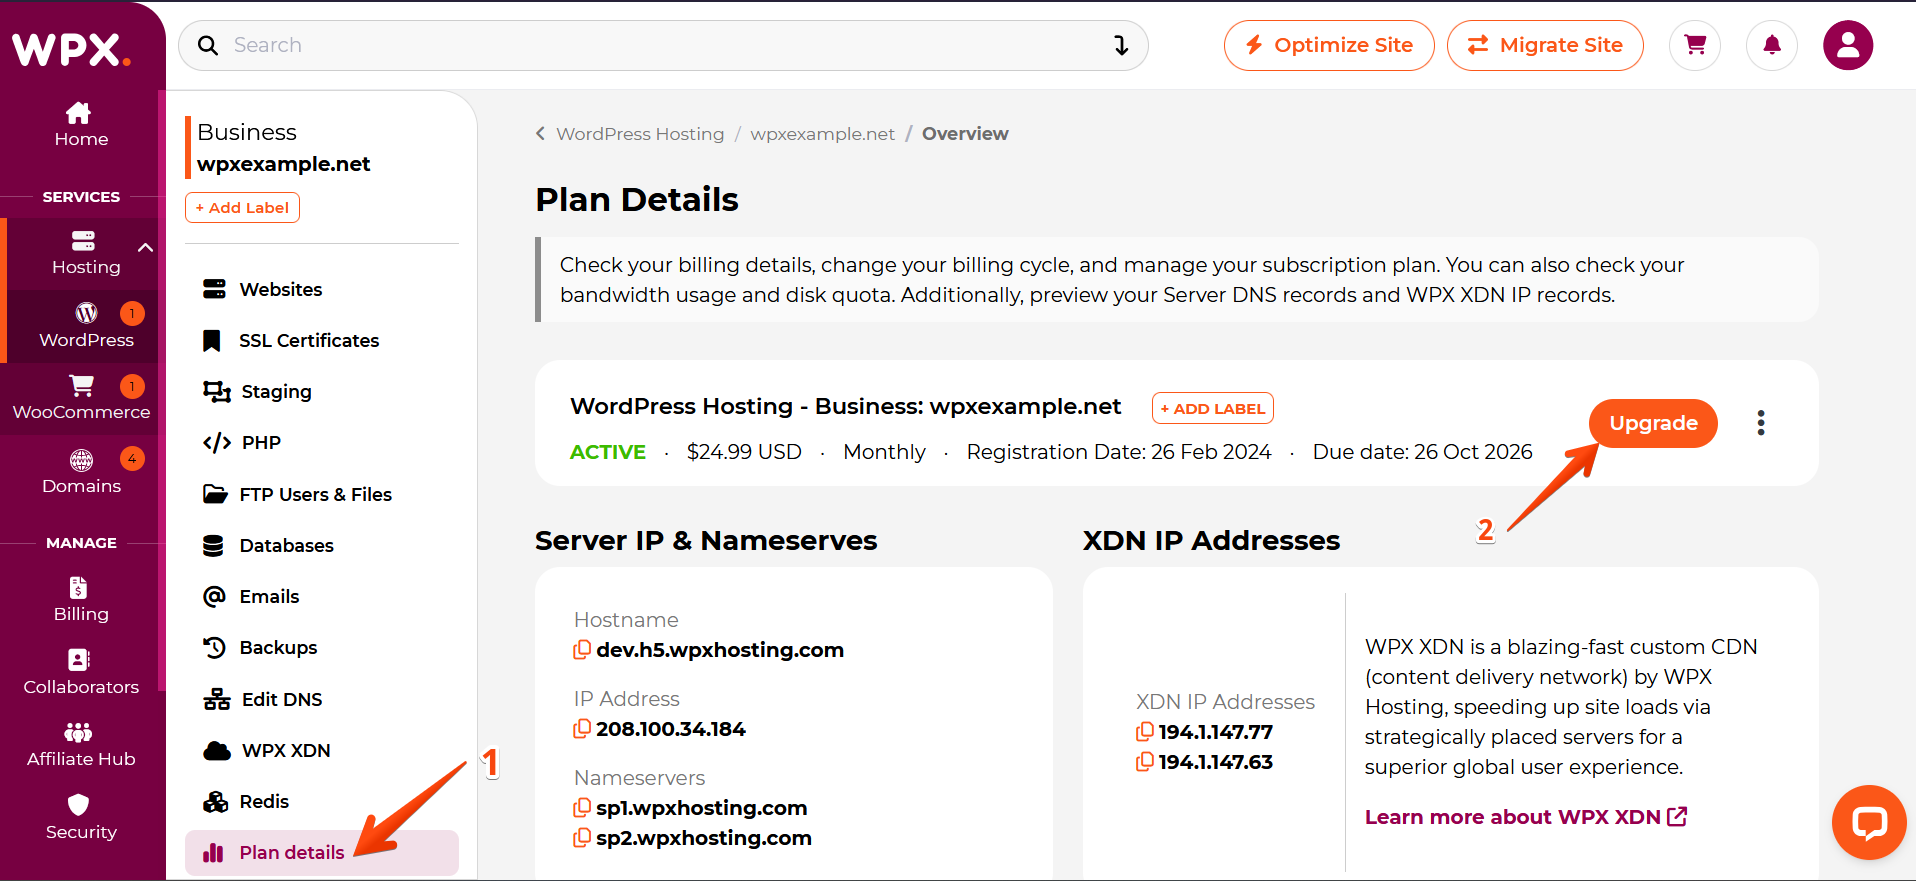
Step 2. Go to Control Panel
Once logged in:
- Locate your hosting plan in the WPX client area.
- Click the Control Panel button next to the plan you wish to manage.

Step 3. Upgrade your hosting plan
Within the Control Panel:
- Select Plan Details: This section shows your Billing Options, Server Information, and current Hosting Plan Usage.
- Click the Upgrade button.
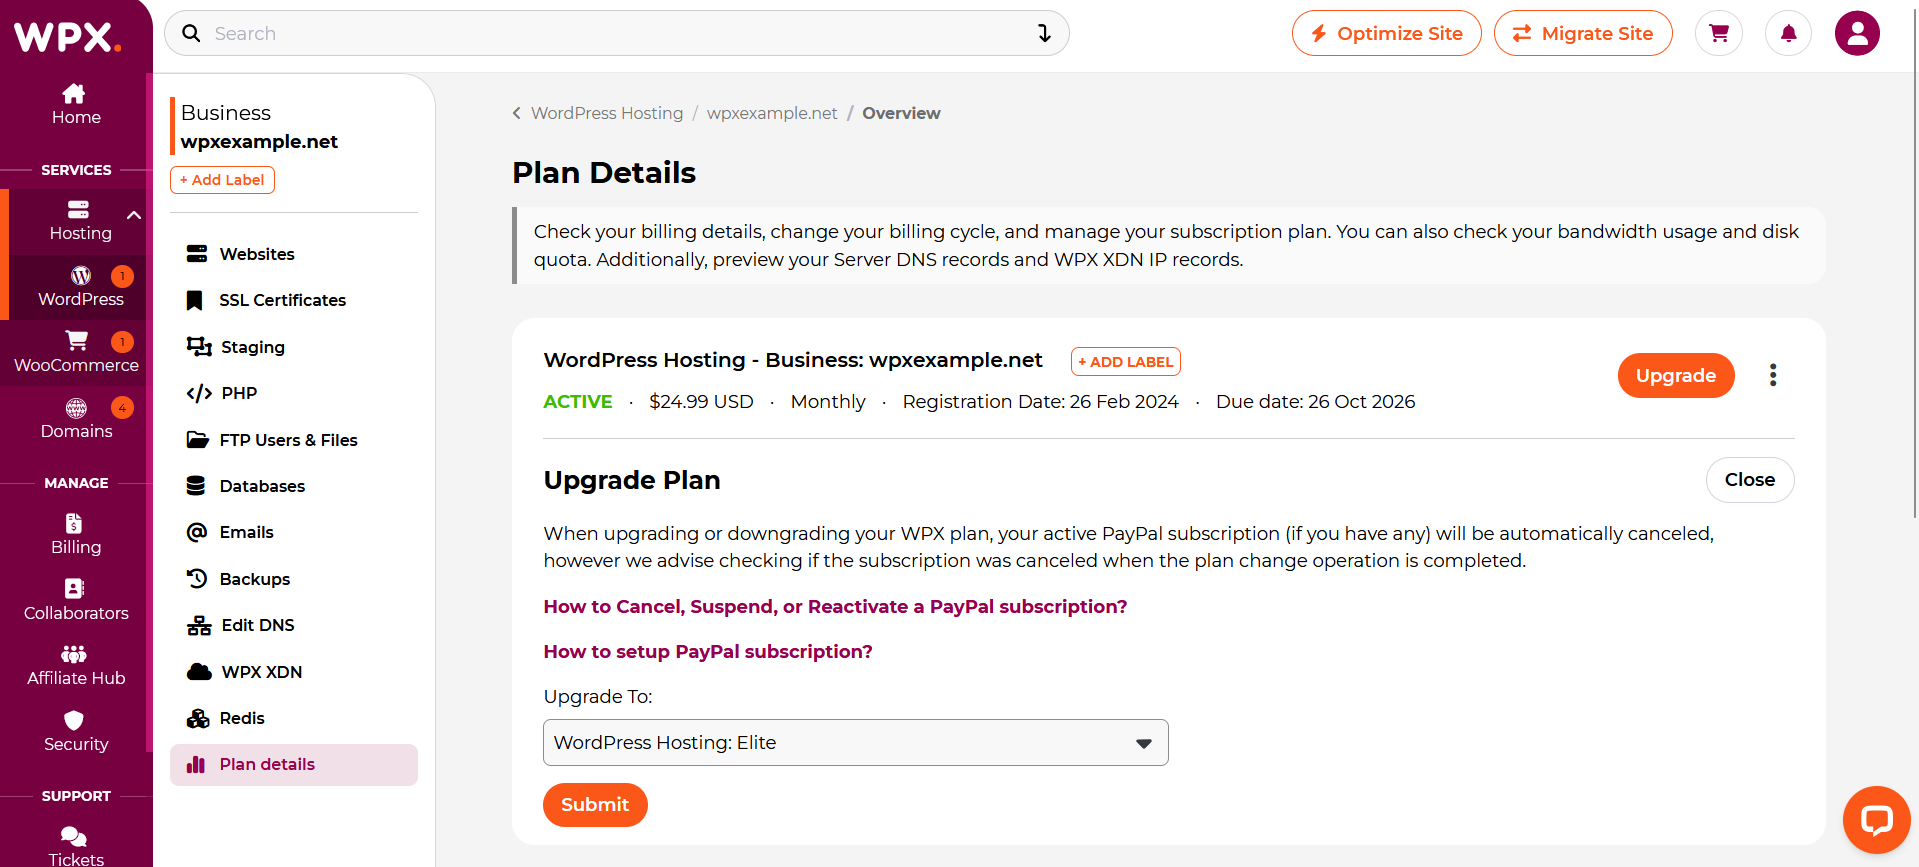
Then:
- Choose your desired plan from the available options.
- Click Submit to confirm and proceed.
Review the Upgrade details and click Submit to proceed.
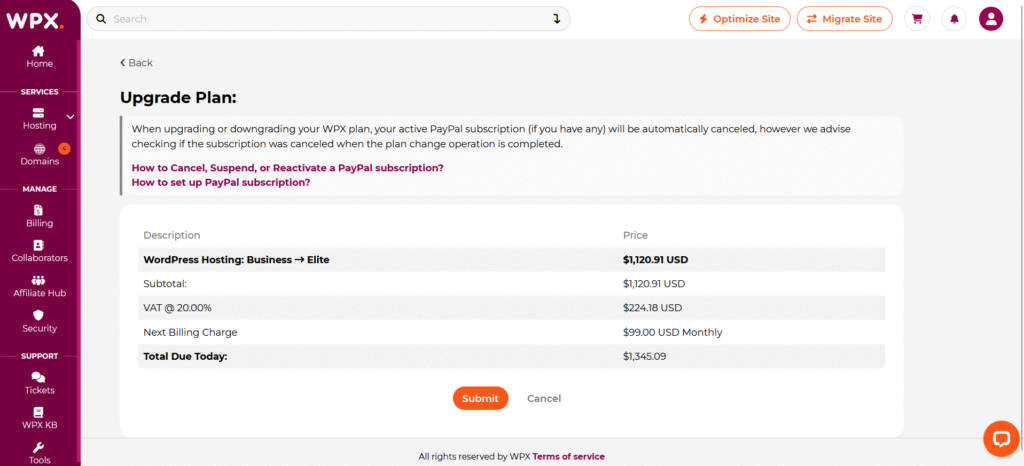
A new invoice will be generated automatically, based on the time remaining in your current billing cycle and the price difference between plans.

Step 4. Complete the Payment
Once payment is received (automatically processed if you have a saved card), the system will begin the upgrade—this typically takes just a few minutes.
PayPal Users:
If you previously paid via PayPal, be sure to cancel your old subscription. Otherwise, PayPal may continue billing you for your previous plan, which can lead to service interruptions.
Not sure how to create a new PayPal subscription? Check out our step-by-step guide here.
Stuck at any point? Don’t worry, just click the live chat widget in the bottom-right, and one of our support agents will assist you in under 30 seconds.