This step-by-step guide will show you how to connect your WPX email account to your Android smartphone using the Email – Lightning Fast & Secure Mail app, which is available on the Google Play Store.
Step 1. Log in to your WPX account
Begin by logging into your WPX account. You can do this by visiting the WPX login page.
Step 2. Go to Control Panel
Once logged in:
- Locate your hosting plan in the WPX client area.
- Click the Control Panel button next to the plan you wish to manage.

Step 3. Get your Email Settings
If you’re already familiar with where to find your email settings, you can skip this step.
Otherwise:
- In the Control Panel, click on Emails.
- Then click the Settings button next to the email address you want to configure.

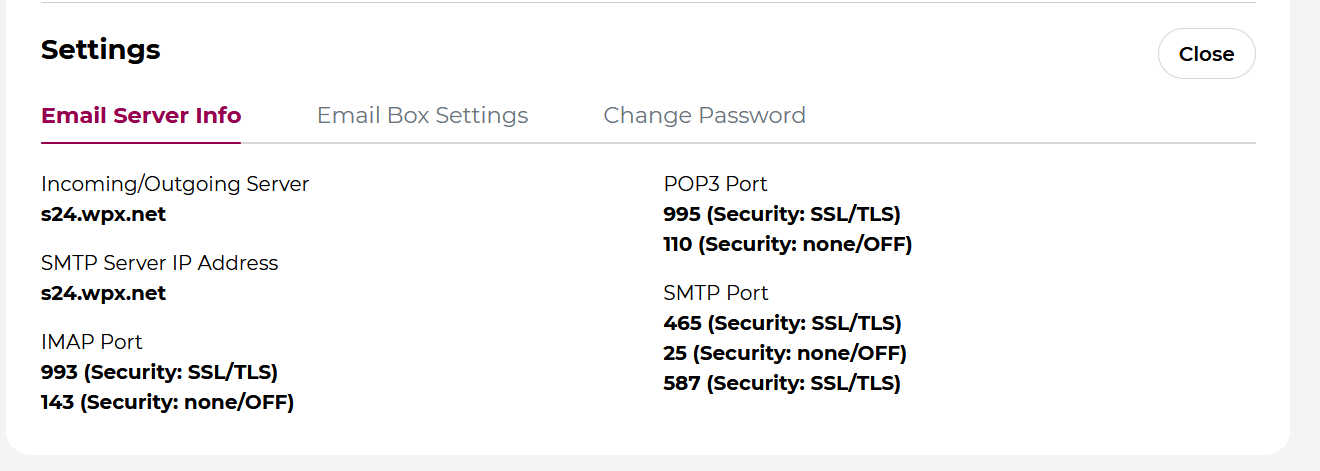
Here, you’ll find:
- Email server info (incoming/outgoing servers),
- Email login/username,
- The option to change the password (if needed).
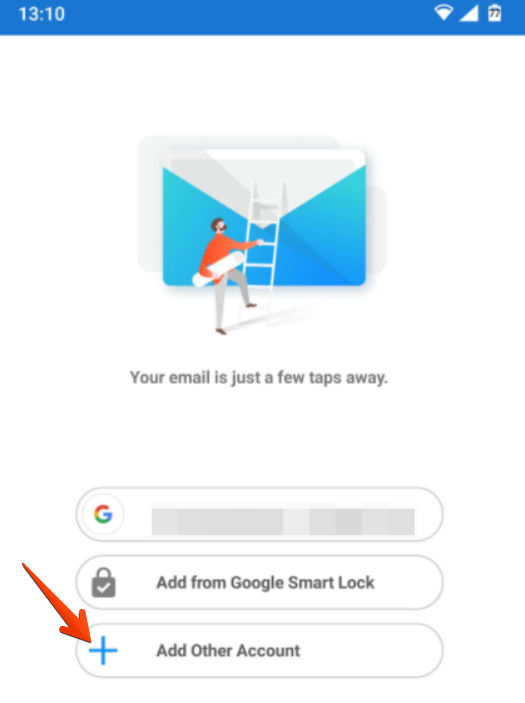
Step 4: Open the Email App on your Android Device
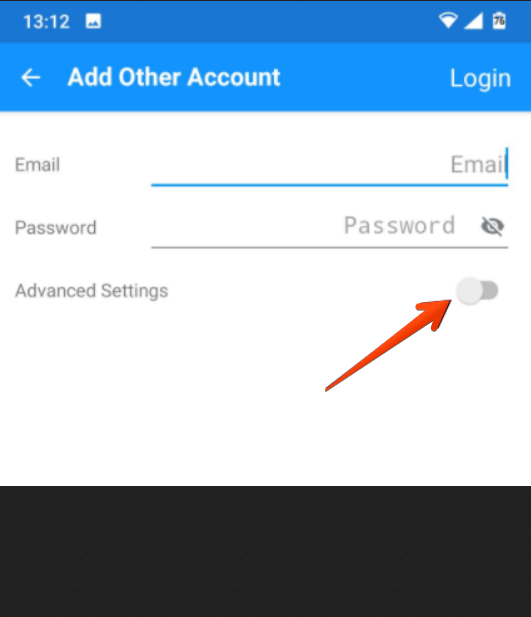
Launch the Email – Lightning Fast & Secure Mail app, and tap Add Other Account. Then select the Other icon and tap on the Advanced Settings slide button:

Step 5: Enter your Email Account Details
Now, fill in the configuration settings using your actual WPX email details.
Account Info
- Email Address: Your full WPX email address.
- Username: The correct email username (may differ from the address).
- Password: The password you set when creating the mailbox.
Incoming Mail (IMAP)
- Server: Your server’s hostname (e.g.,
s28.wpx.net) - Port:
993 - Security:
SSL/TLS
Outgoing Mail (SMTP)
- Server: Same as the incoming server (e.g.,
s28.wpx.net) - Port:
465 - Security:
SSL/TLS
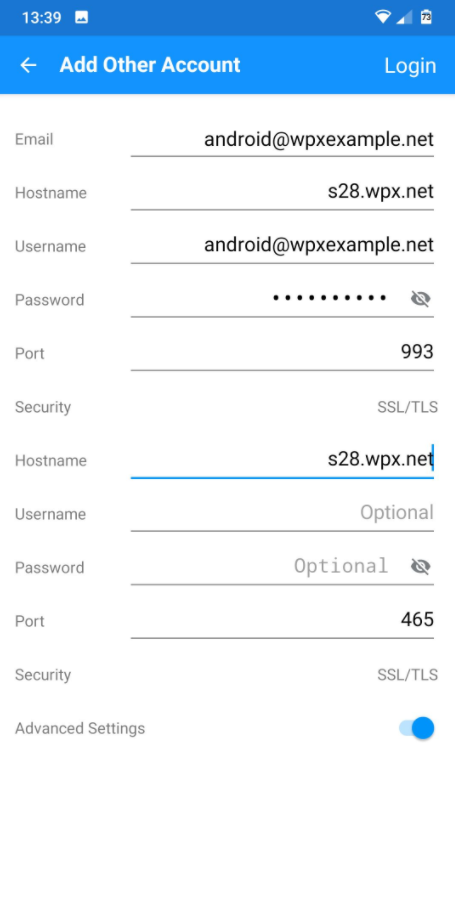
Once completed, tap Login in the top-right corner.
If you get stuck with anything discussed on this page, please get in touch with WPX Support Team via live chat (use the bottom right-hand widget) and they will respond and help within 30 seconds or less.