Welcome to the new and improved WPX Control Panel, a fast, intuitive, and user-friendly interface designed to simplify every aspect of your domain management. Whether you’re renewing domains, updating contact details, managing DNS records, or transferring domains in or out of WPX, everything you need is right at your fingertips.
Our interface simplifies the complexity of traditional domain management platforms, providing you with clear control over your domain portfolio, complete with full support for DNS configuration, WHOIS privacy, and more.
In this guide, we’ll walk you through the key features available under the Domains section of your WPX Client Area. If you’re looking to manage your WordPress hosting, check out our Hosting Control Panel guide.
To get started, log in to your WPX account and head to the Domains tab.
Accessing the Domain Settings
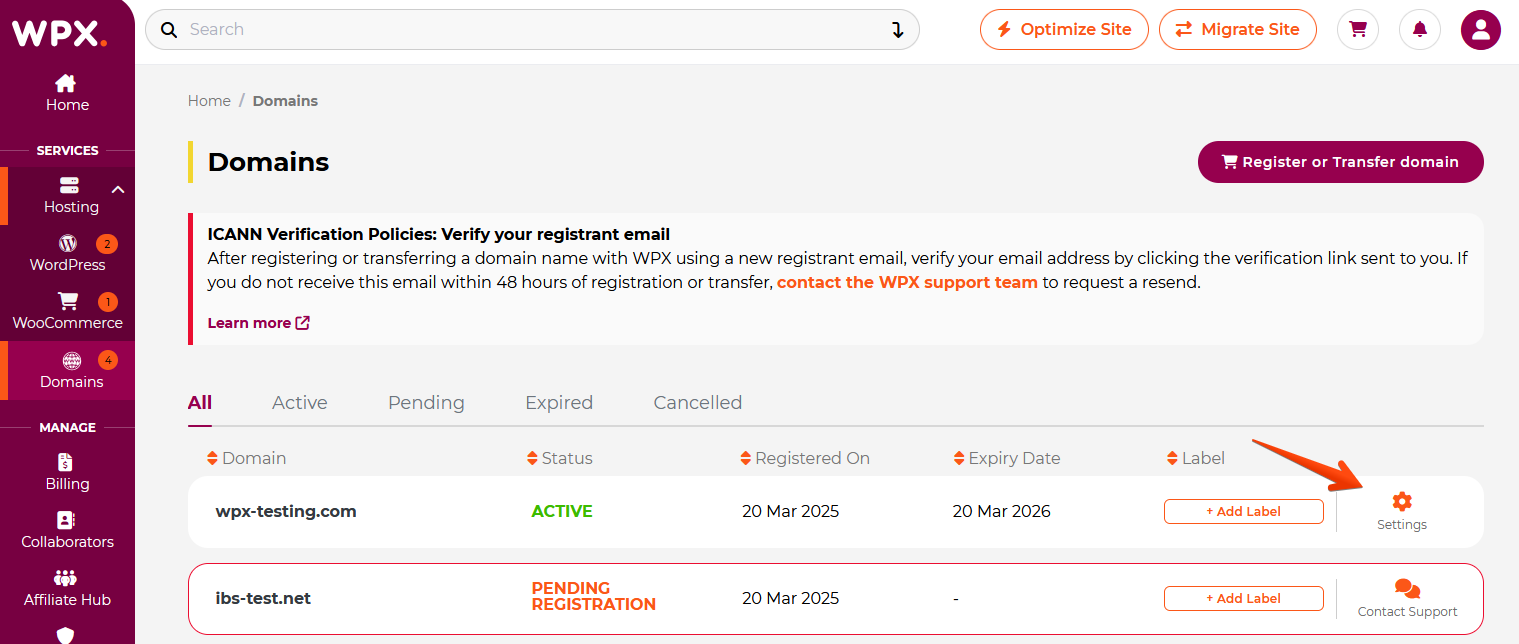
From your Client Area home page, navigate to Domains.
Click the Settings button next to the domain to enter the control options.
Domain Details
The Domain Details section provides a concise overview of your domain’s current status and configuration.
From this section, you can:
View key information, including:
- Domain expiry date
- WHOIS privacy status (on/off)
- Autorenew status (enabled/disabled)
- Registrar lock status (on/off)
Renew the domain manually with a single click
Edit Nameservers — the only editable field in this section — to point your domain to WPX or any external hosting provider.

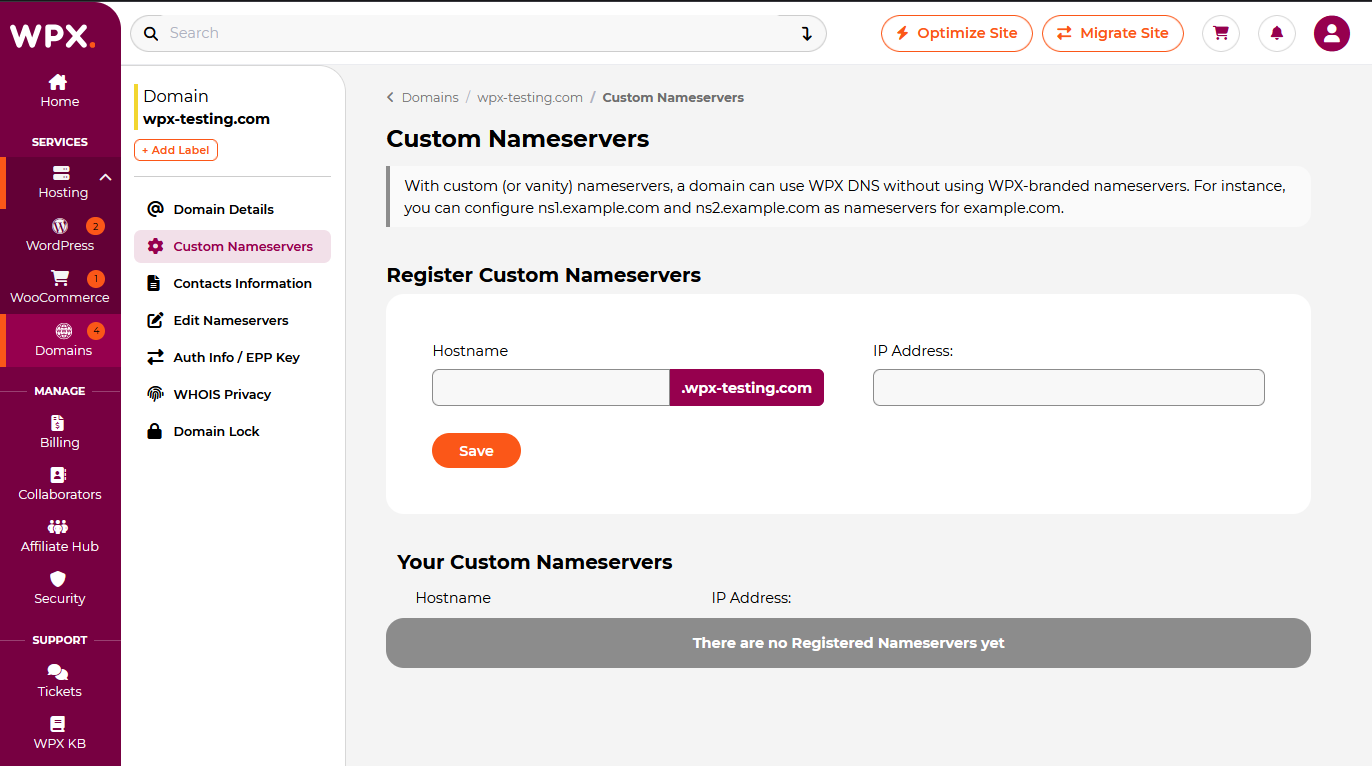
Custom Nameservers
With Custom Nameservers (or vanity), a domain can use WPX DNS without using WPX-branded nameservers. For instance, you can configure ns1.example.com and ns2.example.com as nameservers for example.com.
Contact Information
In the Contact Information section, you can update the contact details associated with your domain. You have the option to use different information for each contact type: Registrant, Administrative, Technical, and Billing, or simply apply the default information from your WPX account across all fields.

Edit Nameservers
In the Edit Nameservers section, you can configure which nameservers your domain uses:
- Use Our Nameservers (WPX Nameservers, if you have a hosting plan with us);
- Add Custom Nameservers if your DNS is hosted elsewhere.
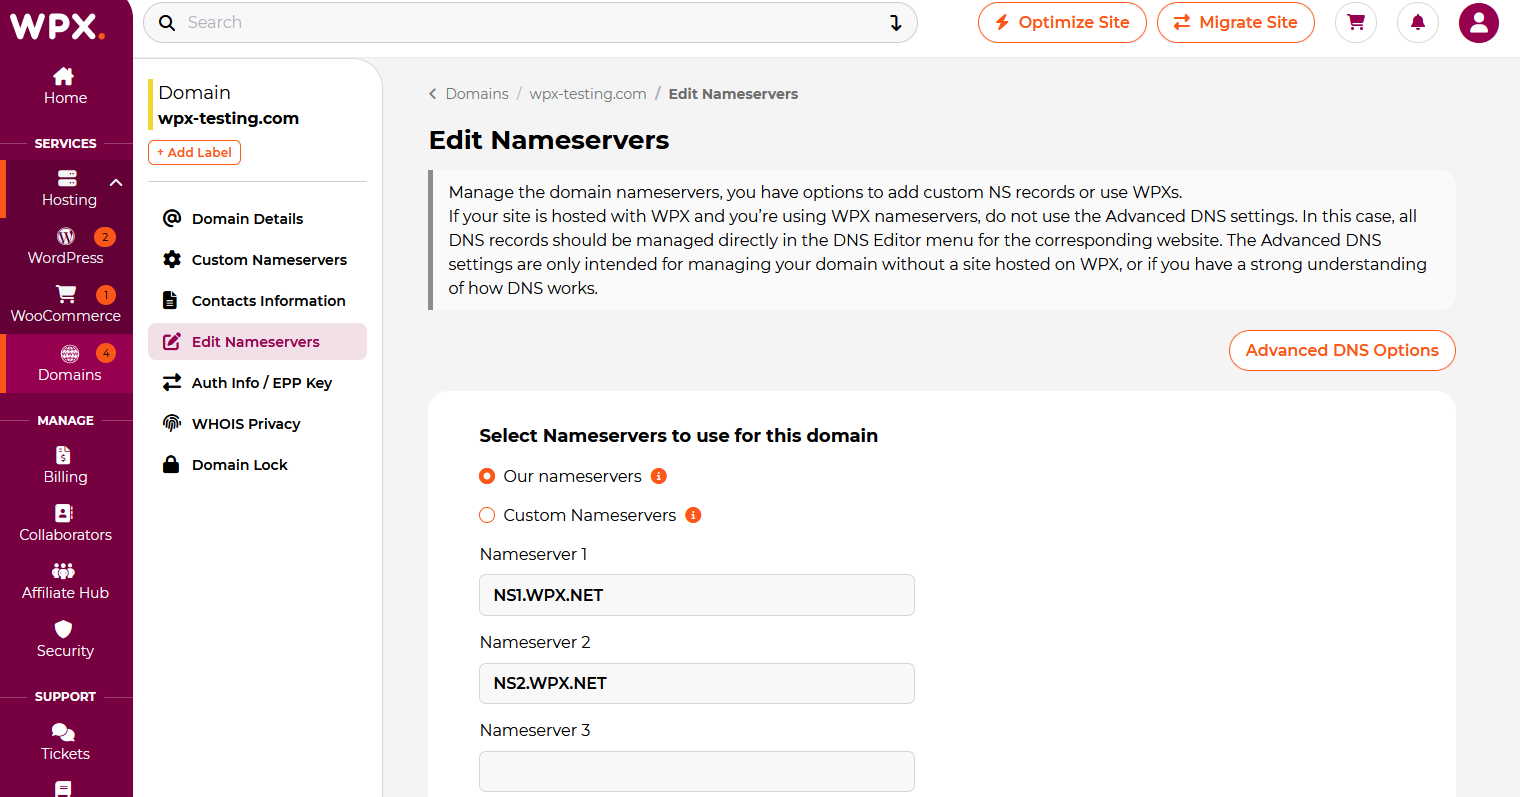
Advanced DNS Options
Clicking the Advanced DNS Options button allows you to add or modify custom DNS records for your domain.
The default nameservers used by our registrar are:
ns-uk.topdns.com.
ns-usa.topdns.com.
ns-canada.topdns.com.
Or, in the case of ResellerClub-managed domains:
ns1.resellerclub.com
ns2.resellerclub.com
ns3.resellerclub.com
ns4.resellerclub.com
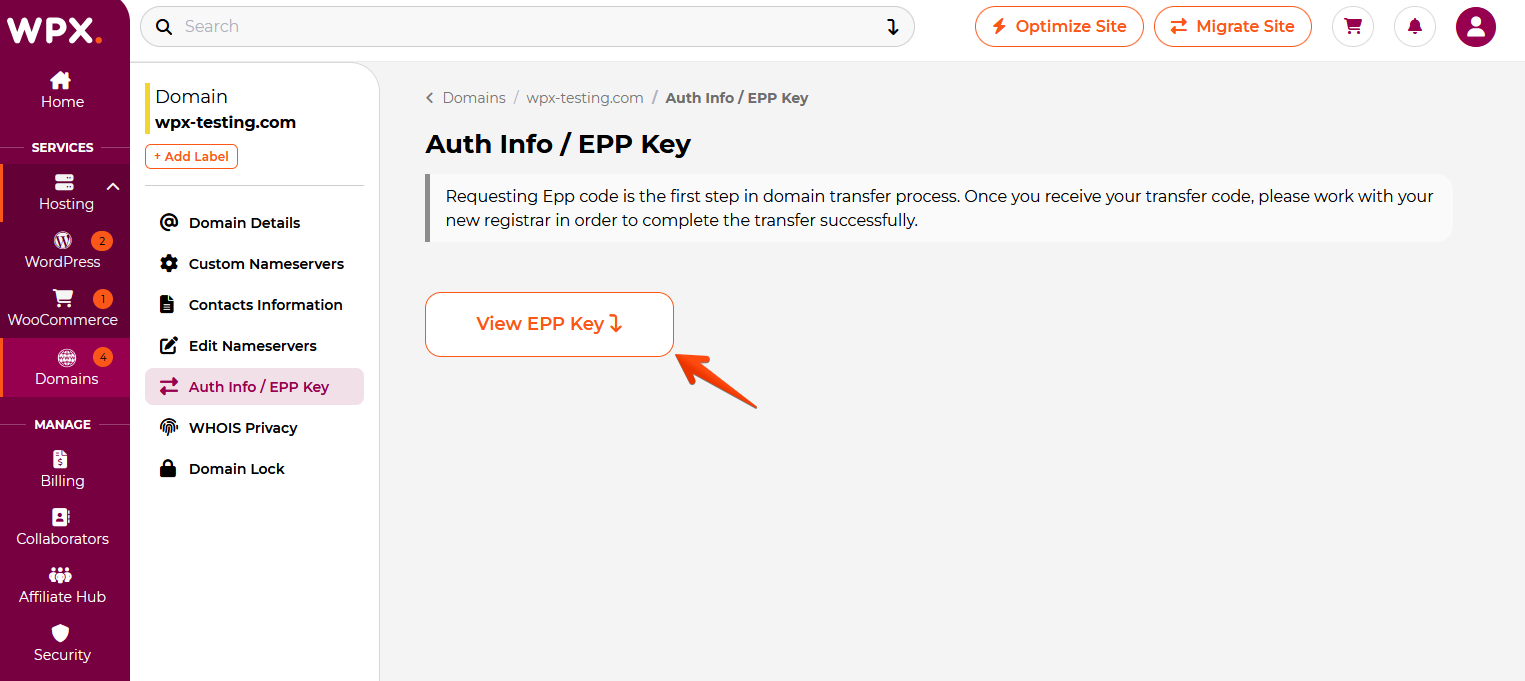
Auth Info / EPP Key
To transfer your domain away from WPX, you’ll need an EPP Code (also known as an Auth Info Key).
- You can request the EPP Key from this menu (Click the View EPP Key button);
- The key will be displayed on your screen after the request.
Make sure your WHOIS privacy is disabled before attempting a transfer (see below).
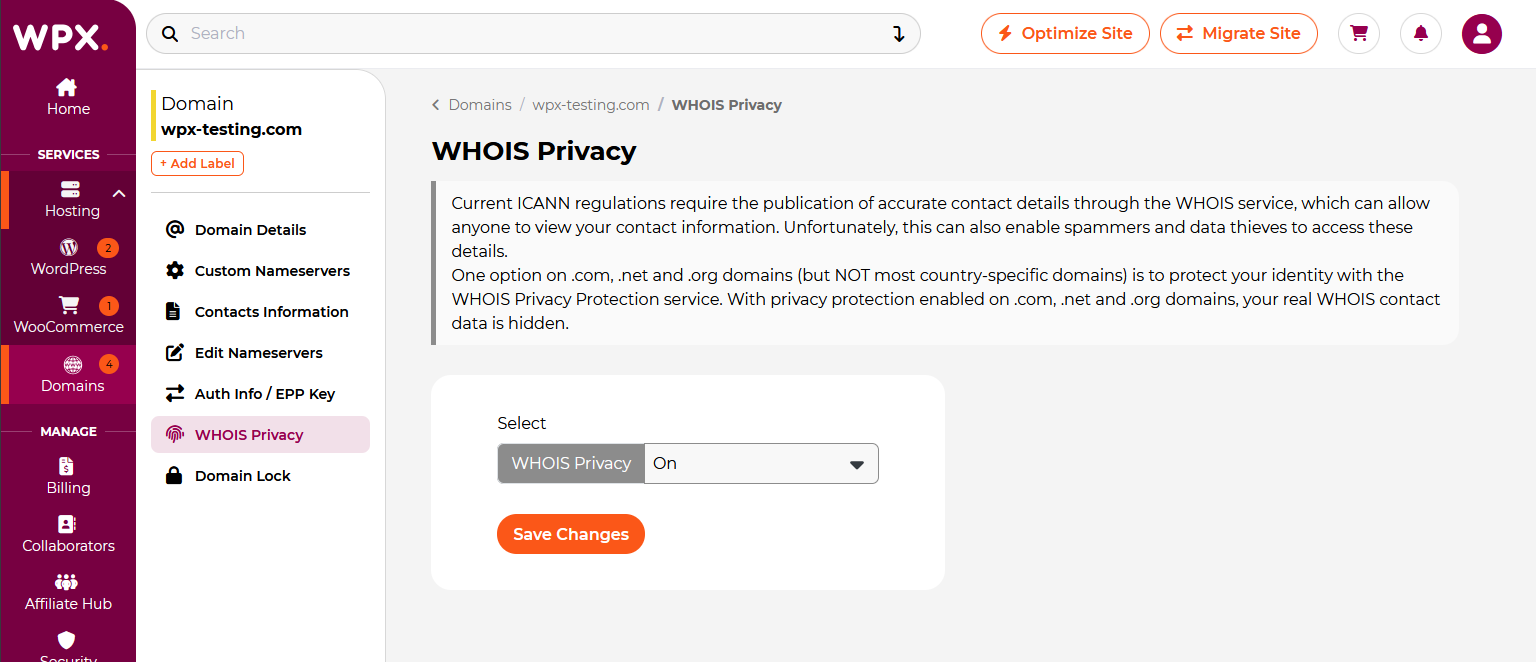
WHOIS Privacy
In the WHOIS Privacy section, you can control your domain’s WHOIS Privacy Protection.
Disable it only when transferring your domain, as the receiving registrar needs to verify ownership
Keep WHOIS Privacy enabled to hide your details in public domain lookups
Domain Lock
In the Domain Lock section, you can unlock your domain to allow a transfer to another registrar.

Have more questions? Contact the WPX Support Team through the live chat widget in the bottom-right corner, and they’ll assist you promptly, typically within 30 seconds.