Email security is a critical aspect of any online business or organisation. Ensuring that only legitimate emails reach your recipients helps maintain trust and protect against phishing attacks. One of the tools at your disposal for this purpose is DMARC, which stands for Domain-based Message Authentication, Reporting, and Conformance. In this article, we’ll walk you through setting up a DMARC record in WPX Hosting’s DNS Zone Editor.
What is a DMARC record?
A DMARC record is a TXT record in your DNS (Domain Name System) settings that instructs email receivers on handling messages from your domain. Essentially, it tells the recipient’s email server what to do if it receives a message claiming to be from your domain.
Step 1. Log in to your WPX account
Begin by logging into your WPX account. You can do this by visiting the WPX login page.
Step 2. Go to Control Panel
Once logged in:
- Locate your hosting plan in the WPX client area.
- Click the Control Panel button next to the plan you wish to manage.

Step 3. Go to the Edit DNS menu
In the Control Panel:
- Select Edit DNS.
- Choose the domain for which you want to set up DMARC.
- Click on the + Create Record button to add a new DNS entry.

Step 4: Add your DMARC TXT Record
Fill out the following details to add the DMARC record to your DNS zone:
- Type – TXT
- Host – _dmarc
- Value – v=DMARC1; p=reject; rua=mailto:email@your_domain.com
- Leave TTL blank for the default value.
Make sure to replace email@your_domain.com with a valid email address at your domain where you’d like to receive DMARC reports.
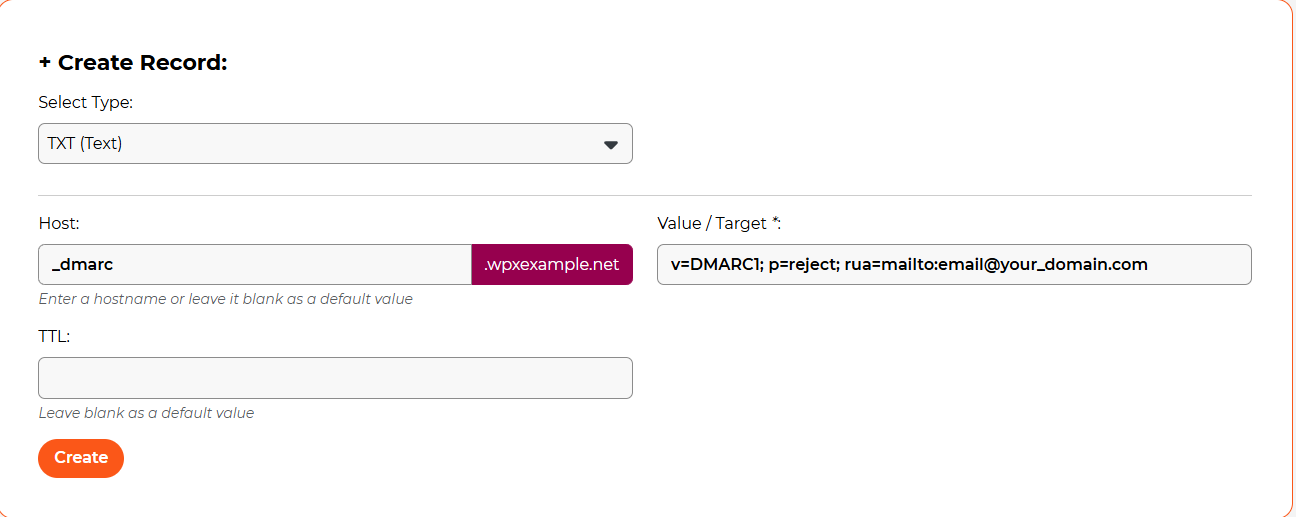
Once entered, click Create to save the record.
Stuck at any point? Don’t worry, just click the live chat widget in the bottom-right, and one of our support agents will assist you in under 30 seconds.