Managing your website files via FTP (File Transfer Protocol) allows for secure, direct access to your hosting environment. Whether you’re working with developers, designers, or managing multiple projects, creating additional FTP users gives you more flexibility and control.
In this guide, we’ll show you how to add new FTP users in the WPX Control Panel.
Step 1. Log in to your WPX account
Begin by logging into your WPX account. You can do this by visiting the WPX login page.
Step 2. Go to Control Panel
Once logged in:
- Locate your hosting plan in the WPX client area.
- Click the Control Panel button next to the plan you wish to manage.
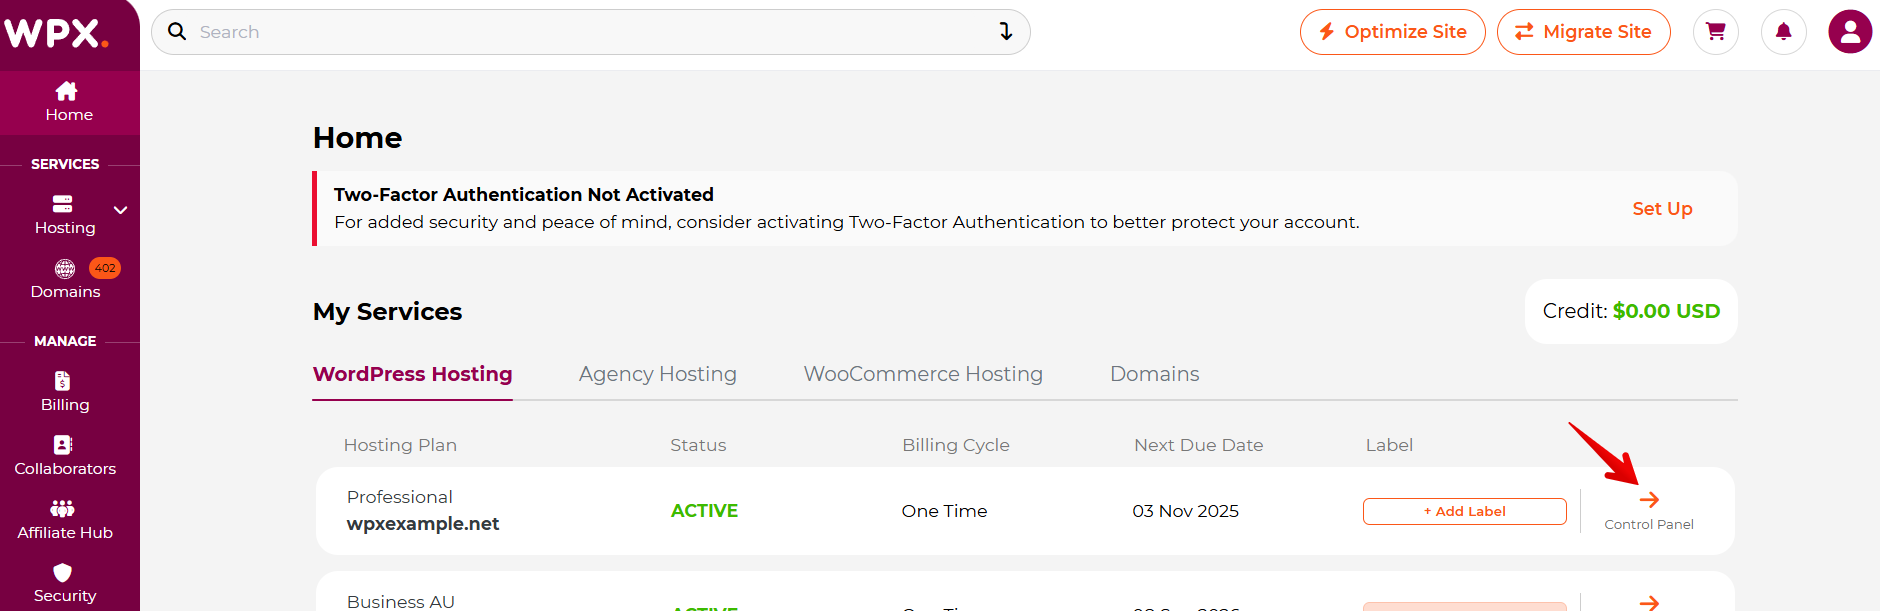
Step 3. Go to FTP Users & Files and add a new FTP user
Now that you’re in your WPX Control Panel, select the FTP Users & Files menu, then click the + Create FTP User button
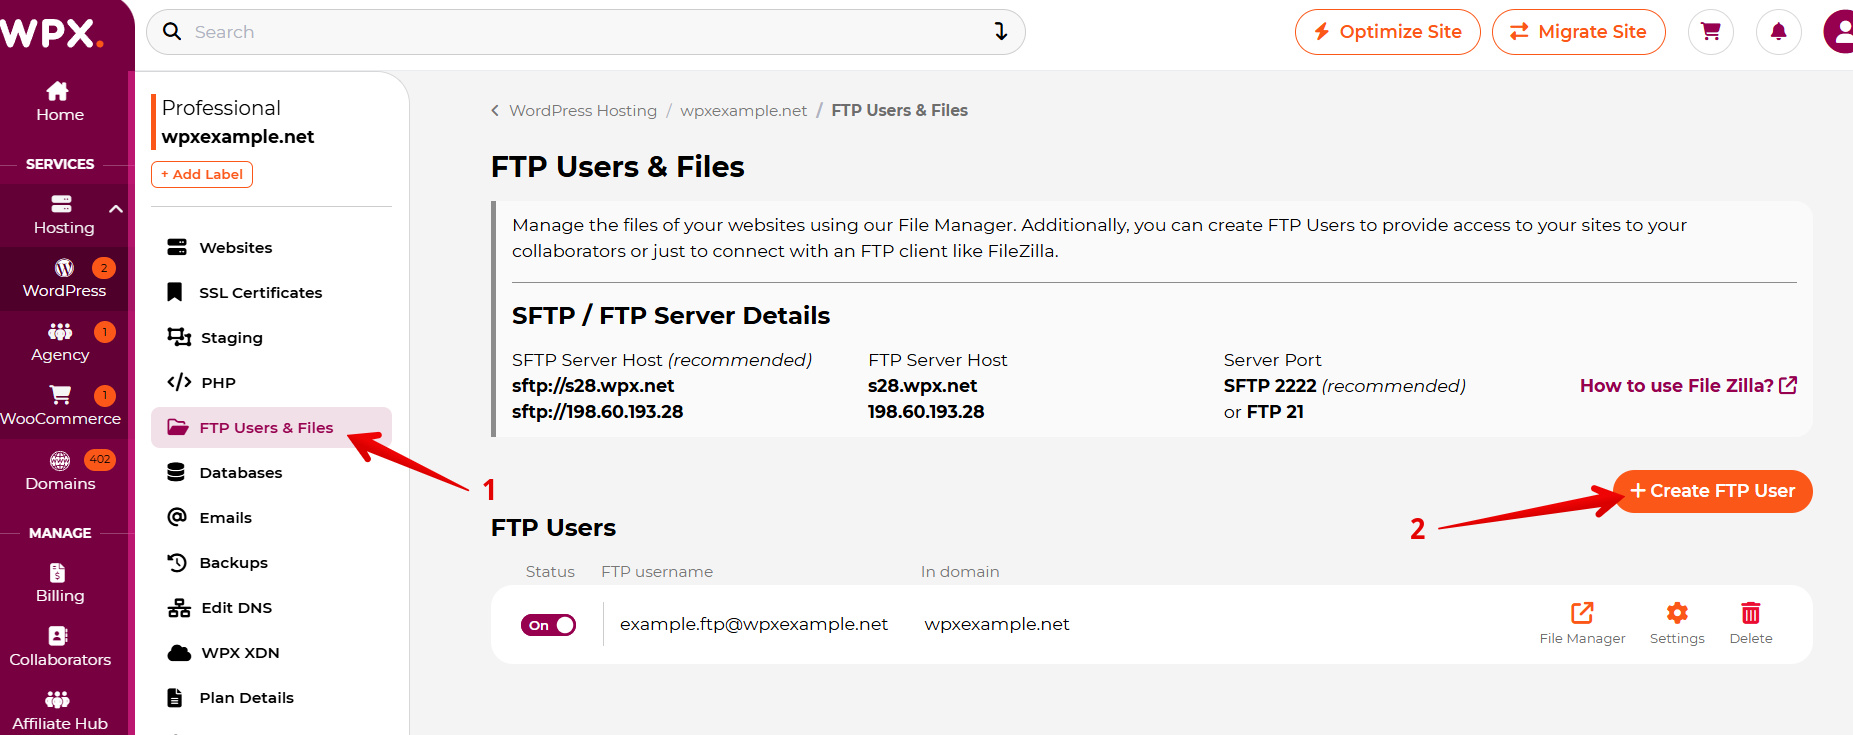
Make sure to fill in the required details to create your new FTP user.
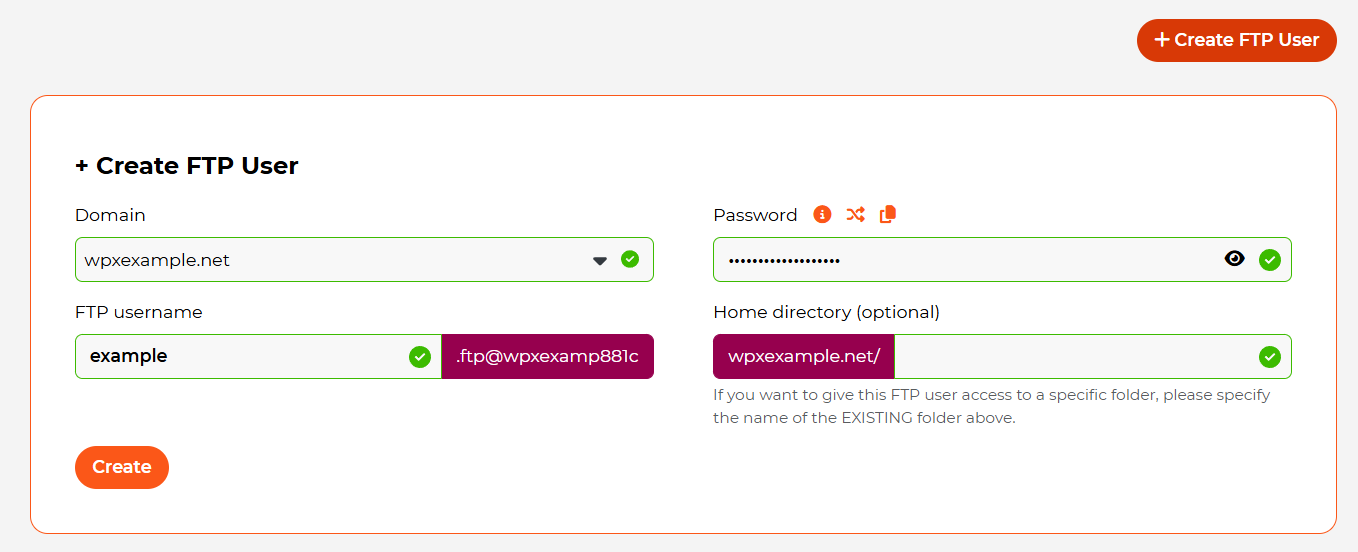
The password for the FTP account can be one of your choosing or automatically generated.
The FTP User that you have created can be used for connecting via FTP and SFTP.
Each FTP user has access only to the website for which it was created. If you want to give access to another domain, please create a new FTP user.
Step 4. Changing the FTP user’s password
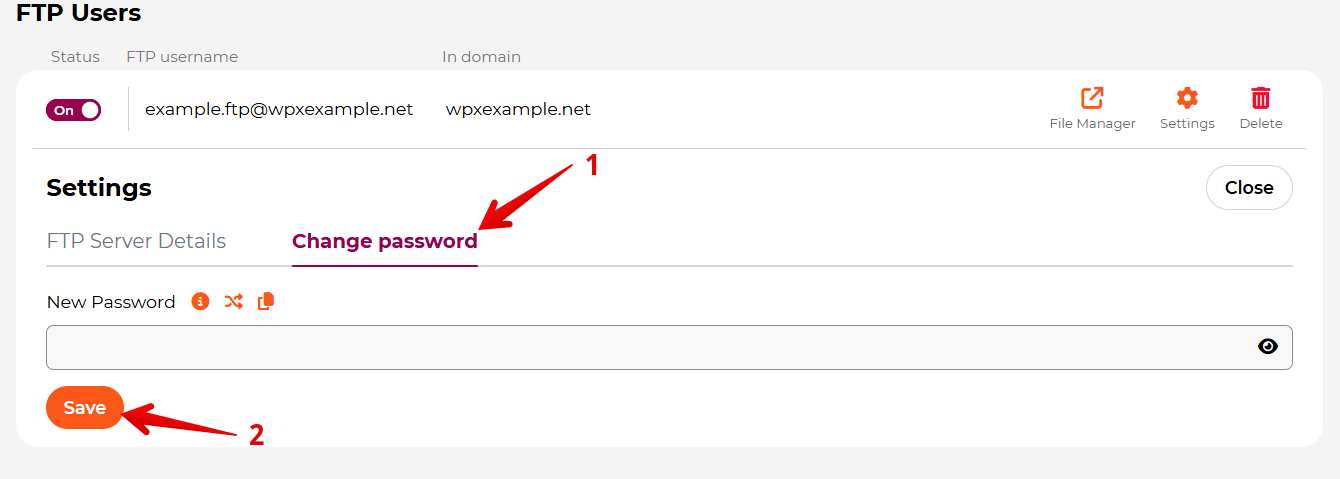
If you wish to change the FTP user’s password, select the Settings button next to the FTP user.

Select the Change password (1) option of the FTP user and add your new password. When you are done with the changes, save your new password and click the Save (2) button.
Step 5. Disabling the FTP user
To activate or deactivate an FTP user, click the button located directly beneath Status (1).

Stuck at any point? Don’t worry, just click the live chat widget in the bottom-right, and one of our support agents will assist you in under 30 seconds.