Keeping your website running on the latest PHP version is key to maintaining strong performance and security. Newer versions have many benefits, such as speed improvements, better caching, and important security patches, making them a better choice for your site.
In this article, we will explain how you can change the PHP version of your websites using the WPX Control Panel.
Step 1. Log in to your WPX account
Begin by logging into your WPX account. You can do this by visiting the WPX login page.
Step 2. Go to Control Panel
Once logged in:
- Locate your hosting plan in the WPX client area.
- Click the Control Panel button next to the plan you wish to manage.

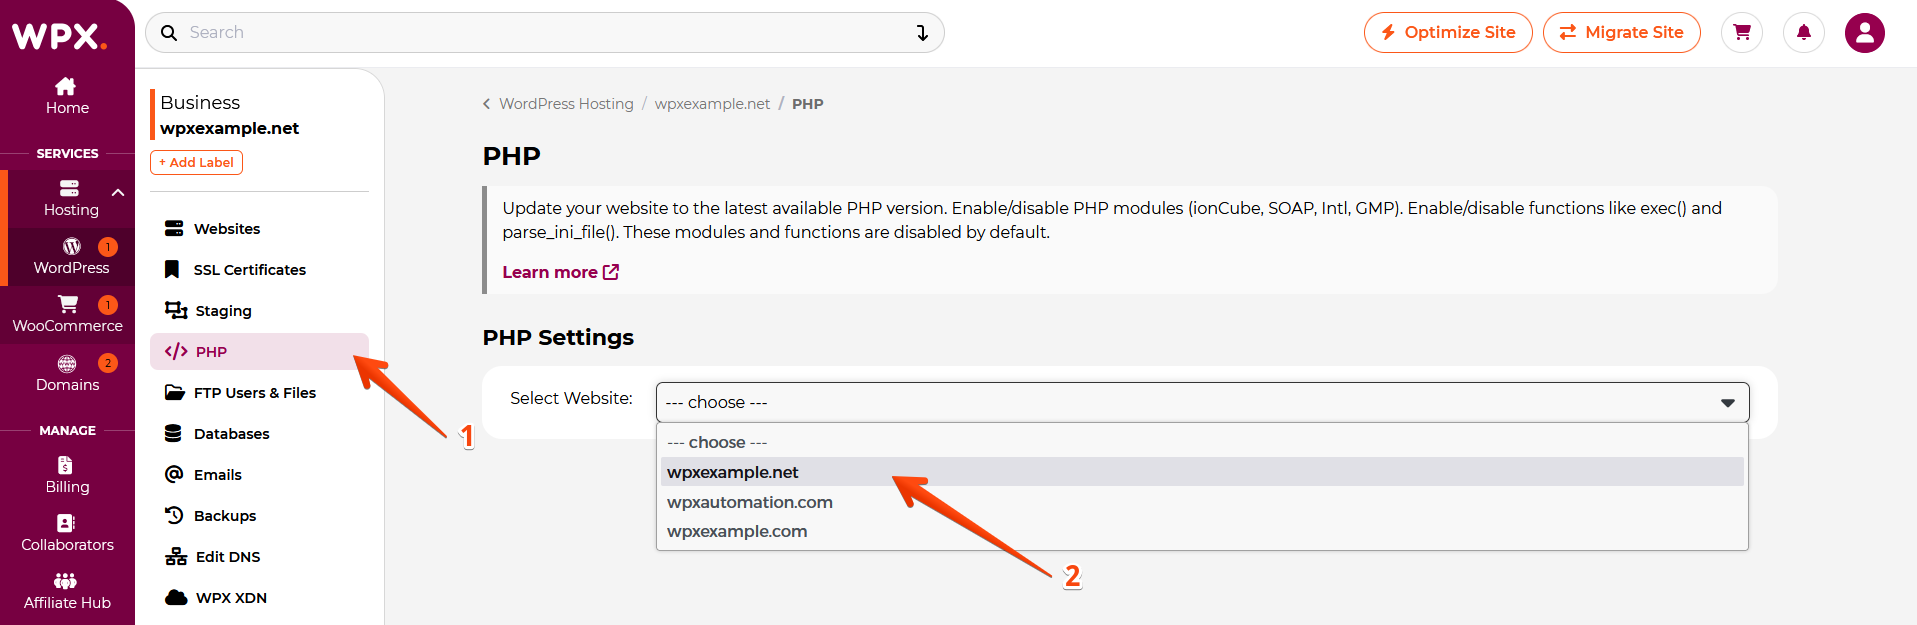
Step 3. Navigate to the PHP menu
- Select the PHP section.
- Select the website you want to change the PHP version for.
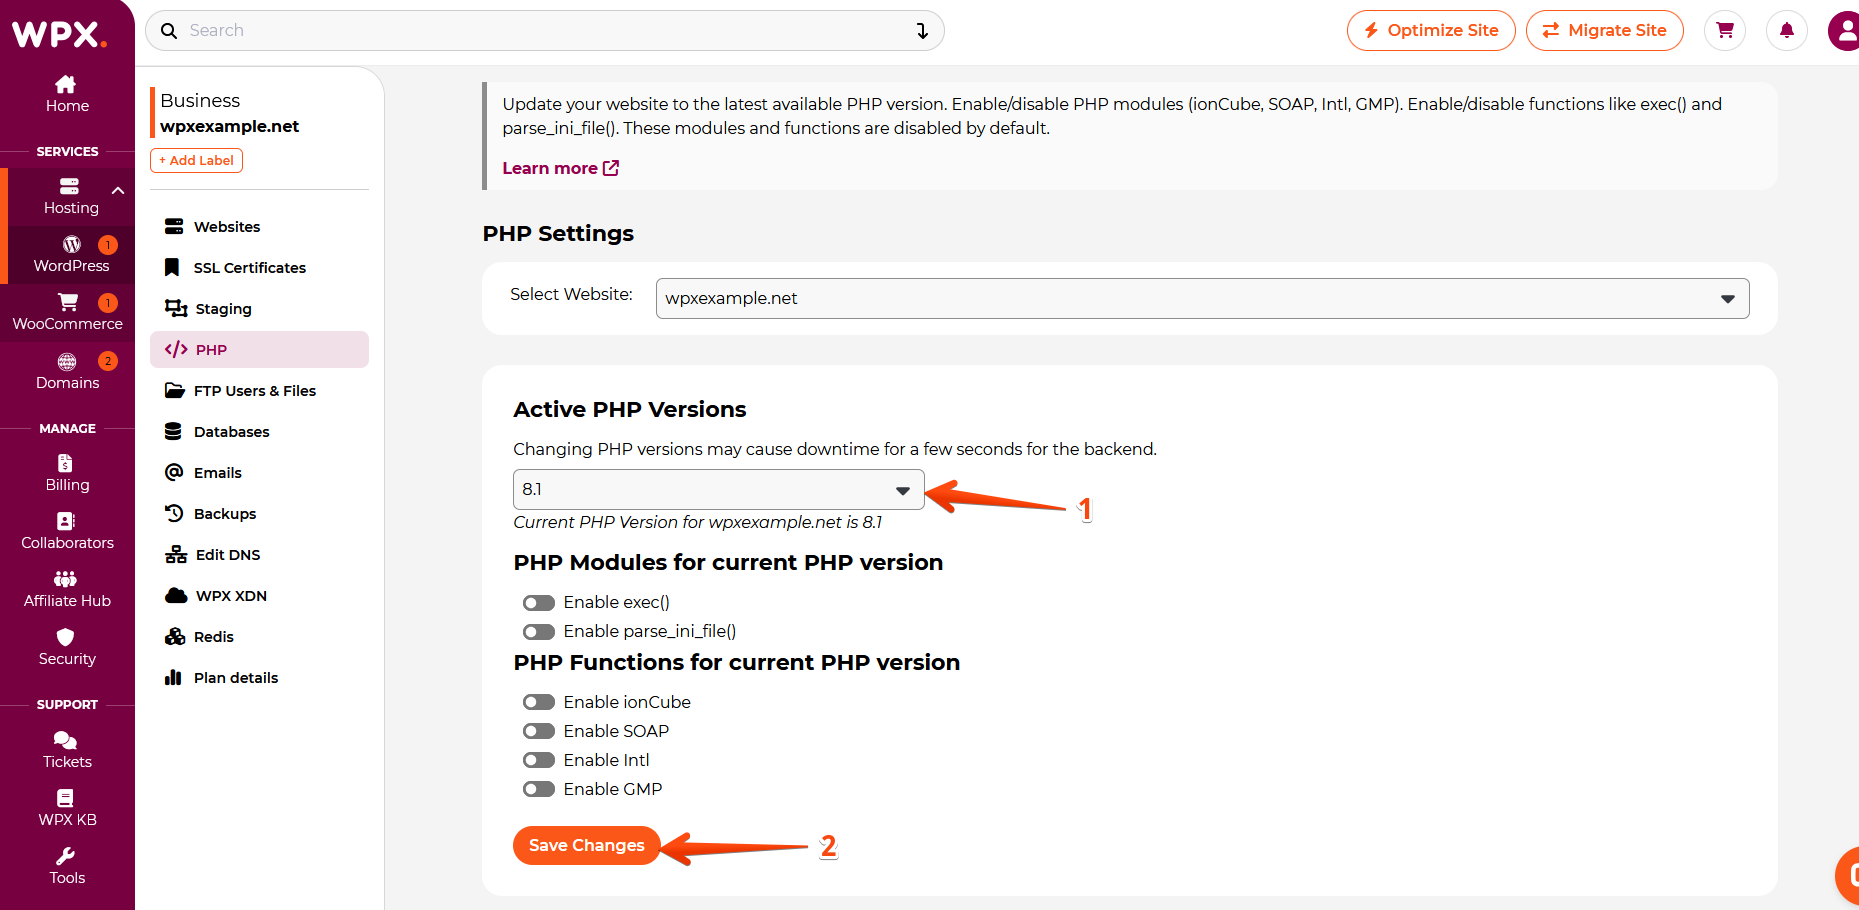
Step 4. Change the PHP version
- Select the PHP version you want to use on the site.
- To apply the changes, click on the Save Changes button.
If you get stuck with anything discussed on this page, please contact WPX Support via live chat (use the bottom right-hand widget), and they will respond and help within 30 seconds or less.