You’ve made changes on your website but cannot see them yet in the browser. You probably need to clear the XDN cache. This article from your WPX control panel will help you do that.
Step 1. Log in to your WPX account
Begin by logging into your WPX account. You can do this by visiting the WPX login page.
Step 2. Go to Control Panel
Once logged in:
- Locate your hosting plan in the WPX client area.
- Click the Control Panel button next to the plan you wish to manage.

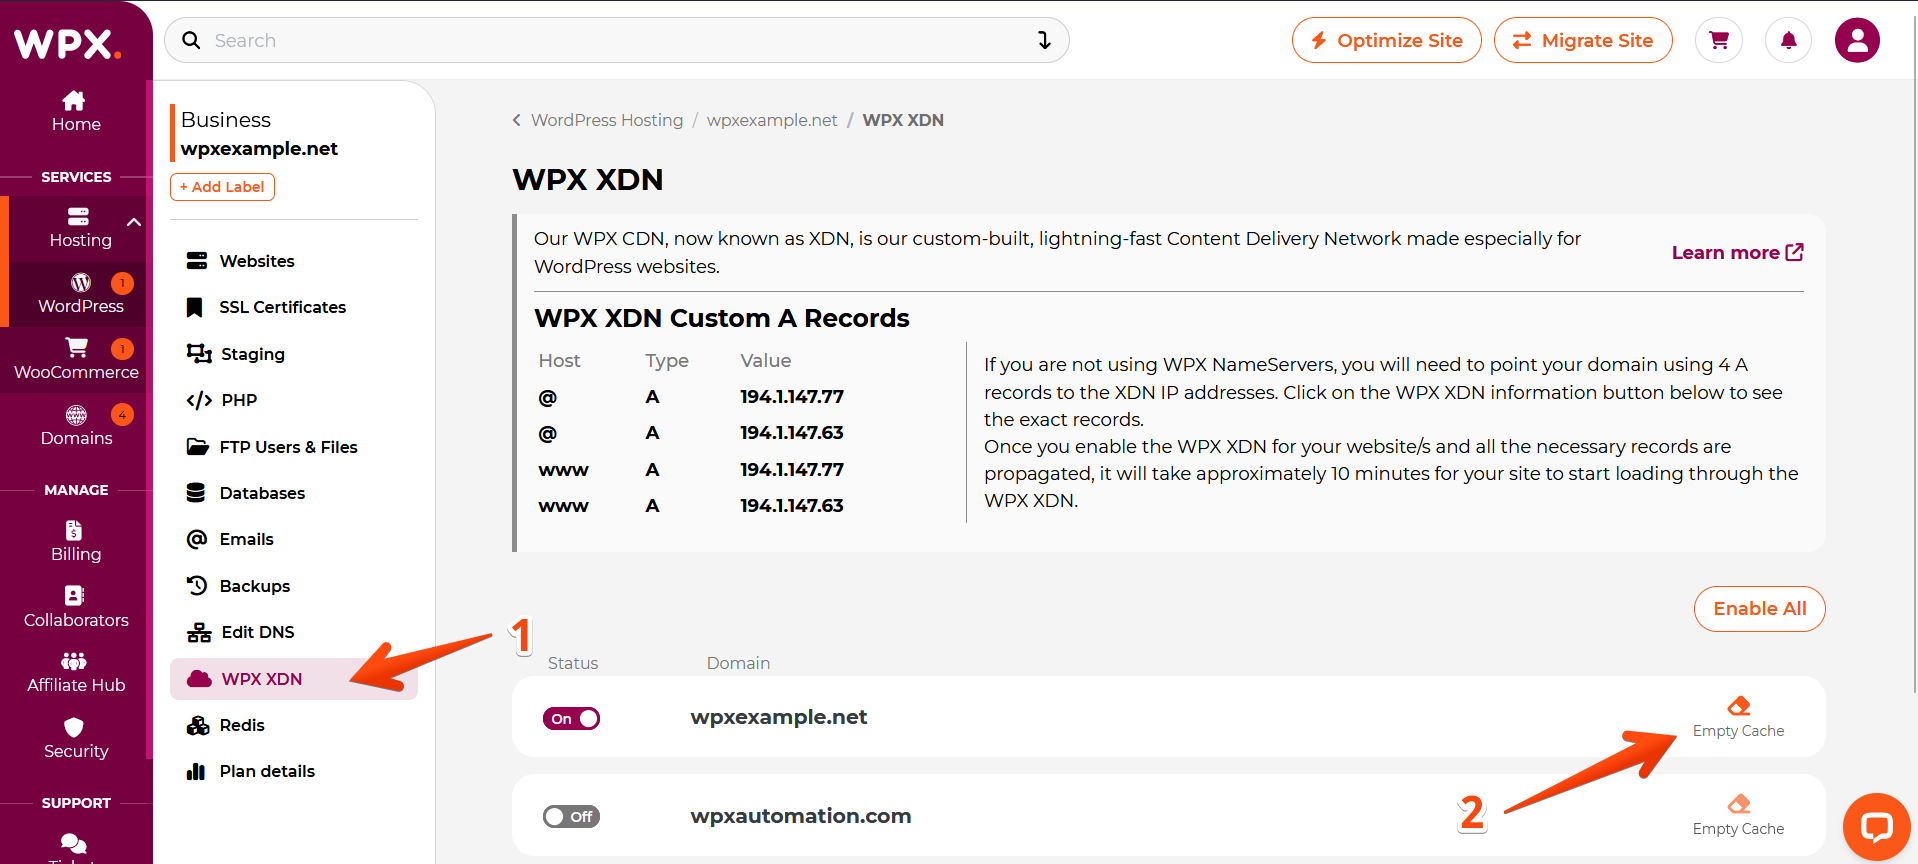
Step 3. Empty XDN Cache
Within the Control Panel:
- Select WPX XDN
- Click on the Empty Cache button next to the site.
Stuck at any point? Don’t worry, just click the live chat widget in the bottom-right, and one of our support agents will assist you in under 30 seconds.