If you’ve already installed an SSL certificate on your site and want to ensure that all traffic is securely routed via HTTPS, this guide will help you do just that. We’ll explain how to force HTTPS and fix common issues so your visitors always connect to a protected version of your website.
What is Mixed Content, and how to fix it?
Many users encounter Mixed Content warnings after installing their first SSL certificate. This happens when a webpage loads some elements (like images, scripts, or stylesheets) over HTTP instead of HTTPS.
Mixed Content prevents your site from being fully secure, often triggering browser warnings that your connection is not completely safe.
This article will show you how to fix these issues so your entire site uses HTTPS consistently.
Step 1. Log in to your WPX account
Begin by logging into your WPX account. You can do this by visiting the WPX login page.
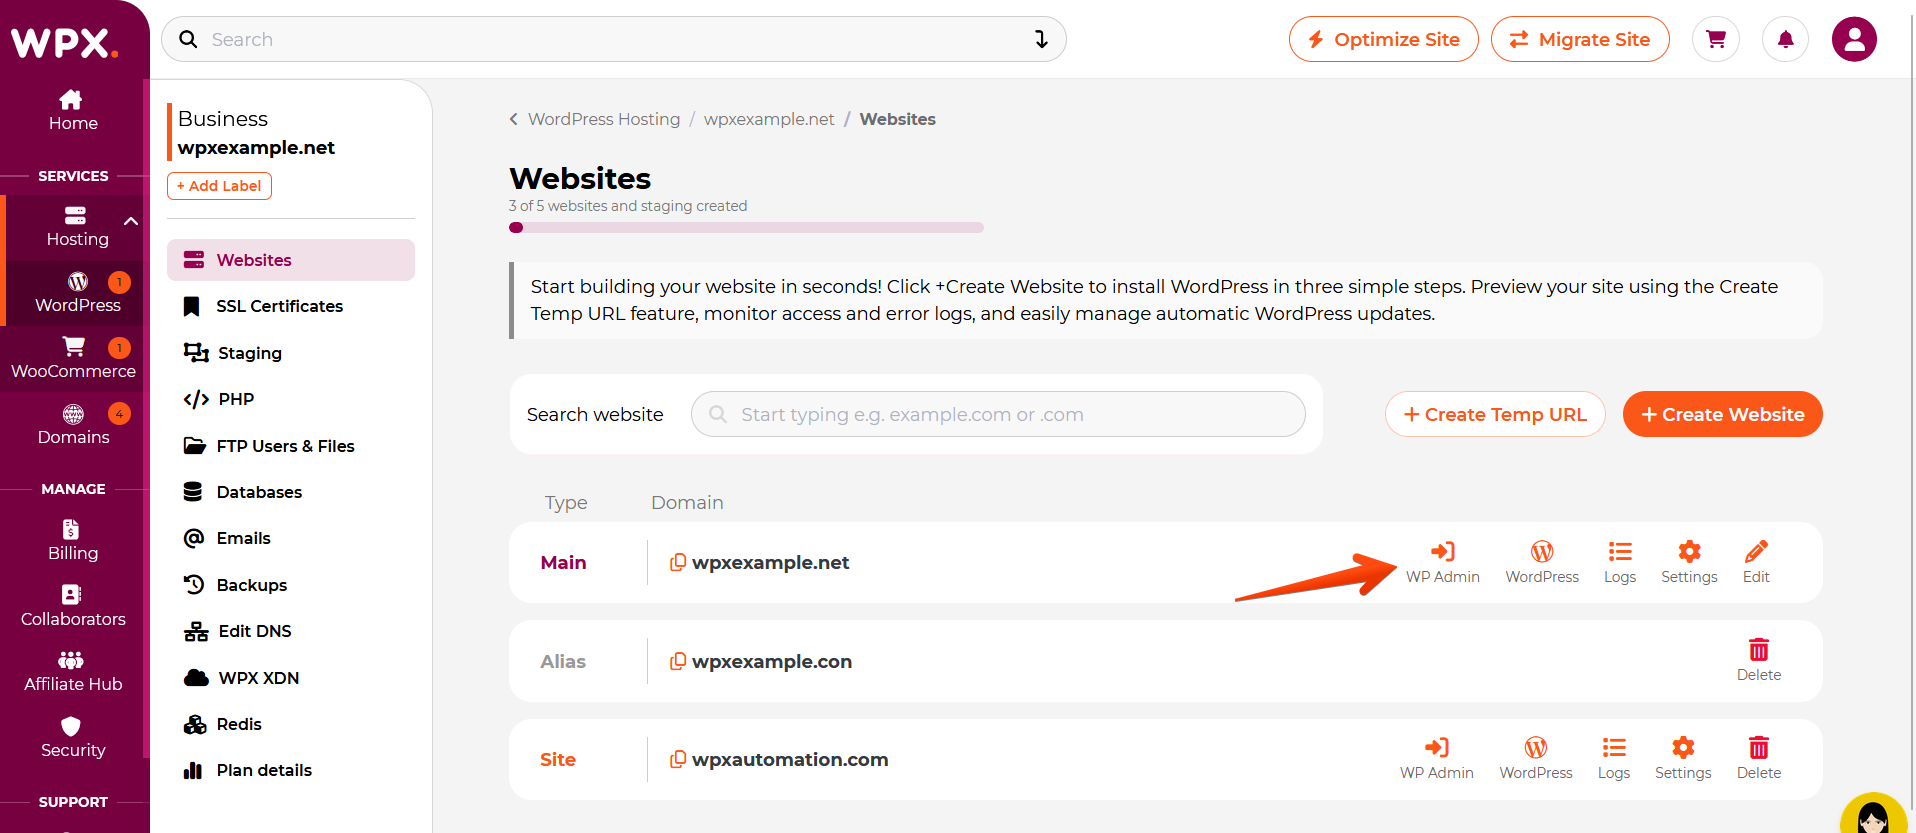
Step 2. Go to Control Panel
Once logged in:
- Locate your hosting plan in the WPX client area.
- Click the Control Panel button next to the plan you wish to manage.

Step 3: Log in to Your WordPress Dashboard
Within your Control Panel, click the WP Admin button for the site you want to configure.
Step 4: Update your site URLs to use HTTPS
To ensure WordPress loads fully through HTTPS. In your WordPress dashboard, go to Settings and select General.

Locate the fields WordPress Address (URL) and Site Address (URL).
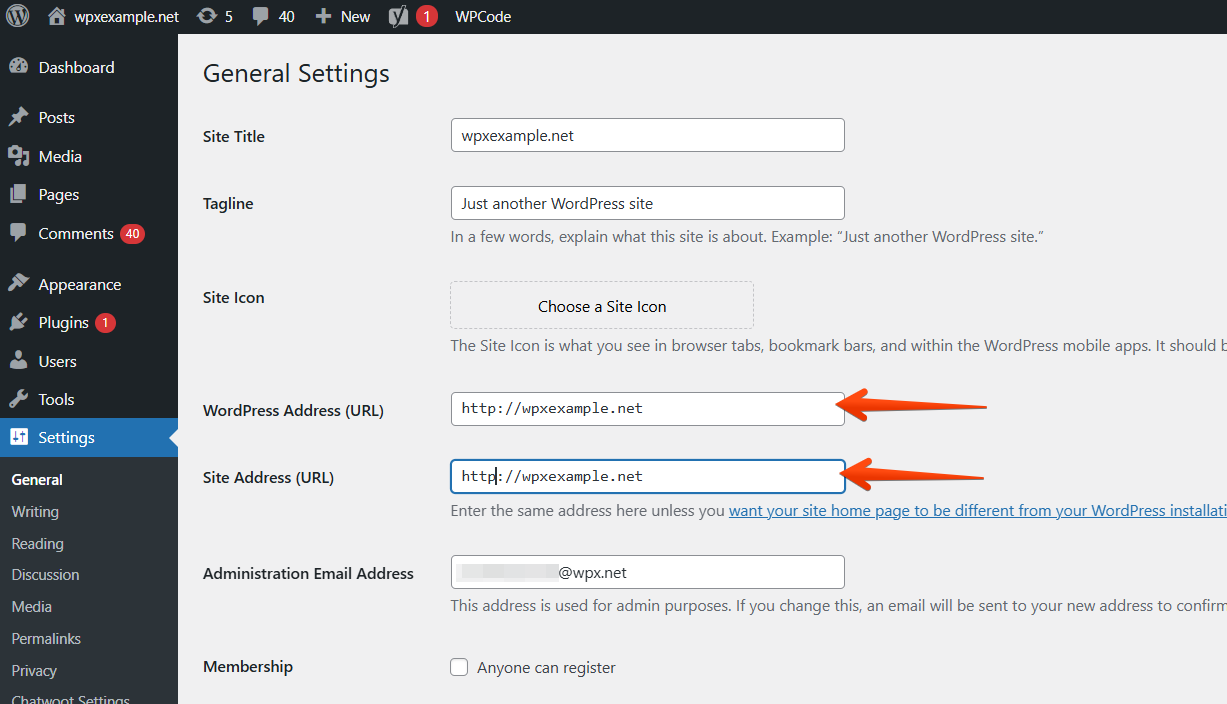
Change both URLs to start with https:// instead of http://.

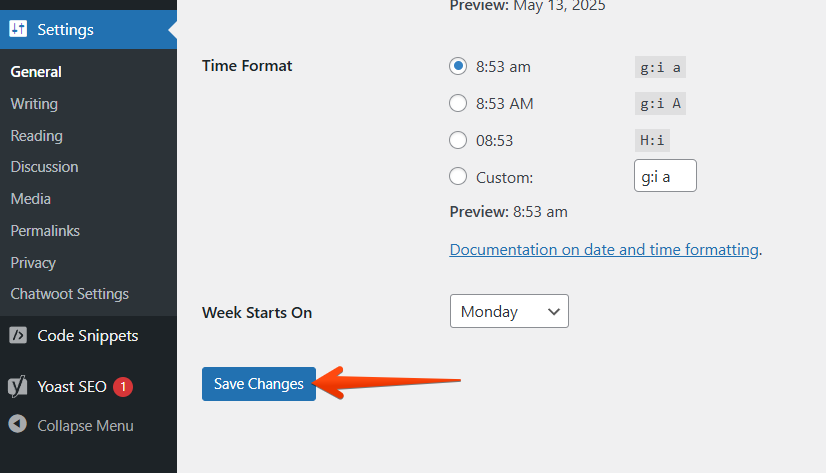
Scroll down and click Save Changes.
This step forces your website to use HTTPS as the default protocol.
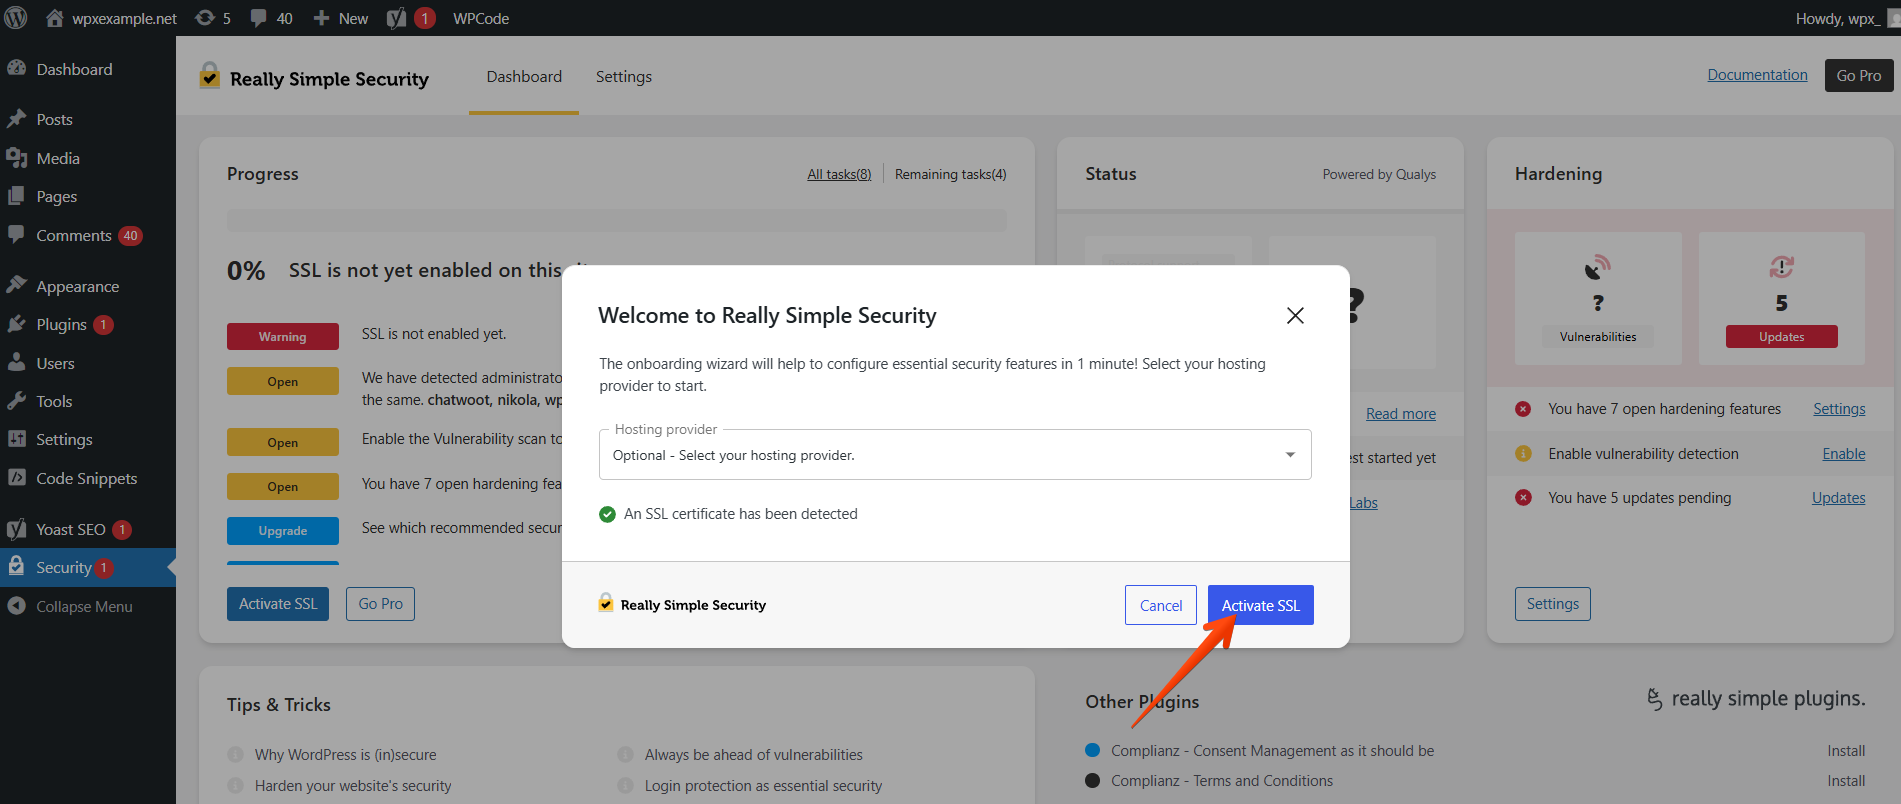
Step 5: Install and Activate the Really Simple SSL Plugin
To fix any remaining insecure links and fully enforce HTTPS across your site, we recommend using the Really Simple SSL plugin.
In your WordPress dashboard, go to Plugins and then Add New.

Search for Really Simple SSL (1), and then click the Install Now button.

Click Activate.
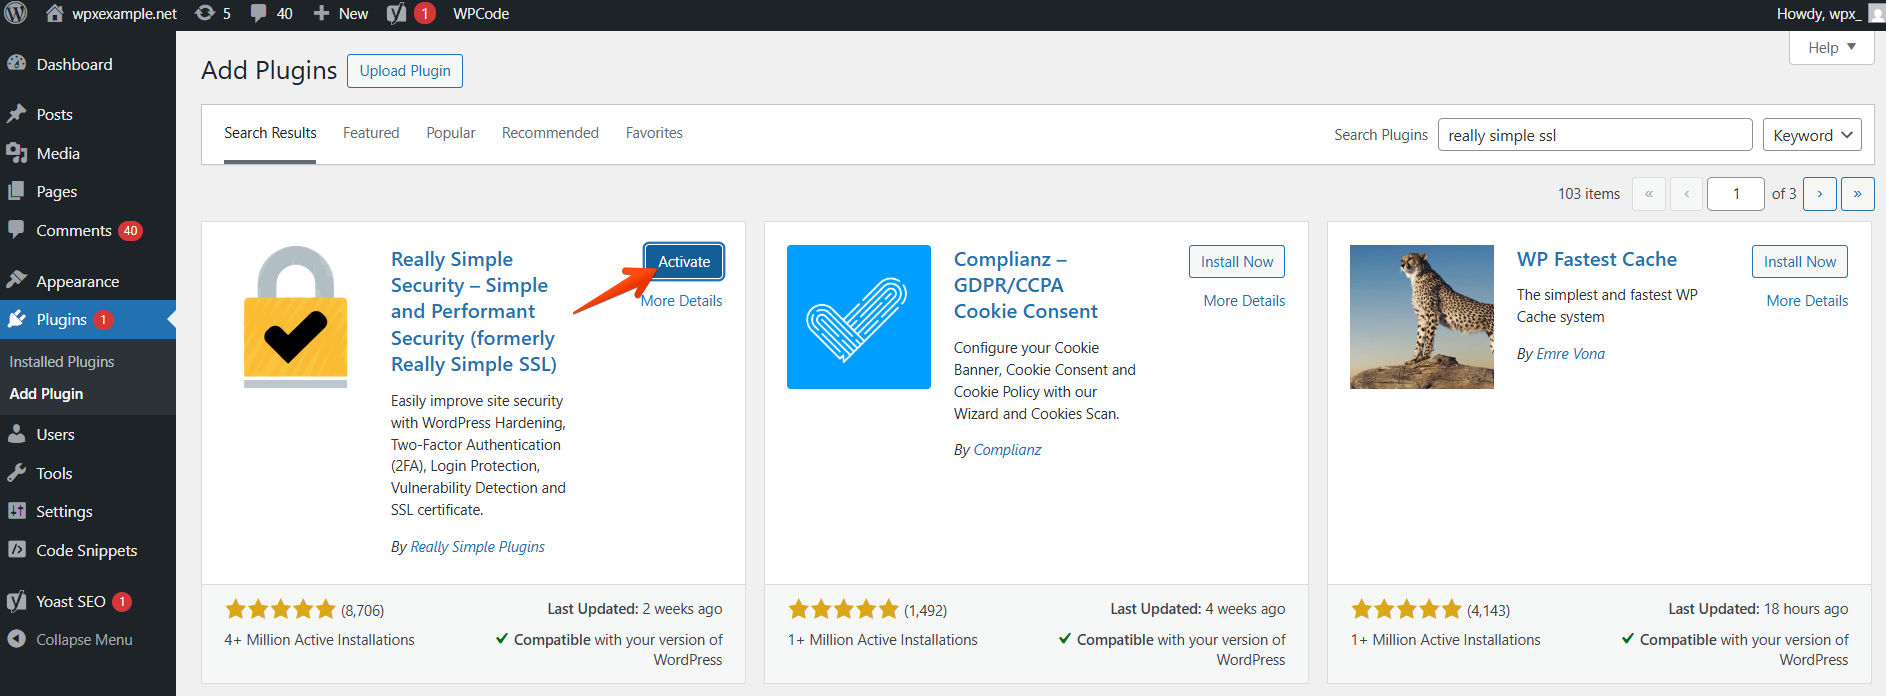
After activation, follow the prompt to Activate SSL. The plugin will automatically handle the rest.
Have more questions? Contact the WPX Support Team through the live chat widget in the bottom-right corner, and they’ll assist you promptly, typically within 30 seconds.