If you want to secure specific versions of your website, such as only the www version or a connected alias, you’ll need to install a custom SSL certificate.
This guide will walk you through installing a custom SSL certificate from your Control Panel.
Step 1. Log in to your WPX account
Begin by logging into your WPX account. You can do this by visiting the WPX login page.
Step 2. Go to Control Panel
Once logged in:
- Locate your hosting plan in the WPX client area.
- Click the Control Panel button next to the plan you wish to manage.

Install a custom SSL Certificate for the “www” version of the site
By default, WPX’s free SSL covers both @ (root domain) and www versions. But when installing a custom SSL certificate, you can specify which version(s) to secure.
To install a custom certificate for just the www version:
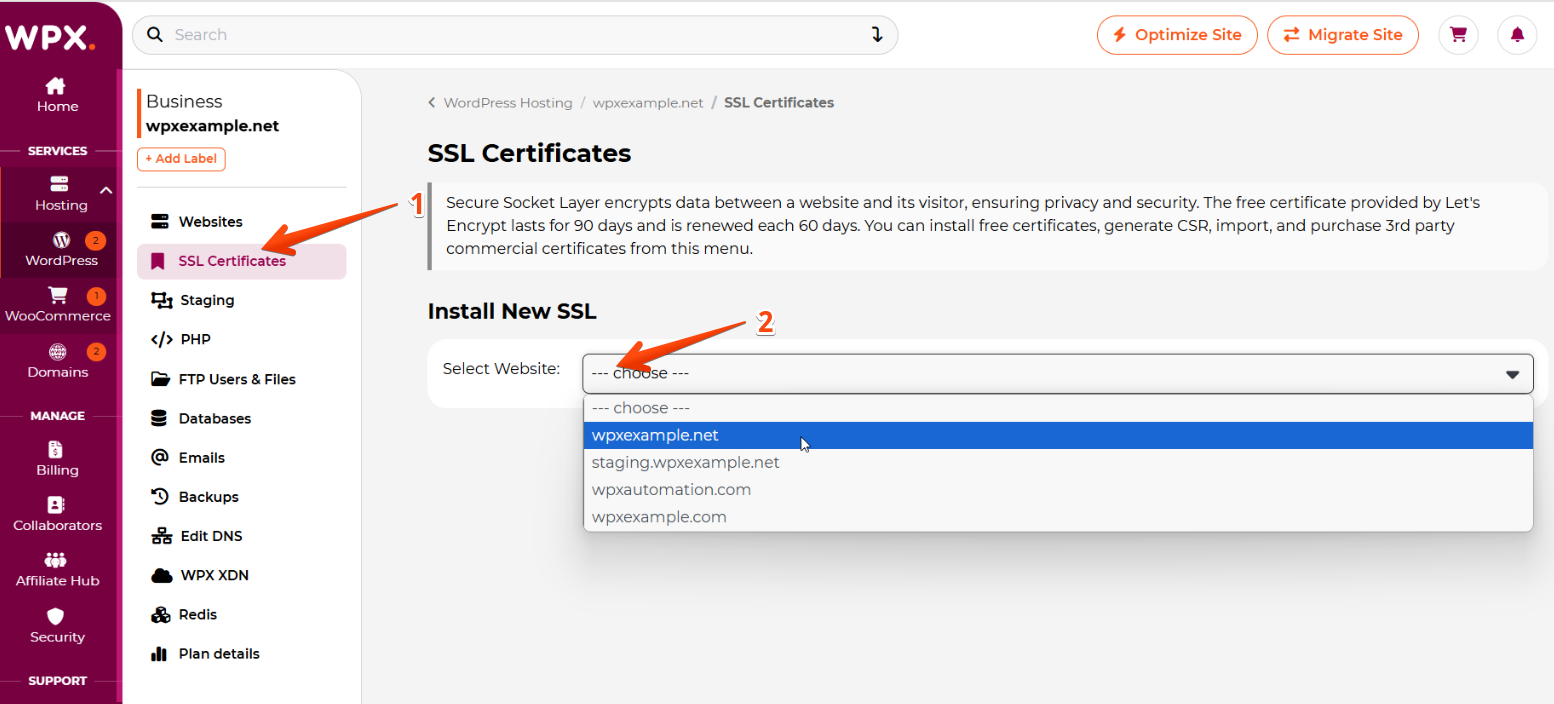
- In the Control Panel, go to SSL Certificates.
- Select your website from the dropdown menu.
- Enter your domain as
www.yourdomain.comto secure only thewwwversion.
Once done, click Install. You’ve now installed a custom SSL certificate for just the www version of your site.
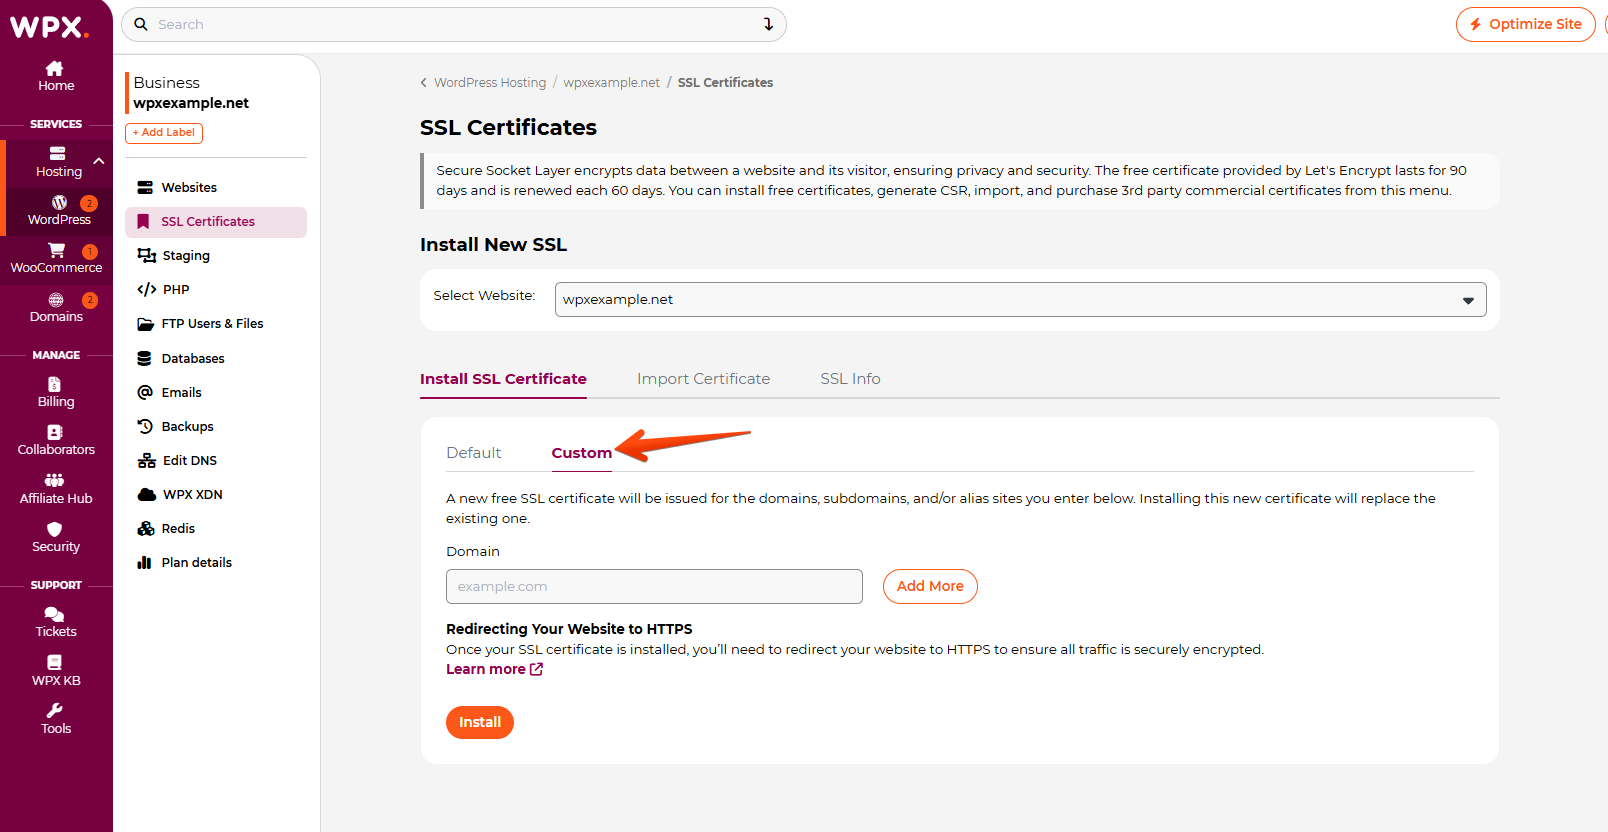
Click the Custom tab.
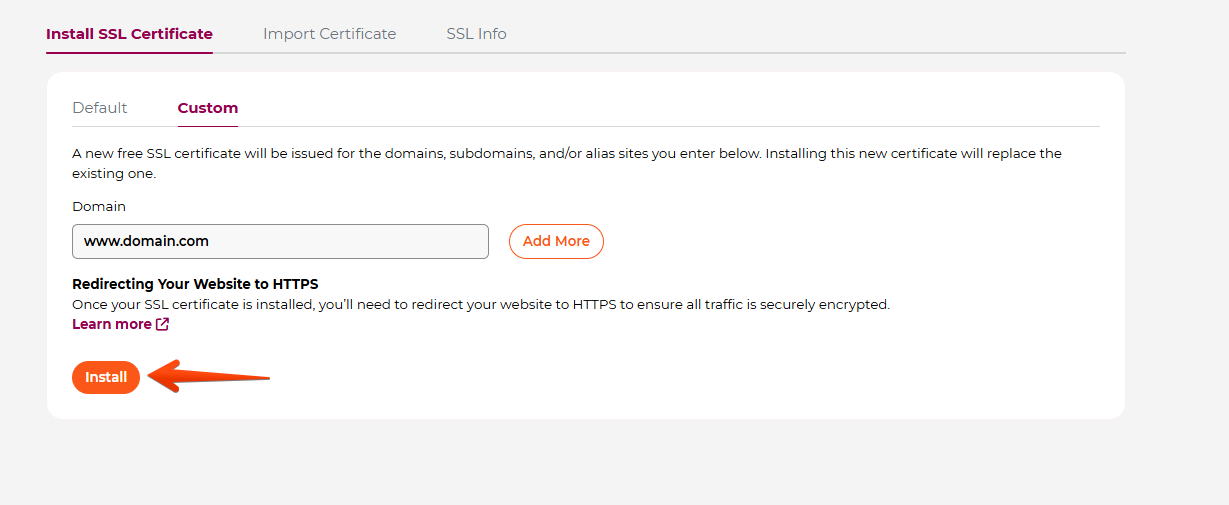
Enter your domain as www.yourdomain.com to secure only the www version.
Once done, click Install.
Install a custom SSL certificate for the Alias
If you have a domain alias connected to your main website, you can install a custom SSL certificate that covers both.
Here’s how:
- Open the Custom tab.
- Go to SSL Certificates in your Control Panel.
- Select the site that the alias is connected to (primary).
Click the Custom tab.
- Click Add More to duplicate the input fields. Enter both the primary domain and the alias domain.
- Click Install.

Stuck at any point? Don’t worry, just click the live chat widget in the bottom-right, and one of our support agents will assist you in under 30 seconds.