WP Rocket is a powerful, premium caching plugin designed to significantly boost your website’s speed and performance. Since WP Rocket does not offer a free version, you’ll need to purchase a license and upload the installation files manually to your site’s plugin directory.
This article will guide you through:
- Installing WP Rocket on your website
- Applying WPX’s recommended configuration
- Clearing the cache when needed
Step 1. Purchase WP Rocket and Download the Plugin
First, visit WP Rocket’s official website and purchase a license.
After completing your purchase, create a WP Rocket account and download the plugin ZIP file from your dashboard.
Step 2. Upload and Activate WP Rocket
Once downloaded:
- Log in to your WordPress website.
- Go to Plugins > Add New.
- Click Upload Plugin, choose the WP Rocket ZIP file, and install it.
- After installation, click Activate Plugin.
Alternatively, you can upload the plugin ZIP via the File Manager in your WPX Control Panel under the /wp-content/plugins/ folder.
Once activated, your WP Rocket license will connect, and you’ll see your website listed in your WP Rocket account under Sites connected.
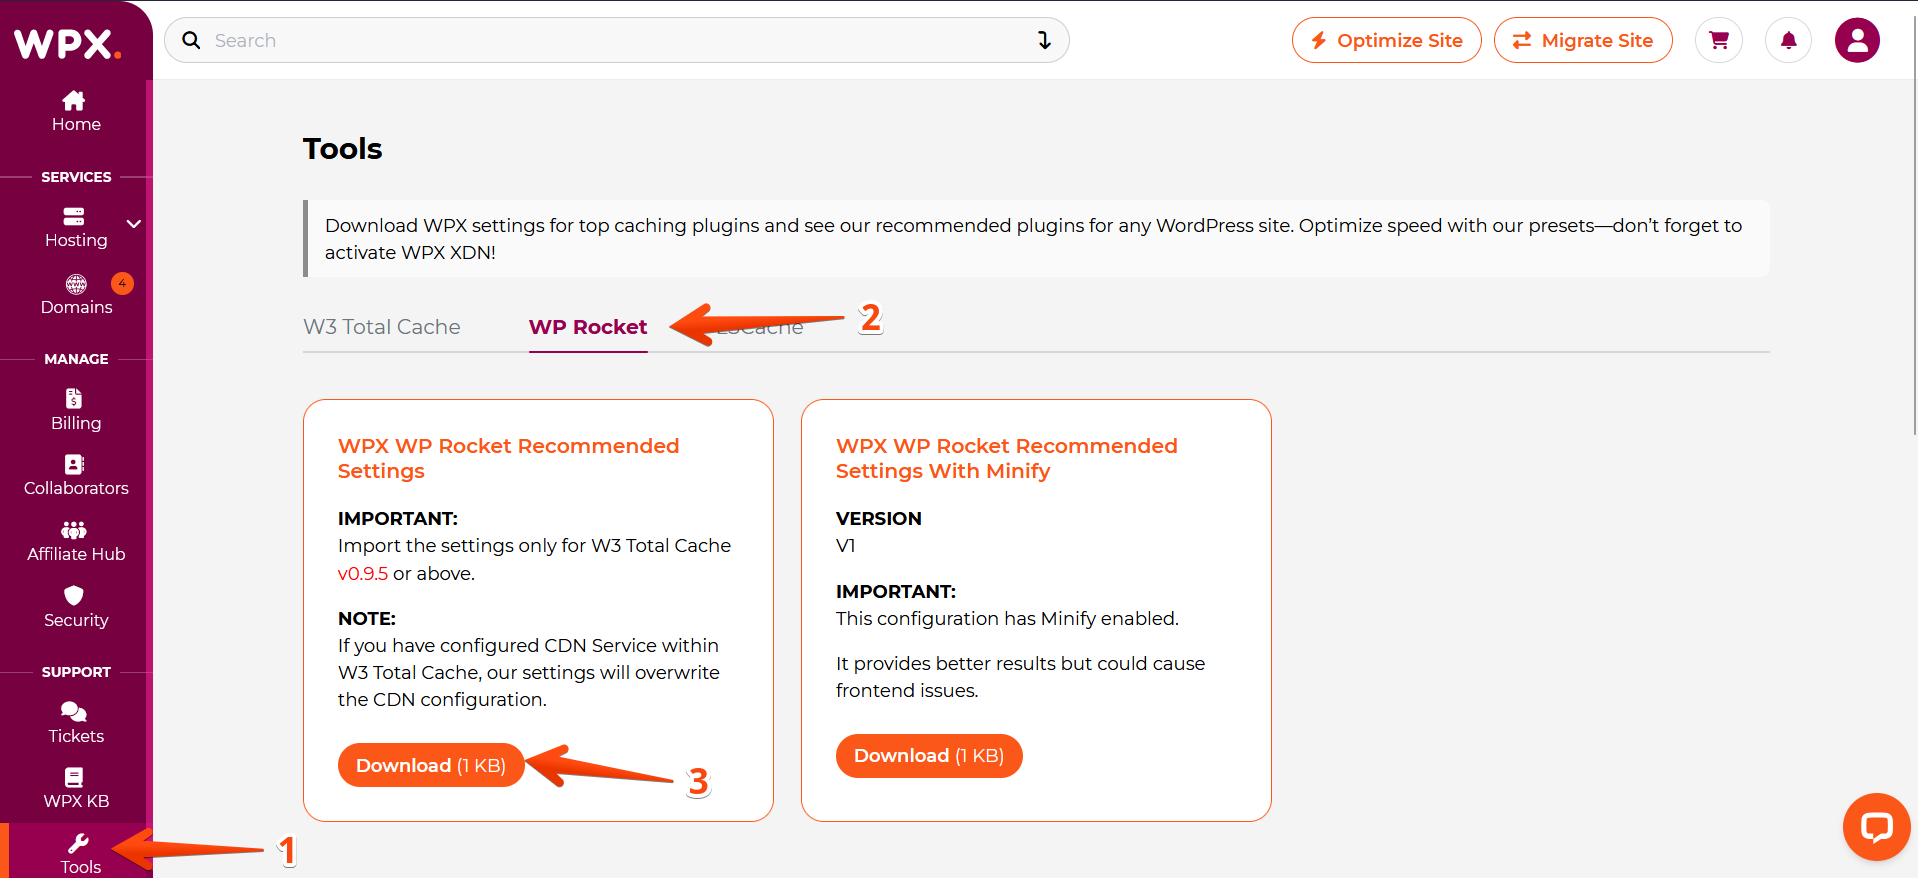
Step 3. Log in to your WPX account
To download these recommended settings, first, log in to your WPX account. You can log in to your WPX account here.
Step 4. Download WPX pre-configured settings
Once logged in:
- Navigate to Tools > WP Rocket in your WPX account.
- Choose one of the two available configuration files:
- WPX WP Rocket Recommended Settings – the standard version optimized for most sites.
- WPX WP Rocket Recommended Settings With Minify – for websites that already bundle or minify their JS and CSS files.
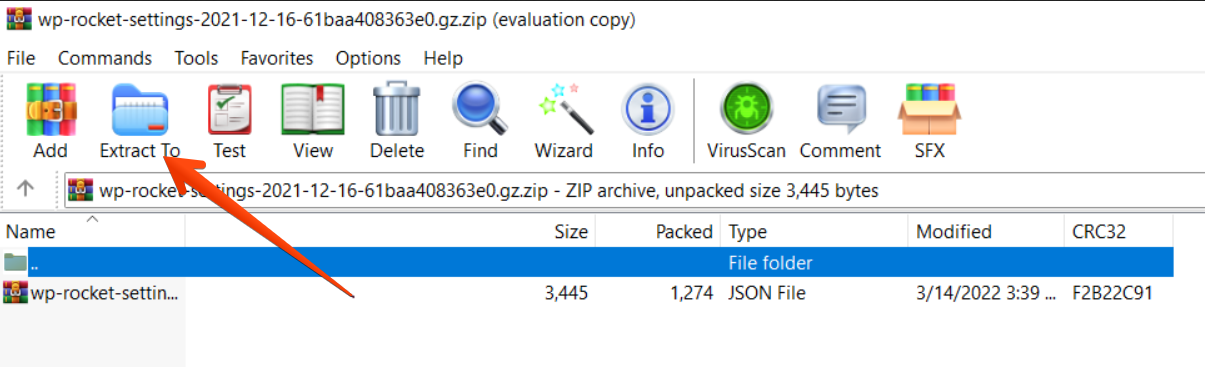
Step 5. Unzip (extract) the zipped file
Once downloaded, extract the ZIP file on your computer to prepare it for upload.
Step 6. Rename the file to match your site
WP Rocket requires imported configuration files to match your website’s internal name format. To do this:
- Rename the WPX-recommended settings file using that exact filename (keeping the
.jsonextension). - In your WordPress dashboard, export your current WP Rocket settings to generate a file.
- Copy the exact filename of the exported file.
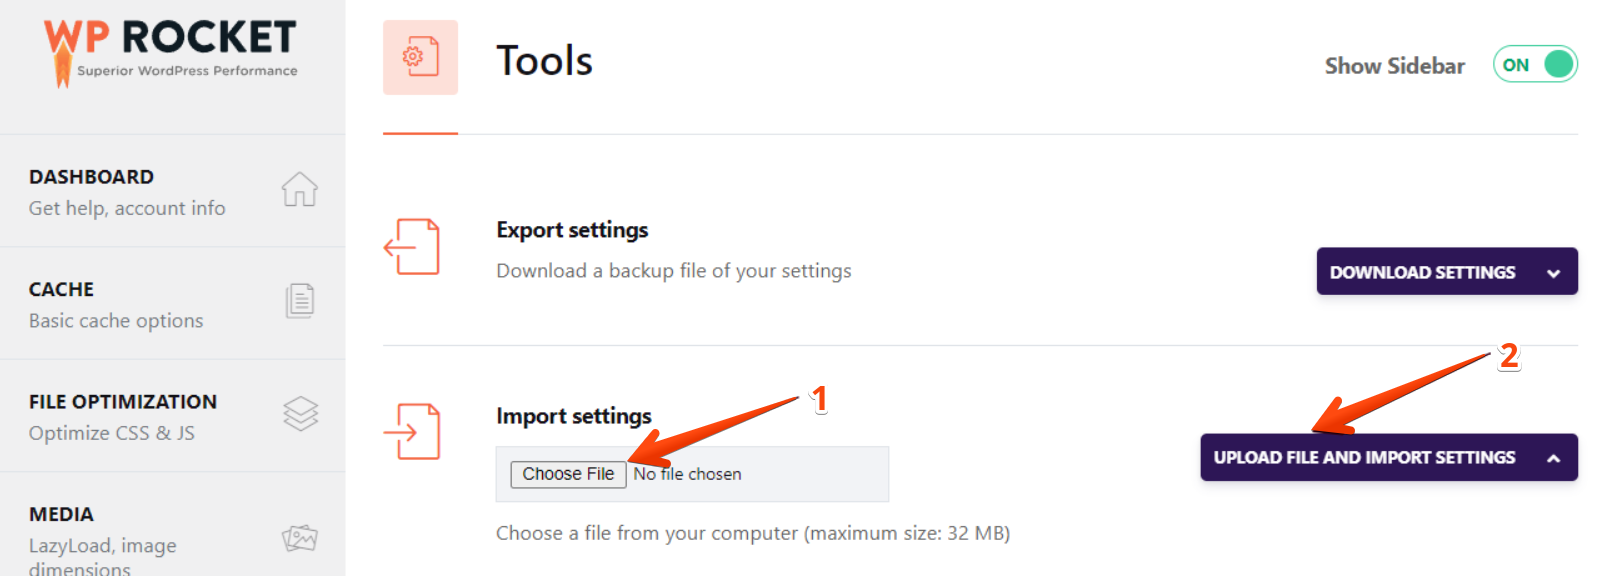
Step 7. Upload the settings
Now go back to your WordPress dashboard:
- Hover over the WP Rocket menu in the admin bar.
- Select Settings.

Under Import Settings, upload the renamed .json file and click Upload file and import settings.
While WPX’s recommended settings offer a great starting point, we always recommend reviewing and adjusting them to fit your website’s specific needs and setup.
How to Clear the Cache?
To manually clear the cache after making changes to your website:
- Hover over the WP Rocket menu in the top admin bar.
- Click Clear Cache.
This will ensure all visitors see the latest version of your content.

Stuck at any point? Don’t worry, just click the live chat widget in the bottom-right, and one of our support agents will assist you in under 30 seconds.