When signing up with us, you will be asked to choose a primary/main domain for your hosting service.
Once added, that domain will be associated with your account and its main details, including file access username and password. If later on, you would like to change that domain to another one (i.e. add a new website), that can easily be done.
Because the primary(main) domain is linked to your account, all of the main details are also connected to it and if another existing site replaces it, it will cause a system conflict. This means that the new main domain will have to be a completely new site or a migrated website from elsewhere.
We created this article to explain how you can change your main domain through the WPX admin panel.
Step 1. Log in to your WPX account
Begin by logging into your WPX account. You can do this by visiting the WPX login page.
Step 2. Go to Control Panel
Once logged in:
- Locate your hosting plan in the WPX client area.
- Click the Control Panel button next to the plan you wish to manage.

Step 3. Change the main domain
To change the domain, follow these steps:
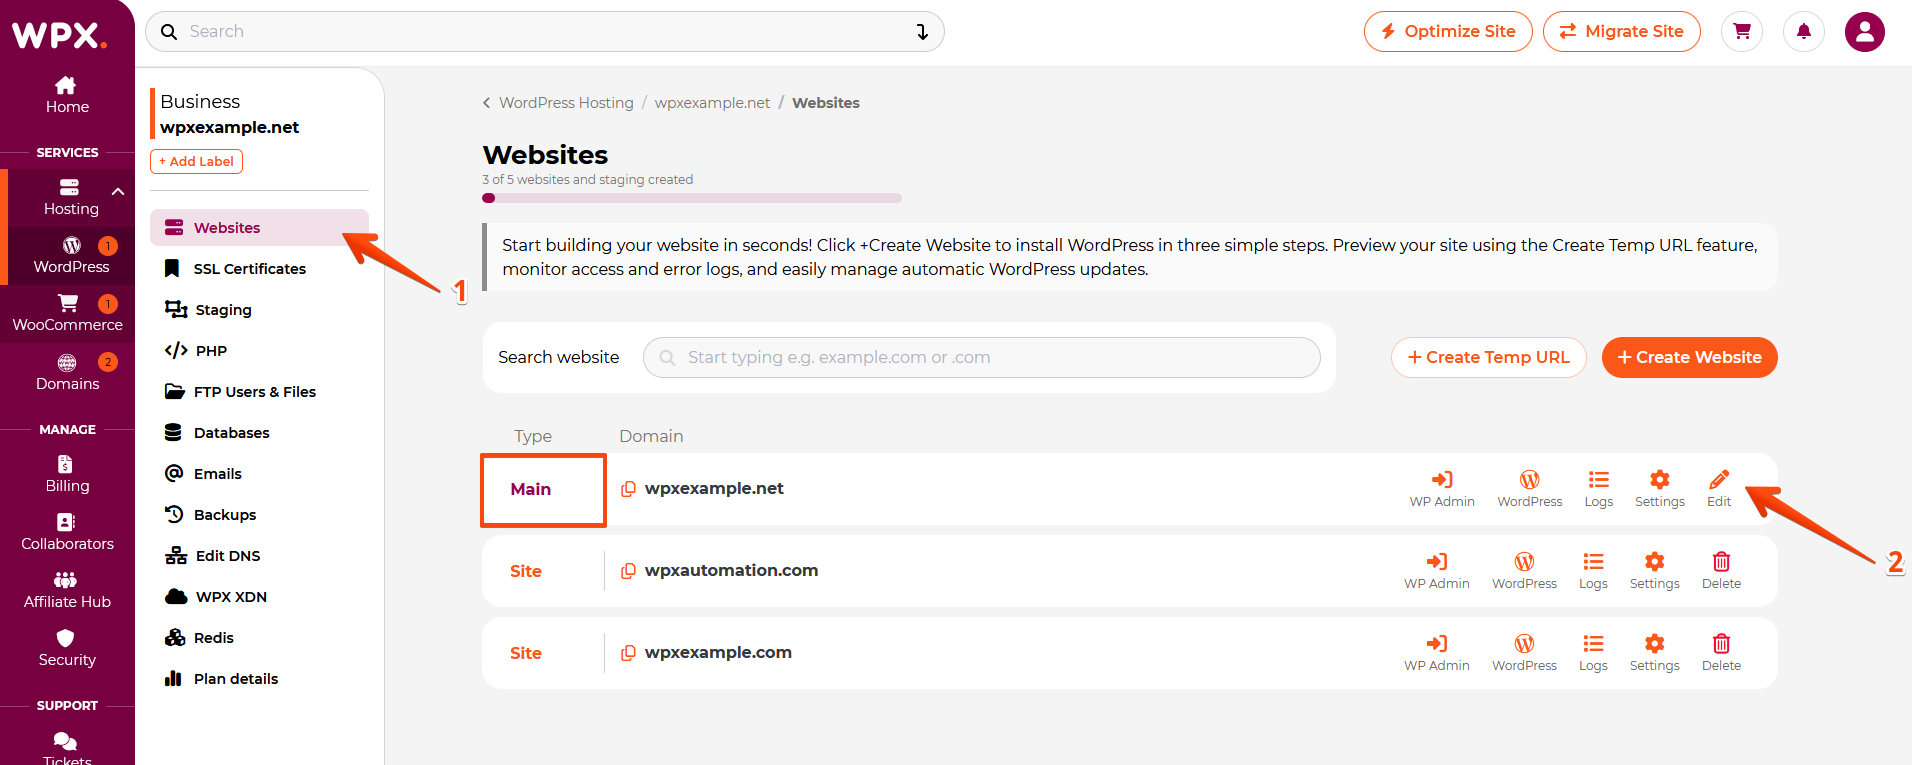
- Click the Websites section
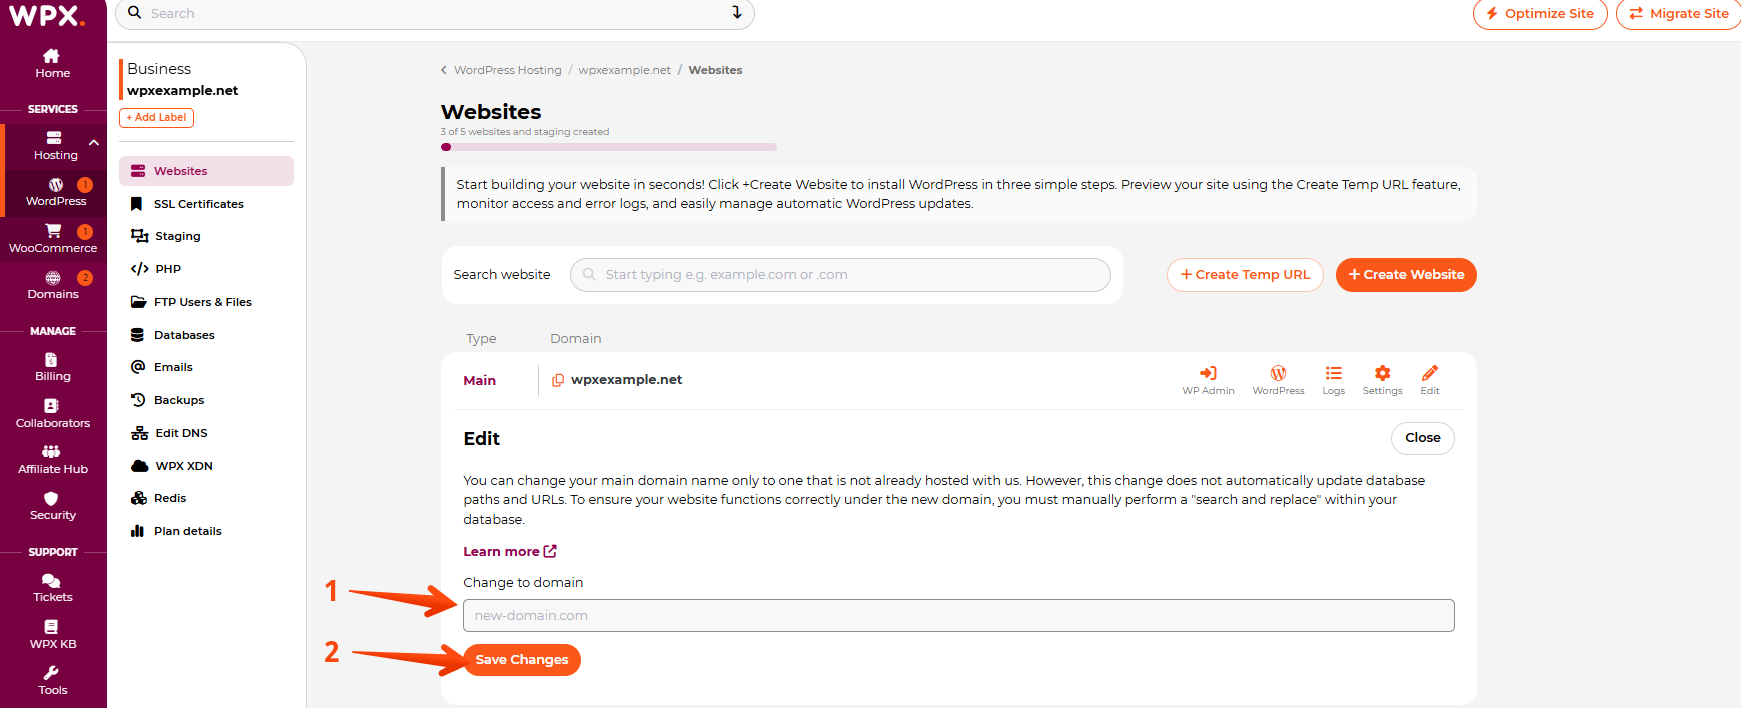
- Select Edit – This will open a new menu.
- Change the Domain – Enter the new domain in the provided text field.
- Save Changes – Click Save Changes to apply the update.
Now with your new main site, you have a couple of options:
- You can develop a completely new website from scratch. Here is how to install WordPress if you want to start fresh.
- You can fill out a migration request to move a website from another hosting to that slot.
- You can migrate a site yourself.
If you get stuck with any function discussed here, please contact WPX Support via live chat (use the bottom right-hand widget!) and they will usually respond and help within 30 seconds or less.