If you’re setting up your website and need to upload files, this guide will walk you through where to store them, how to access the correct directories, and the best methods for uploading files to your hosting panel.
What is the name of the main folder for my website files?
Understanding Your Main Website Folder
Every website you add to your WPX hosting account has its own dedicated folder where all its internal files are stored. This folder is called public_html, which serves as the root directory for your website’s files.
Each site has its own separate public_html folder, keeping your file structure organized and easy to manage.
How can I upload files to public_html?
You can upload files to your website’s root directory using one of the following methods:
- WPX File Manager: A built-in tool in your WPX hosting panel for easy file uploads.
- FTP/SFTP Connection: Use an FTP client to transfer files securely.
These methods allow you to upload various types of files, whether they’re verification files, custom scripts, or anything needed for your website development.
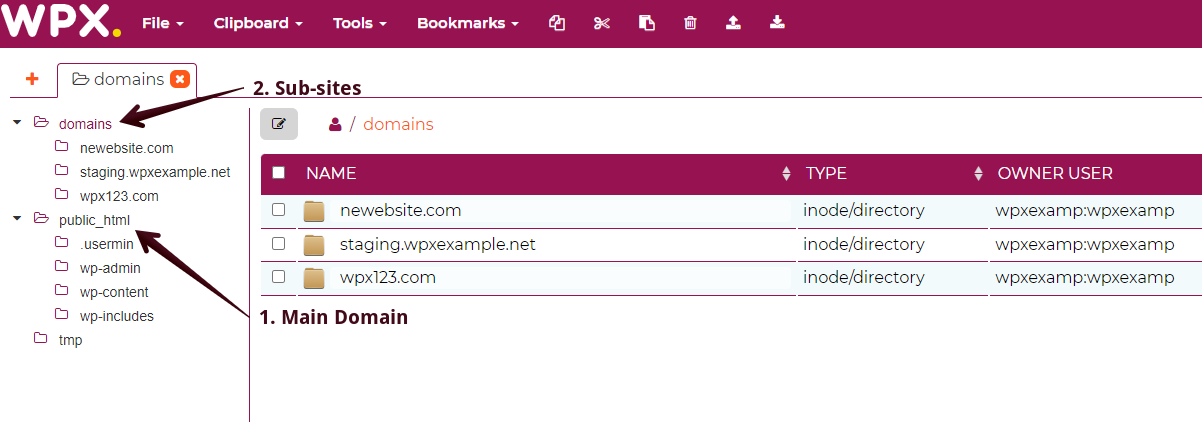
Directory Structure for Main Domains vs. Subdomains
- Your Main Website files are stored directly in the public_html folder.
- Any Subdomains or Additional Sites are stored inside the
/domainsdirectory, each having its own public_html folder for its files.
In the following screenshot, you can see how these folders are organized:
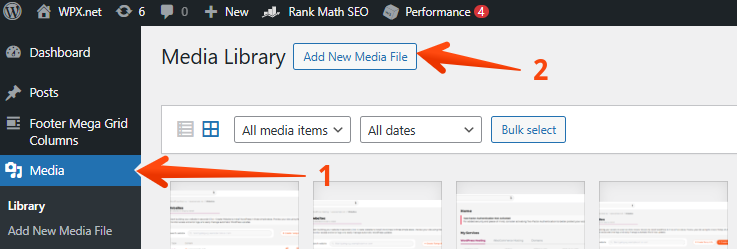
Where can I upload my images?
You can upload images directly through the Media Editor in WordPress by logging into your WordPress site.
After you log in to your site, you navigate through Media Library (1) and Add New (2) to select the image you want to upload:
When you upload images through WordPress, they are automatically stored in the following directory:
public_html/wp-content/uploads
For general file uploads, we recommend using File Manager for easy access to your public_html folder, while the Media Library is ideal for managing images.
Inside the public_html folder, you’ll also find important WordPress files such as wp-config.php and .htaccess, which you can edit or modify if needed. You can also create new files, like robots.txt, for SEO and sitemap configuration.
If you get stuck with anything discussed on this page, please get in touch with the WPX Support Team via live chat (use the bottom right-hand widget) and they will respond and help within 30 seconds or less.