Welcome to the new and improved WPX Control Panel, a fast, modern, and intuitive interface built specifically to outperform traditional dashboards like cPanel. Designed with responsiveness and ease of use in mind, it streamlines every aspect of managing your WordPress hosting, domains, emails, backups, SSL certificates, and more, all from one unified dashboard.
This guide will walk you through the Hosting sections of the WPX Control Panel. For information on managing domains, check out our Domain Management guide.
To begin, log in to your WPX account here.
Accessing the Hosting Control Panel
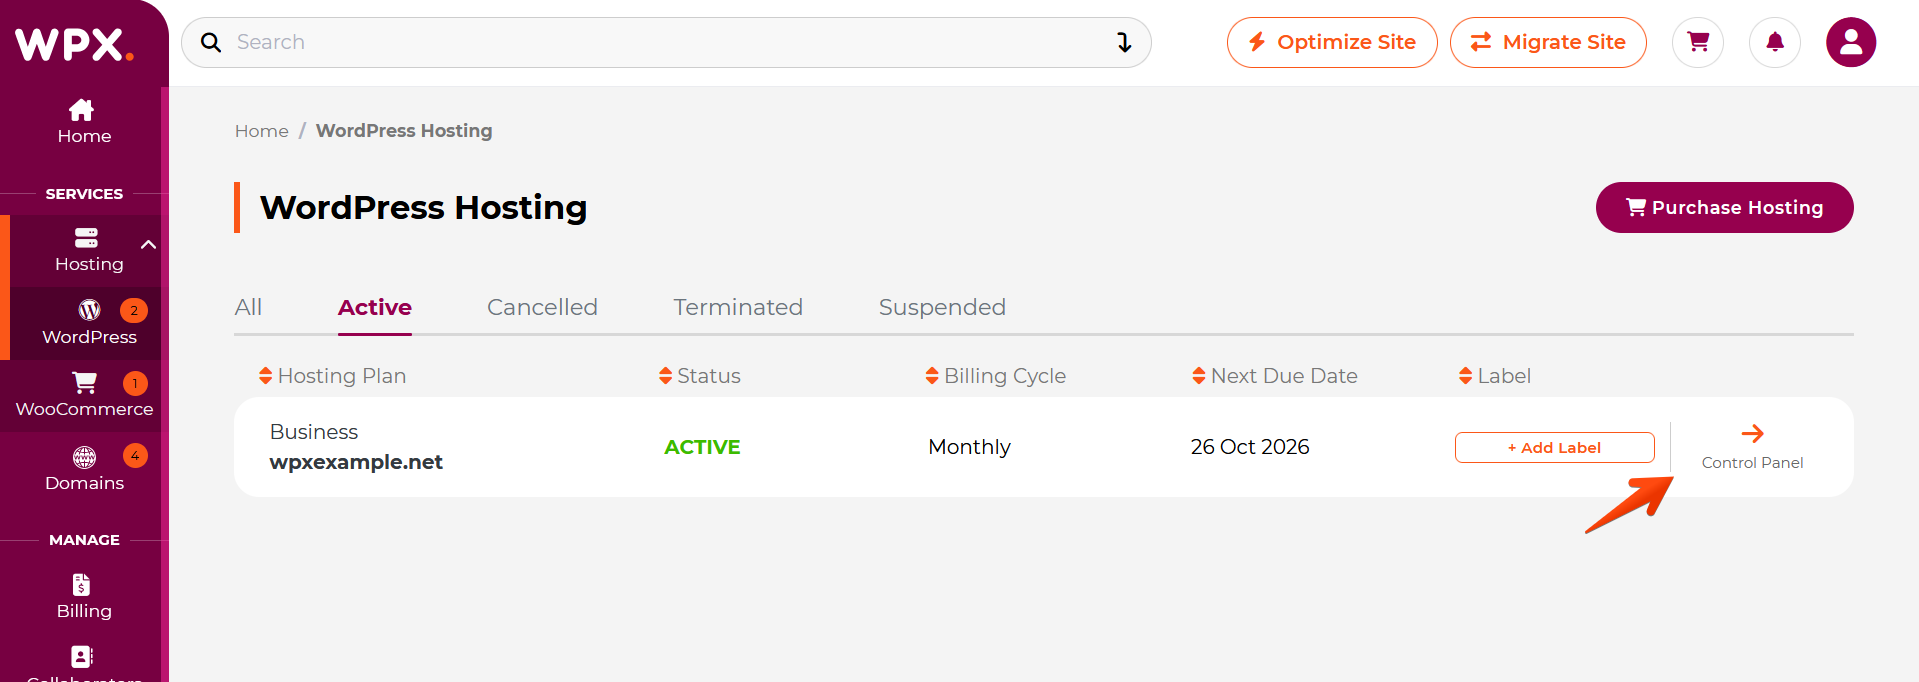
From your Client Area home page, navigate to Hosting and select either WordPress or WooCommerce, depending on your plan.
Click the Control Panel button next to the relevant hosting plan to begin managing your websites.
Websites
In the Websites section, you can create new sites, delete sites, install WordPress, and use our Temporary URL feature to preview your site before making any DNS changes.
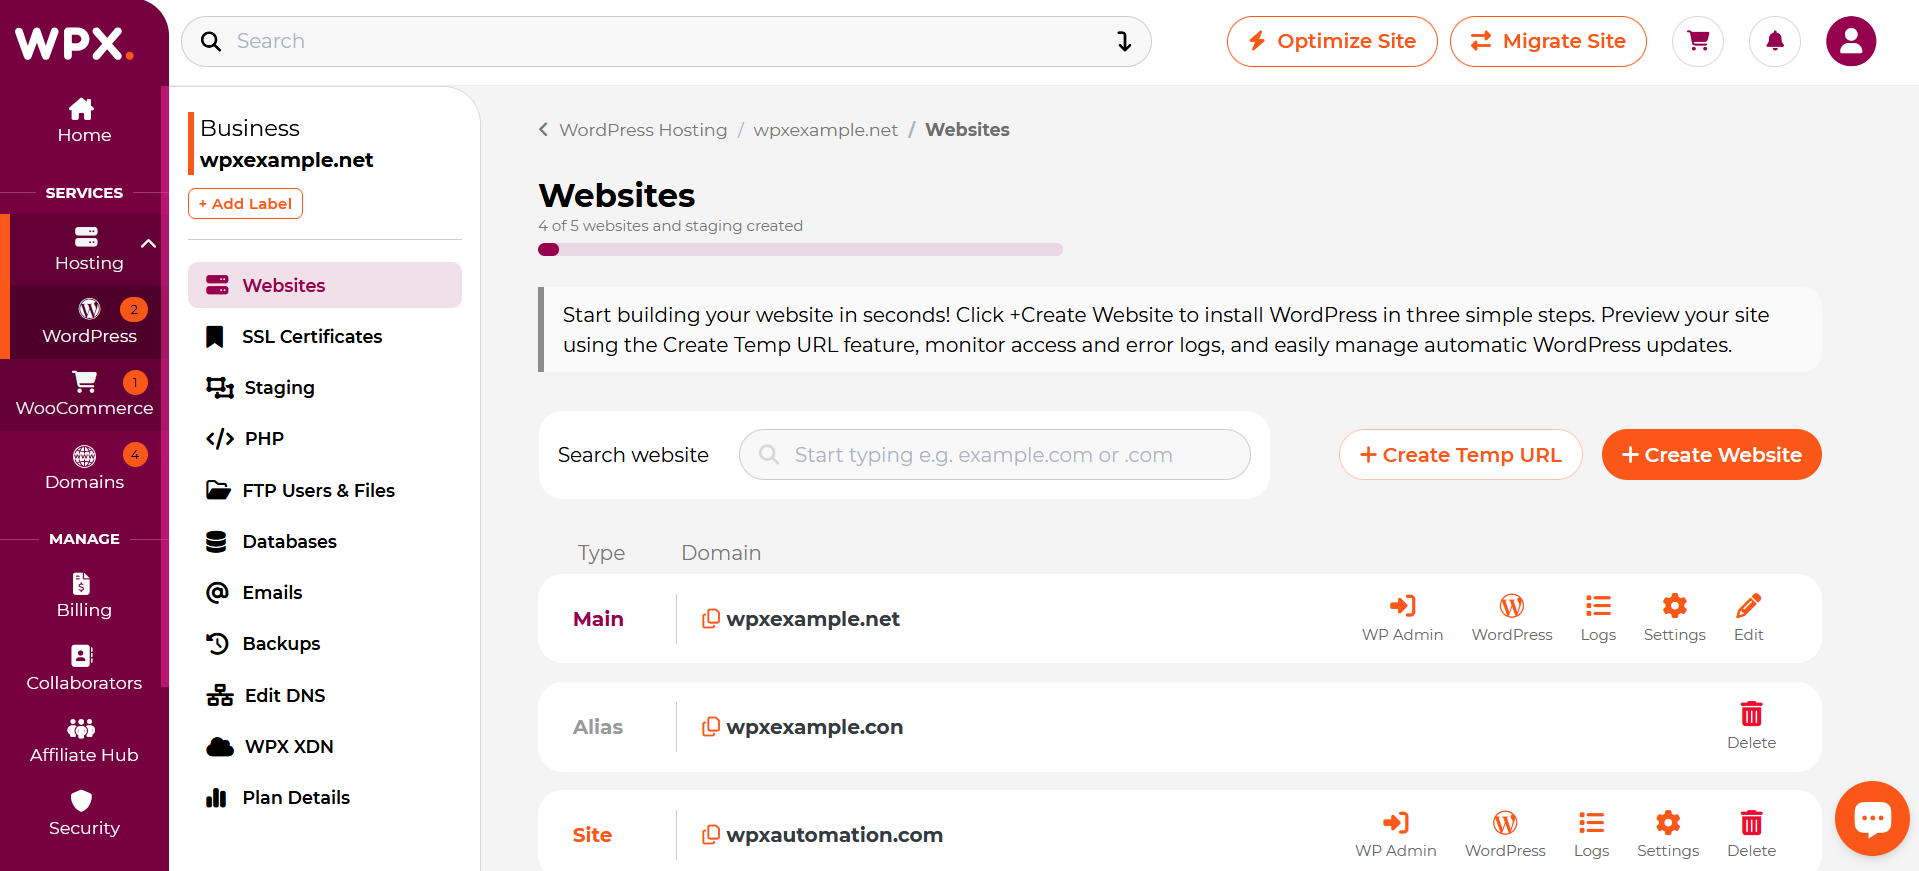
Each site includes a set of action buttons for easy management:

- WP-Admin: Quickly access the WordPress Admin Dashbaord.
- WordPress: Install or reinstall WordPress (on the root domain or in a subdirectory), and manage automatic updates for plugins, themes, and the WordPress core.
- Logs: View detailed Error Logs and Access Logs specific to the site.
- Settings: Modify your main domain (only available for primary domains), enable a Multisite Network, or turn the WPX Email service on or off.
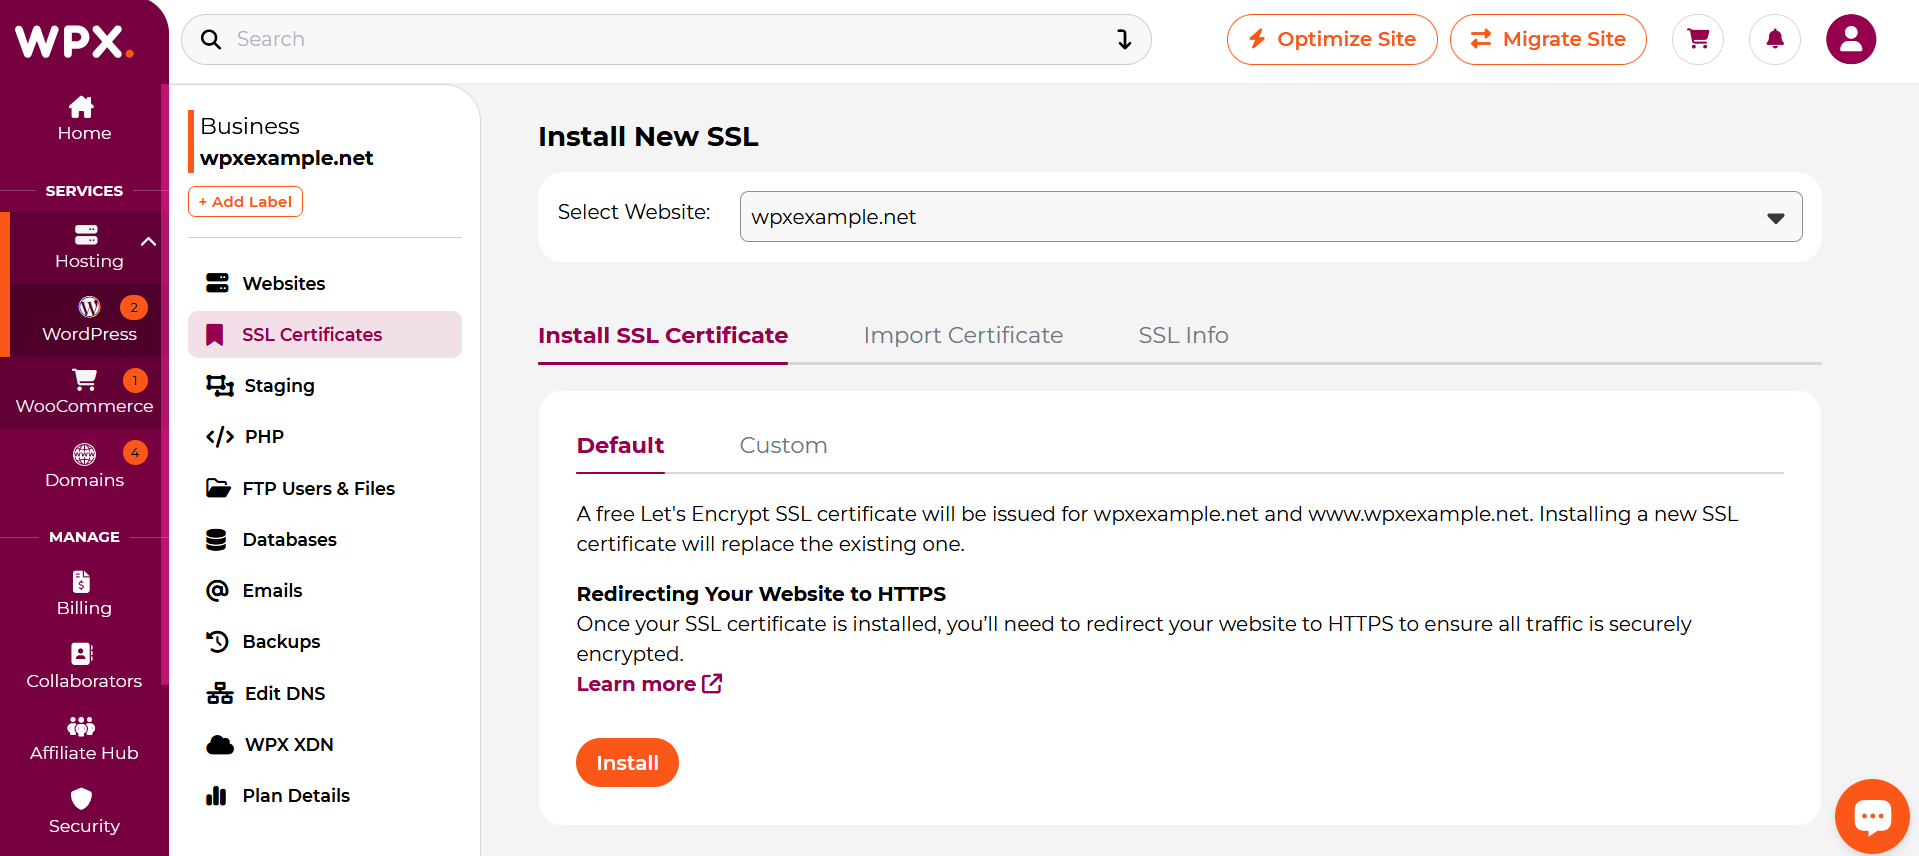
SSL Certificates
In the SSL Certificates section, you can easily install free SSL certificates for all your websites with just a few clicks.
To get started, select a site hosted with WPX. Once selected, you’ll see several options for managing that site’s SSL certificate:

- Install SSL Certificate: Install a free Let’s Encrypt SSL certificate with a single click.
- Import Certificate: Upload and install a commercial (paid) SSL certificate.
- SSL Info: View details of the currently installed SSL certificate, including validity and type information.
Staging
All your staging sites are listed here. You can create and merge Staging sites with a few clicks.
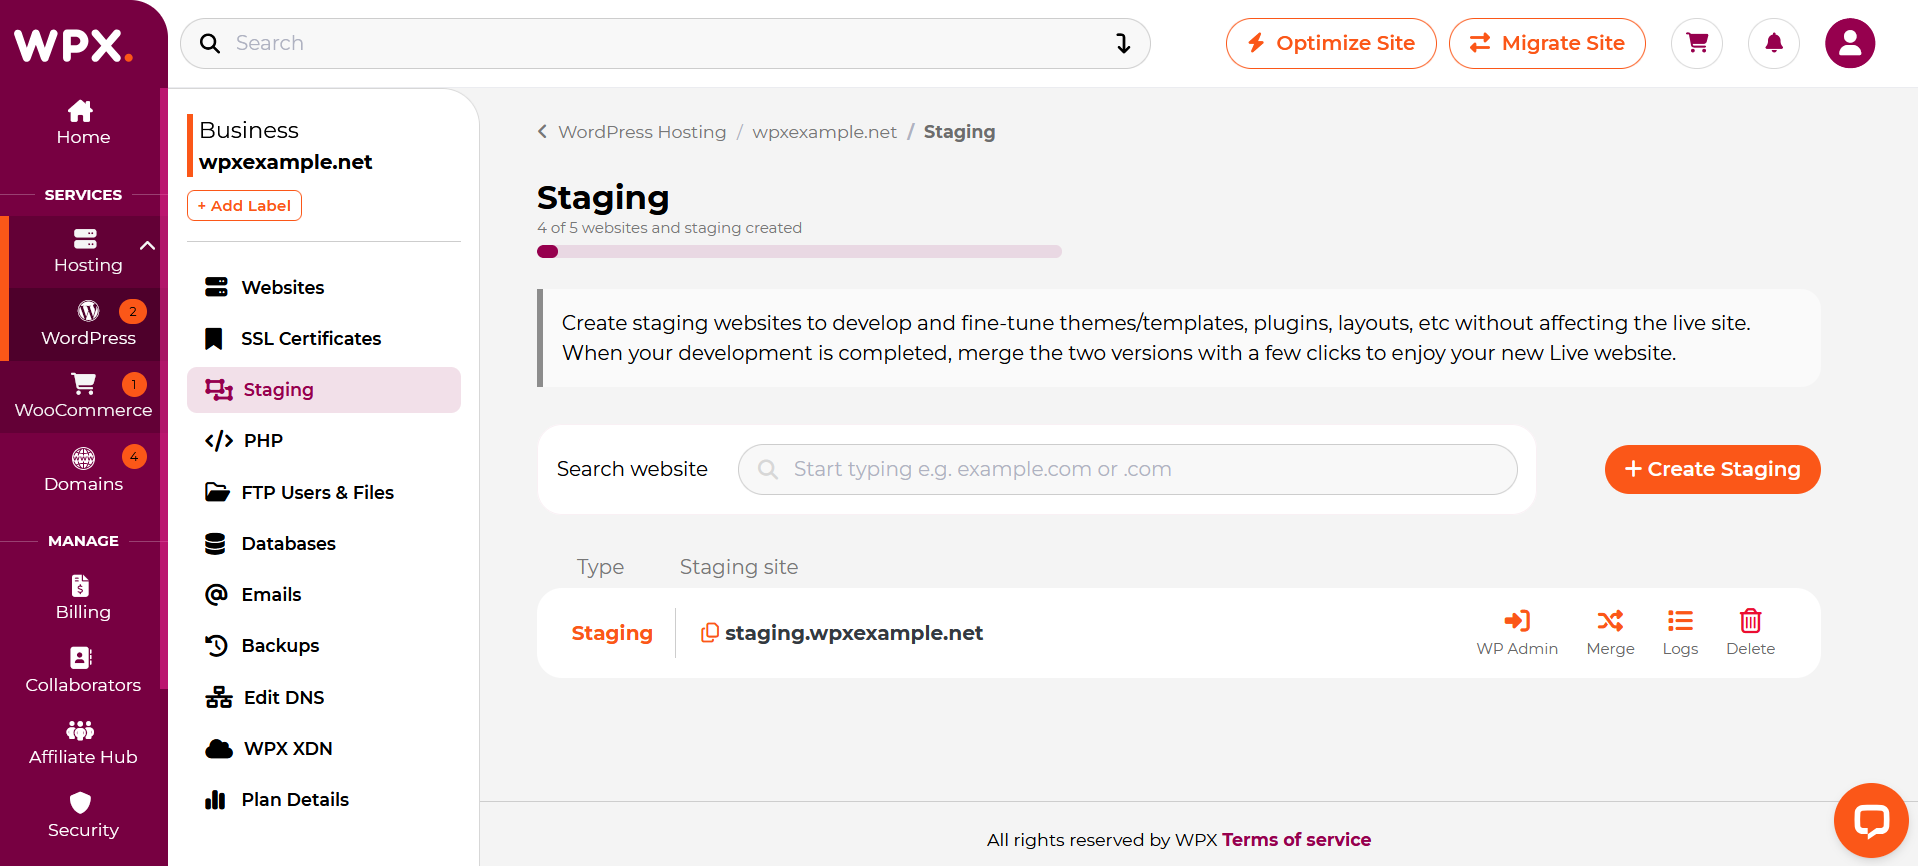
You’ll find easy action buttons next to each staging site.

- WP-Admin: Quickly access the WordPress Admin Dashboard (uses the same login as the live website.
- Merge: Apply staging changes to your Live website.
- Logs: View detailed Error Logs and Access Logs specific to the site.PHP
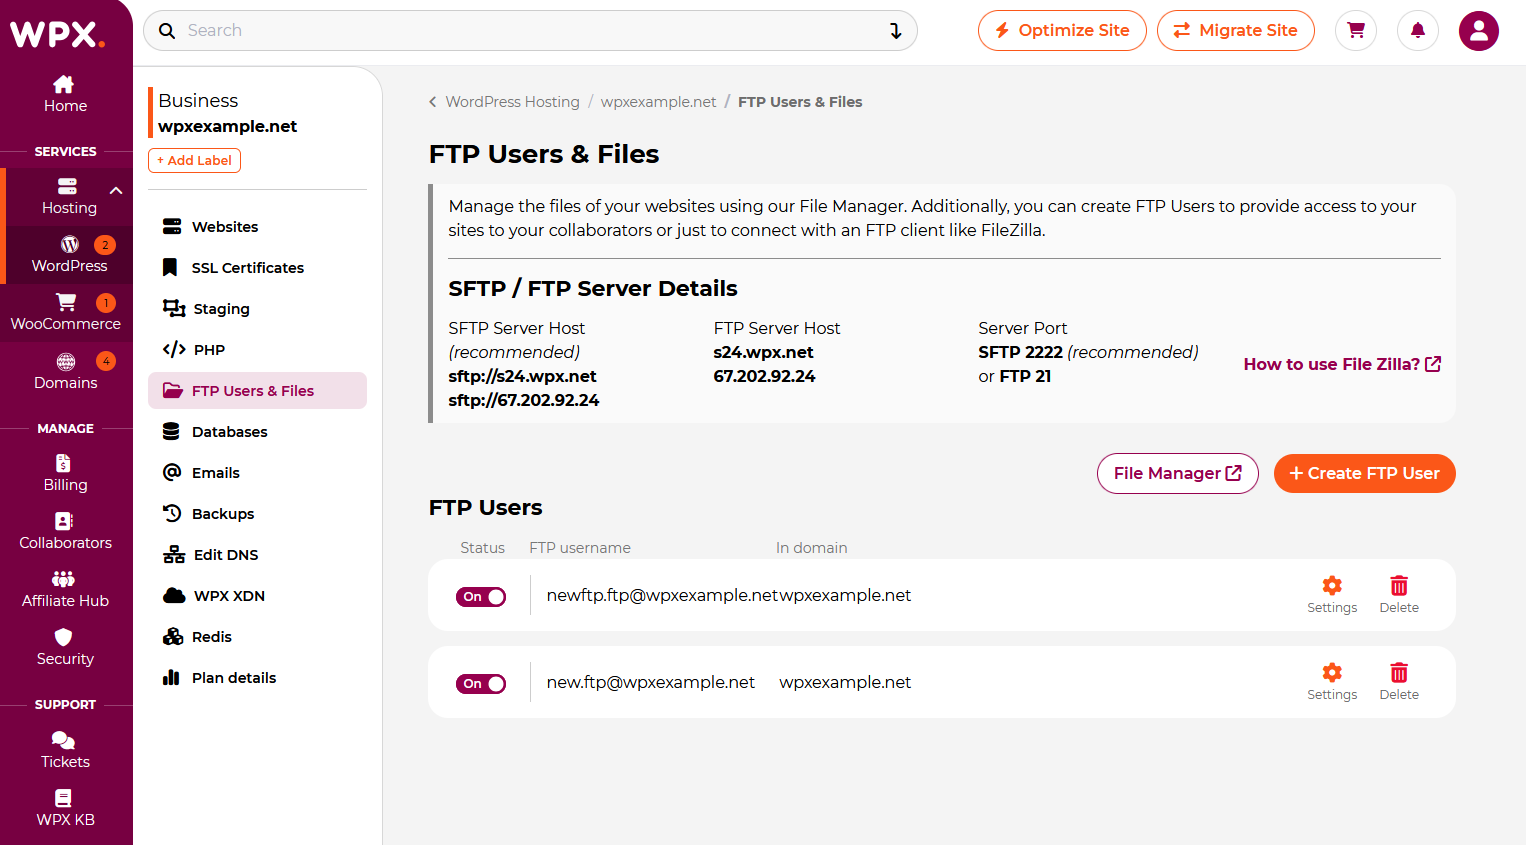
FTP Users & Files
Manage your site’s files and FTP access with ease.
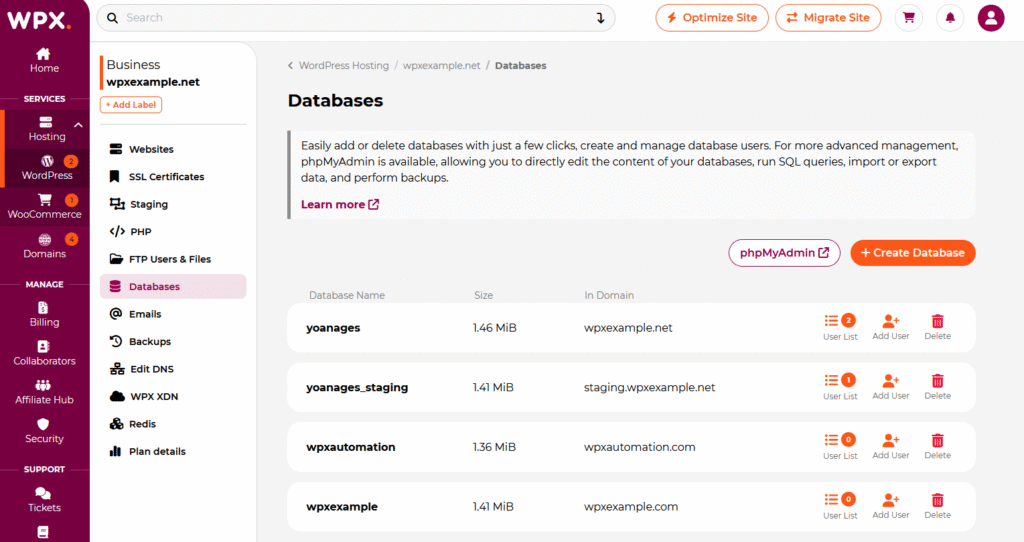
Databases menu
Manage everything related to MySQL databases.
- Database Users – Create, edit, or delete users.
- Databases – Add or remove databases.
- PHPMyAdmin – Access and manage database contents.
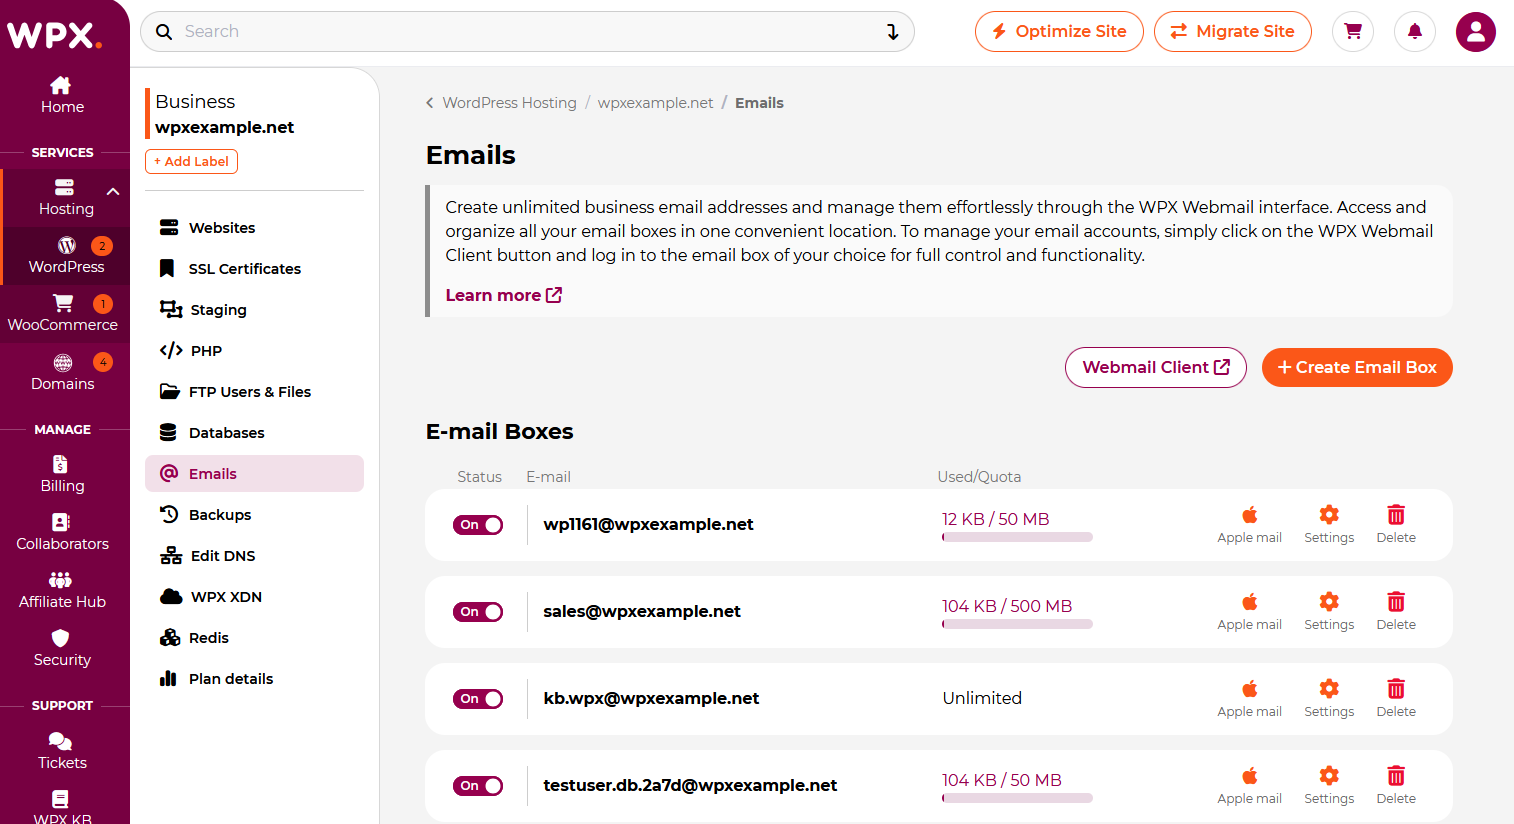
Emails
Easily set up and manage email accounts hosted with WPX.
- Create unlimited Email Boxes
- Set up forwards, aliases, limits, and more
- Access WPX Webmail directly from the dashboard
- Download the configuration for Apple Mail setup
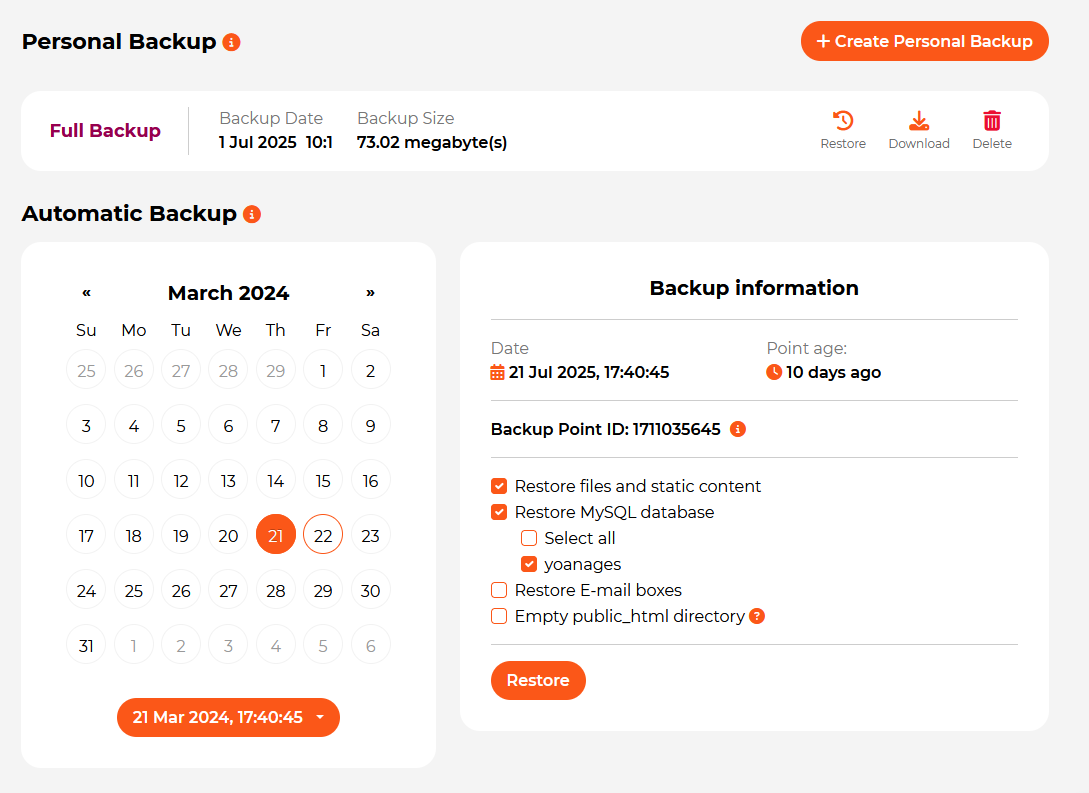
Backups
In the Backups section, you will find all the available options for Backup and Restore of your sites and other valuable content.
Select your website to view backup options:

Once selected, you will find two sections:
- Personal Backup – Manually create, restore, download, or delete backups (available for 24 hours).
- Automatic Backup – Daily backups managed by WPX (restoration only).
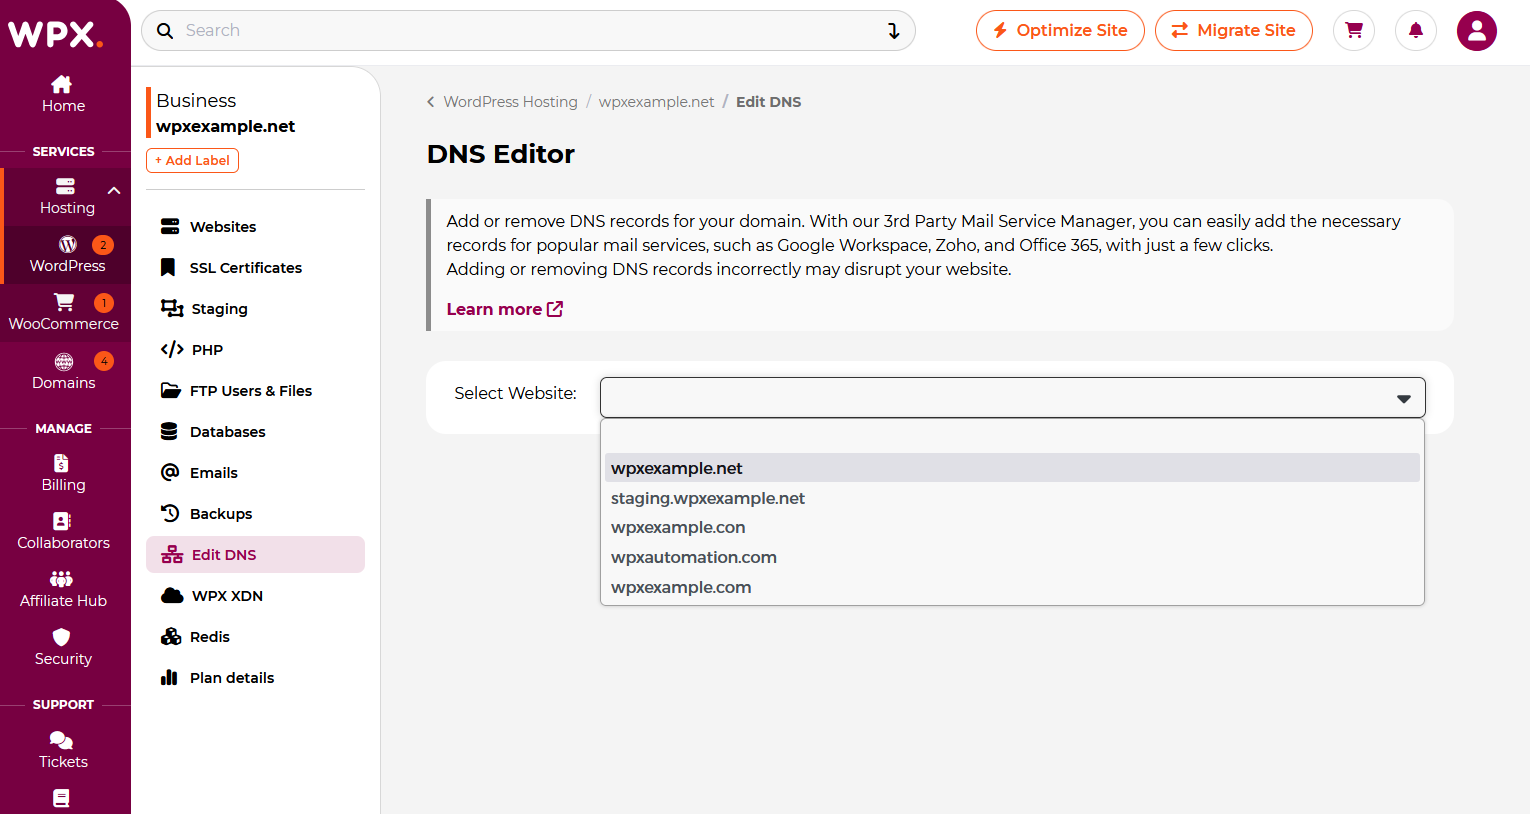
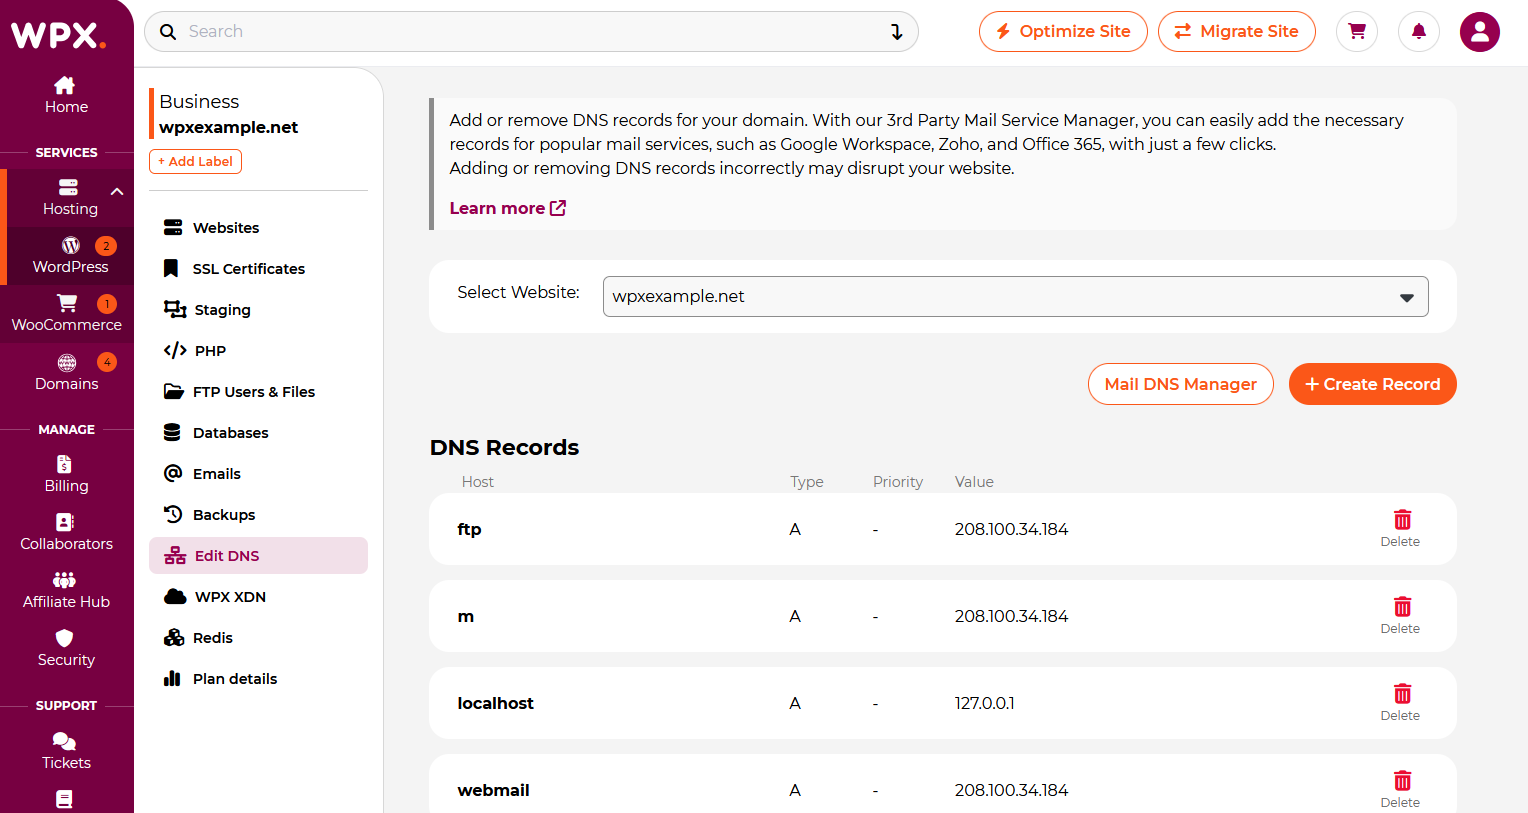
Edit DNS
Manage DNS zones with ease, including support for third-party mail services.
- DNS Records – Add/remove A, CNAME, MX, TXT records, and more.
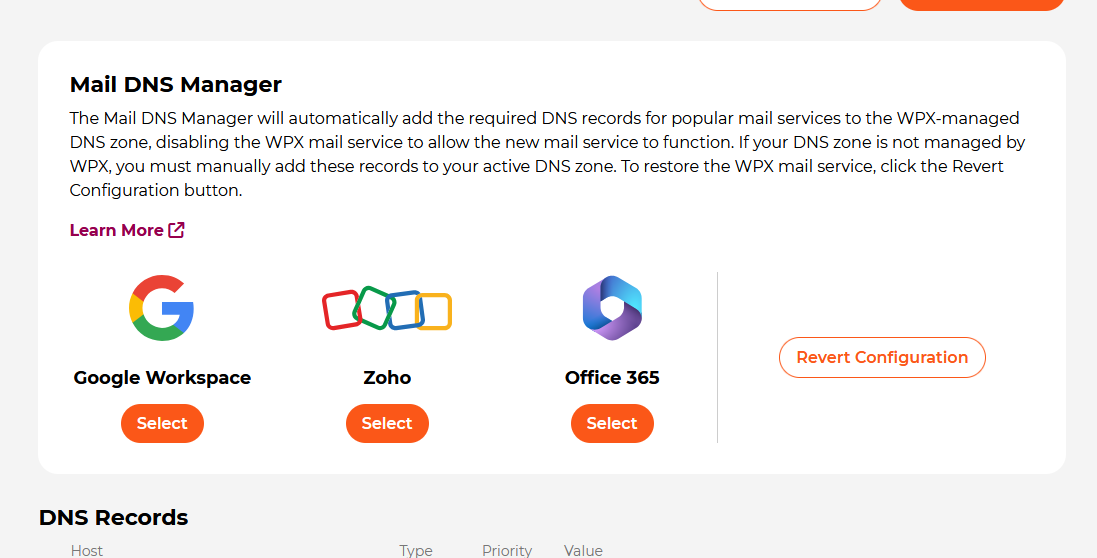
- Mail DNS Manager – Automatically configure DNS settings for:
- Google Workspace
- Zoho Mail
- Office 365
DNS Records – WPX preconfigured DNS zone is automatically created when you add a site to your hosting plan. All you need to do is point your domain to WPX. You can add and remove DNS records easily.
Mail DNS Manager – The Mail DNS Manager will automatically add the required DNS records for popular mail services to the WPX-managed DNS zone, disabling the WPX mail service to allow the new mail service to function. If your DNS zone is not managed by WPX, you must manually add these records to your active DNS zone. To restore the WPX mail service, click the Revert Configuration button.
WPX XDN
Control your site’s performance with WPX XDN — our custom content delivery network.
- Enable/Disable XDN for any hosted site
- Clear XDN Cache as needed for instant content updates

Redis
For WooCommerce plans, enable Redis for enhanced database caching and faster load times.

Plan Details
In the Plan Details section, you can upgrade or downgrade your Hosting Plan. Other Billing options available here are: change billing cycle or send a cancellation request for the selected hosting plan.

You can also find:
- Server information – origin Server IP & Nameservers
- XDN IP Addresses
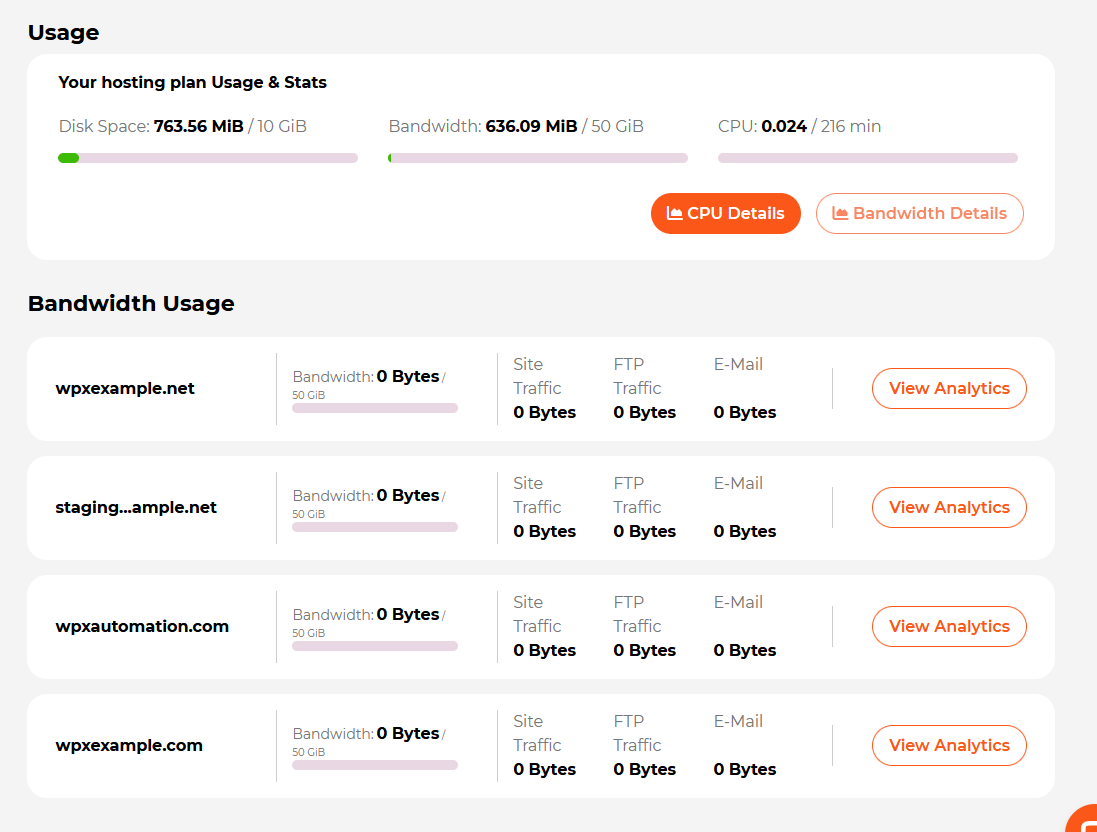
- Usage – CPU and Bandwidth usage for that hosting plan.

Stuck at any point? Don’t worry, just click the live chat widget in the bottom-right, and one of our support agents will assist you in under 30 seconds.