One feature that is typical for the WordPress / WooCommerce ecosystem is the rapid speed of development. The community is very prolific and its members create a lot of updates every single day. Some of them bring new and improved features; others address important security issues.
The constant need to apply a fast-flowing stream of updates will quickly turn into a chore even for the most strong-willed WordPress website administrator. One might be tempted to ignore updates or apply them infrequently, but this is very unwise.
While it might be OK to delay functional updates, security patches must be applied as soon as published in order to minimize the risk of an automated or targeted hacking attack.
Fortunately, many tools make the task of keeping your WordPress websites updated easier and quicker. In this column, I will talk about my tool of choice to manage those updates.
Even if you are responsible for a single WordPress website by the time you read this column, I strongly recommend that you get familiar with this kind of tool.
I promise that each of them will help you save time and effort even when managing a single WordPress website. And as soon as you become comfortable with this way of working, you will find it very easy to increase the number of WordPress websites you manage by a factor of 10× or 100× without breaking a sweat.
WordPress Remote Maintenance Tools — What Do They Do?
When thinking about remote maintenance of WordPress websites, one can have different tasks jobs in mind. Taking care of updates is obviously an important one (and the subject of this column). But there are other management-related tasks that can also be performed remotely from a single dashboard in order to amplify one’s productivity.
Among these tasks are handling of backups, uptime and performance monitoring, intrusion/hacking monitoring and recovery, and additional features such as WAF (web application firewalls) or even virtual patching (the ability to apply restraints over incoming traffic in order to ensure protection a specific kind of exploit for which there isn’t an actual code patch from the maker of the compromised software module).
That is why it is only natural that many tools that started as remote update tools eventually evolved and branched out to offer other kinds of management services. Over the last decade, I have tested multiple remote management tools and I have planned a separate article that discusses a few of them that are worth checking out.
However, preventive care alone — as in keeping your WordPress websites always up to date and patched to the latest version available — will easily put you in the top 5% of WordPress users in terms of safety against hacking and other calamities.
In this column, I will show you how to set up the self-hosted version of InfiniteWP — the tool that I successfully used for this purpose since 2015 on all WordPress websites that I own and manage on behalf of my clients. Once you see how easy it is to operate, I hope to convince you to start using it yourself.
InfiniteWP: Functions and Features
InfiniteWP is the product of an Indian company called Revmakx. It has two different versions: for single users and for enterprise environments, and also comes in two varieties — self-hosted and SaaS (accessible via web dashboard).
The self-hosted version, which is the one I am using, can be deployed on any web server that you own or manage, either as a separate vhost or under a separate folder of an existing vhost.
InfiniteWP provides the following remote functionality:
- monitoring for and applying updates;
- enable/disable/install/uninstall plugins and themes;
- publish new post;
- single-click admin login;
- enable/disable maintenance mode;
- manual local backups (files/db/both);
- obtain server/folder information (OS type and version, PHP version and settings)
The premium version — which I will not cover in this column — adds many powerful functions such as:
- Deployment, cloning, and migration of websites
- User management
- Comments management
- Malware and vulnerability scanning (WordFence, iThemes Security)
- Uptime/Google PSI monitoring
- Client reporting
- Support for 3rd party backup tools (WP Time Capsule)
InfiniteWP offers the premium features pack in tiers (up to 10/20/50 sites or unlimited) as annual subscriptions. I find the pricing very reasonable in terms of cost per managed website. I am not using these extra services though — the free, self-hosted tier is what I use to run my updates, and I employ other tools to take care of security, backups, and so on.
InfiniteWP Self-Hosted Installation in WPX
The InfiniteWP management dashboard can be installed either as a plugin for WordPress (which is very easy and requires no technical skills) or as a standalone web application under its own domain/sub-domain/folder.
I don’t like the idea of repurposing a WordPress website for this and prefer to install InfiniteWP as a standalone application. However, it is not necessary to dedicate a specific domain/sub-domain to it; the app will happily reside inside a folder within an existing website structure.
I think this will make users on the WPX Business Hosting plan particularly happy, as InfiniteWP can be installed in such a way that it doesn’t count towards the (limited) number of websites that the plan accommodates.
To install InfiniteWP, I need to do the following:
- Download the installation files and extract them into the target folder
- Create a database
- Perform the actual installation process
- Secure user access
- Obtain SMTP credentials for good email delivery
- Configure a cron job
- Add one or more websites to monitor and update
I will go through all the steps from within the WPX client area. For other users hosted elsewhere — your mileage may be wary, but if your hosting company runs cPanel, InfiniteWP has a version intended for deployment in that environment. If not, then you can still follow my instructions but adapt to the specifics of the different tasks (e.g. uploading the software, creating a database, etc.).
Downloading InfiniteWP
The InfiniteWP website includes a very well-documented procedure for installing the IWP Admin Panel: https://new.infinitewp.com/install-options/
For this tutorial, I will be using the optimizerable.com website and will install InfiniteWP under optimizerable.com/iwp. This means I will need to go to my WPX Client Area and open Filemin.

Note: Because optimizerable.com is the primary domain for my WPX hosting account, its webroot is located at public_html. The webroot for an additional domain will be under domains/(sub)domain/public_html. Ask your friendly WPX Support Agent if unsure.
Quite annoyingly, when I upload the IWP admin panel archive into the new folder and select ‘Decompress’, it will create another folder inside it. So now I need to delete the .zip file, enter the new folder, select everything, and do a cut to the clipboard, then go back up to the /iwp folder and paste the files there. Oh well. At least the WPX File Manager does support cut and paste for files 🙂 Almost done.

Create a Database for IWP
Before I go any further, I have to create a database for InfiniteWP so that it can store data about the websites it is going to manage in the future. That is why my next stop is WPX Client Area ➡ Manage Databases ➡ Add Database:

After the database has been created, I need to take note of its name, and assign a user to it:

I type a name for the database user and generate a nice 24-character password and click on ‘Add New User’. What happens next is IMPORTANT.
For security reasons, WPX will not directly accept the username you type. It will take your input and add some randomness to it by adding some symbols. After you press the ‘Add New User’ button, watch for the annoyingly tiny confirmation screen that says User whateveryoutype.db.638b43 created successfully. This is NOT the name you will need for the installation.

After you close that tiny notification, click on the orange button called ‘List Database(s)’ next to the newly created database for InfiniteWP. It will show you the username(s) of all users that have permissions to operate a specific database.
Notice anything different about the database user?

The WPX database manager script has silently added a couple of extra characters to the username it just showed you! Now, THIS is finally the username for your new database.
I have reported this bug to the WPX dev team and hopefully they will fix it soon (I will update the article if/when that happens). But if you’re putting the username without the @ symbol and the one or more characters that come behind it and get an error during installation, this is the reason.
Sorry about that.
Anyway: I am done here, and can now finish deployment. I type the full URL to my InfiniteWP folder in a browser window and begin installation. The process is very well documented at https://new.infinitewp.com/install-options/ under ‘Do it Yourself – Manual Installation’. No need to repeat all of that here, but I do need to explain one thing which is not 100% clear.
During the final steps of the installation, you are first asked to create login credentials for your InfiniteWP installation, and then to create a separate account with infinitewp.com. Why is it needed?
Customer Account with InfiniteWP.com
Nowhere during the install process is there a clear explanation as to why you need to have an account with InfiniteWP. The reason is simple: even though you are self-hosting your InfiniteWP installation, you can still take advantage of the premium add-ons which the developer offers. And in order to do that, you will need to create a subscription from the InfiniteWP customer area, and then link that subscription to your InfiniteWP self-hosted solution. This is why you need that InfiniteWP.com customer account.
I suggest that you stick to the free version for a couple of weeks or months, until you get a feeling for the product and start getting comfortable with it. I am not suggesting you should ignore the premium features, but only that you do not rush into buying a subscription.
All of that being said, there are two ways to buy InfiniteWP add-ons, and you must be careful which one you choose in order not to overspend.
The first method is the older method — it was the only way to get those in the first 5 years since InfiniteWP launched. You would select a specific add-on and purchase a subscription for it; that would unlock the features for ALL websites you manage from the same account. If you wanted to have all add-ons, you’d need to shell out a couple of thousand USD every year (which nobody did, of course).
This method is no longer listed on the InfiniteWP website and was officially discontinued at least 5 years ago, yet is still accessible via the self-hosted dashboard itself, and is prominently visible during your first login. It is expensive. Just ignore it.
The present pricing model for InfiniteWP allows access to all add-ons, and pricing is dependent on the number of websites under the user’s management. This is a much better deal that is worth taking advantage of, in case one needs it. But as I said, no need to think about spending money right now. Let’s configure InfiniteWP and study its free functions. I have so much to show you yet.
InfiniteWP Dashboard: A Tour
Upon installation, InfiniteWP puts you into the older, version 2 interface, which was the default until 2018 or thereabouts. These days, it is no longer developed, but it is still supported with bug fixes and such. Having spent ample time in both the V2 and V3 interfacese, I strongly urge you not to bother with V2 at all: it is much less convenient than the newer version 3.
All of that being said, it is possible to deploy InfiniteWP from an installation archive you just downloaded, and still have to update it further. It happens sometimes, and it happened to me while I was installing the version while writing this tutorial. So here is what I did.
I first selected the IWP Update Centre and pressed ‘Update now’. All updates to the control panel look like this following a successful update. Do not forget to press the ‘Reload App’ button to make sure your browser is refreshed with the latest version of the program code.

After I was done with updating the V2 GUI, I switched to the V3 interface using the V3 link to the right hand side of the notification bell. It too signalled it needed an update:

I again pressed ‘Reload App’ and was greeted with a new screen, which loaded the Version 3 GUI but required one more update. Oh well 🙂

After pressing ‘Update Now’ for the last time, I finally arrived in the main area of the InfiniteWP dashboard. It is divided into 3 parts:
?? The column to the left contains a list of all sites you have added for management. It can be hidden by clicking onto the small tab in the lower right corner:

?? The main area lists websites that have updates to the WordPress Core (represented by the W logo), plugins (the yellow plug), themes (the violet paintbrush) and translations (the dual language icon). Above them is a powerful filtering toolbar which allows you to change this view and sort the list based on which plugin, theme or translation file needs updating.
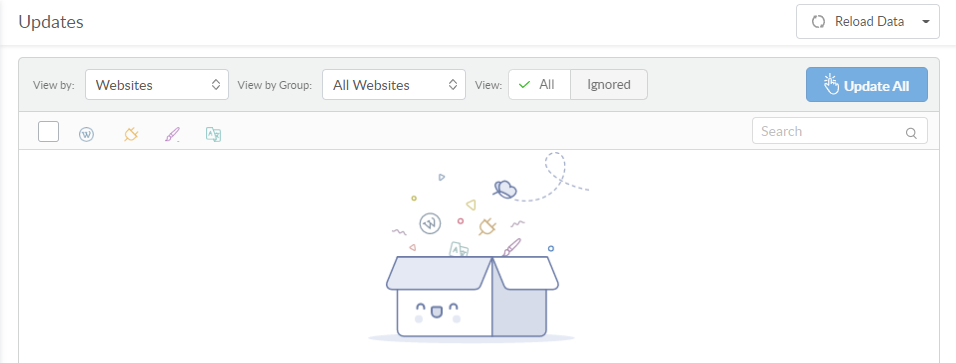
Because you can create site groups, you can also choose to select a specific group (for example, dev/staging websites) and apply operations selectively.
?? In the bottom right corner is the Process Queue button which indicates via animation when something is happening, for example when you update the information about the websites or apply updates:

The Process Queue is a very powerful tool because it keeps track of each and every operation performed on any website. What is more important, this information does not go away when you close that window; it is kept inside the Activity Log which can be opened from the icon in the top right corner of the above screenshot, or from the horizontal navigation menu.
The Activity Log is extremely helpful in situations where you need to identify which particular update broke a website (or caused another issue). This log is your best friend.
?? The last major part of the interface is the toolbar: a set of icons in the upper right part of the horizontal menu:

Here is what each of them does:
The Megaphone icon indicates when there is new information about the InfiniteWP service, the latest update versions, etc.
The two-arrow icon next to it is used to switch back to the Version 2 GUI. No matter how many times I tell you to ignore it, I know you will click on it at least once. When the app switches to the older interface, use the ‘Switch to v3’ link in the navigation to come back to V3 and proceed with our walkaboutл
The third icon reports the curent version of the panel and allows you to check for updates. If there is an update, a red dot will appear there (I have provided a screenshot for this). Because InfiniteWP is a mature product, updates are relatively rare (let’s say once every couple of months).
The icon with the building blocks takes you to the InfiniteWP catalog of premium addons.
The gearwheel is where we will go next from here; it opens the settings panel which control the way your InfiniteWP instance operates.
The last icon with the tiny WPX logo leads to your InfiniteWP instance profile. From here you can change your login credentials. It doesn’t necessarily need to be a WPX logo; the tool uses Gravatar to pull icons for known email addresses and I set mine like this because… it looks awesome 🙂
InfiniteWP Dashboard: Configuration
Before I begin adding websites to InfiniteWP, I first need to spend some time configuring and securing this new instance. This process includes the following tasks:
?? Secure the InfiniteWP instance itself
?? Configure the instance to send emails reliably
?? Set up email notifications
?? Set up a cron job
Securing Dashboard Access
The InfiniteWP dashboard is a gateway for every website you connect to it. A hacker would probably describe it as a giant backdoor. From here, you can enable/disable maintenance mode, publish a new blog post or access the admin panel without login. That is why it is imperative that you protect this panel from unauthorized access as best as you can.
InfiniteWP allows you several ways to restrict access to the dashboard:
?? Allow specific IP addresses only
This is a good thing to have, but only if you have at least a couple of static IP addresses that you can use. There is a procedure to remove this restriction which requires access to the database via 3rd party tool such as Adminer.
I have written previously how you can user Adminer in my “Breaking and Entering WordPress” article (https://wpx.net/blog/restore-admin-access-wordpress/)
?? Enable server level authentication
You can configure InfiniteWP to create a .htaccess/.htpasswd file combination that restricts access to the application directory on browser level (i.e. before serving any m and requres a username/password to let users in.
?? Enable Two-Factor Authentication (2FA)
This is the most flexible of the three options. It works by asking for a random numeric code, which it sends via email to the account owner. This way, even if your password leaks, you are still partially protected (unless, of course, your attacked has access to your email as well). I strongly recommend you to enable 2FA.
Configuring SMTP
One of my first articles for the WPX Blog was about the importance of having reliable email delivery. If you read this article and follow the instructions inside, you will know how to generate a new set of credentials for InfiniteWP.
Activate the ‘Use SMTP to send email’ toggle and plug the details there to ensure maximum deliverability. Here is how I have configured email delivery for my instance (note: I am using the UK datacenter; mail server settings will be different for the US and AU datacenters).

Don’t forget to send a test email! The ability to send emails is crucial for both letting you know when there are new updates to review and install, and when you have activated 2FA. Success is confirmed via green message popup in the upper right corner of the screen that says ‘E-Mail Sent Successfully’.
Activating Notifications
After I configured SMTP, I went back to my ‘Account’ and activated all notifications about updates. I selected to be emailed every day.

Creating a Cron Job
This one is crucially important. Without a working cron job, the application will not be able to regularly check for updates and send notification emails. InfiniteWP will automatically generate the command in the format required for insertion into the server cron table:
php -q /home/{linuxuser}/public_html/iwp/v3/cron.php >/dev/null 2>&1This cron job should run every 20 minutes by default; however if you regularly run multi-threaded backups, you should lower this to 5 minutes.
WPX.net customers can’t add cron jobs from the client area. They need to can ask the friendly WPX.net support staff to do it for them by sending a ticket or via the live messenger.
Note: as per WPX.net standard policy, custom cron jobs are added at the time they receive the request. Meaning that if you send a request at 13 minutes past the hour, your cron task will be set to execute at the hour+13 minutes, at the hour+33 minutes and at the hour+53 minutes. If you want a different schedule, you need to specifically request it.
In my case, I managed to confuse InfiniteWP. Several minutes after the WPX.net support agent added the job, I also called it from a browser using the external task name. Now my instance thinks the task runs every 4 minutes (it will recover soon):

With other hosts you can do the same (ask support to save your cron task) or use the facilities of the control panel, if you have any.
If your host does not allow custom cron jobs, you can use the EasyCron service. InfiniteWP will not create an URL for calling the cron job externally, but you can do that yourself using the local cron task as base:
php -q /home/{linuxuser}/public_html/iwp/v3/cron.php >/dev/null 2>&1becomes
https://www.example.com/iwp/v3/cron.php
Other Settings
After configuring app security, email sending and the cron job, I am almost done. The InfiniteWP app has a couple of extra settings that do not have ‘correct’ values but may need to be tweaked.
There are three connectivity parameters:
1. How many requests the service can issue per monitored server (Max simultaneous read / write requests per IP). Some servers will block more than a certain number of requests coming from another network address over a brief period of time. If you connect a website to InfiniteWP and get frequent connection timeouts, try reducing the number of requests.
2. How many requests the service can issue at the same time (Max simultaneous requests from this server). This one limits the number of outgoing requests that originate from the server which hosts InfiniteWP. If you need to manage more websites, a higher number of connections will allow faster syncrhonization, but you might get blocked, depending on your hosting’s policies.
3. What delay to add between sequential requests towards websites located on the same web server (Time delay between requests to websites on the same IP). This setting is necessary when there is a nervous WAF (web application firewall) sitting on the other end of the connection. If it frequently blocks requests to some monitored website or the other, try to increase the delay between the requests.
InfiniteWP: Adding Our First Site
Finally, after configuring the InfiniteWP dashboard, I am ready to add a website to monitor. This website is — of course — the very same website where I hosted my InfiniteWP instance.
Adding a website to InfiniteWP in GUI version 3 is a breeze. I only need to install the client plugin on the target website, activate it and copy/paste some data into my InfiniteWP instance. Let’s do this…
Downloading the InfiniteWP Client Plugin
The InfiniteWP client plugin is available in the WordPress.org plugin repository and can be installed from within WordPress. I go to Plugins ➡ Add New and search for ‘InfiniteWP Client’. The first result I am getting is the correct one:

Note: Always make sure you’re pulling the right plugin from the repository. Always check the number of active installations. Because InfiniteWP is so popular, imitations are always possible.
Activating the InfiniteWP Client Plugin and Adding the Website
When you activate the plugin for the first time, it generates a block of information that you can either copy line by line, or click on the green ‘Copy details’ button to store everything in your clipboard as a specially formatted text object.
I go back to my InfiniteWP instance and click on the + Add Site button in the lower left corner of the screen. While the cursor is within any of the first 4 fields, I press Ctrl+V to paste the data copied at the previous step. It gets filled automatically across the 4 fields.
I leave Folder Protection empty, because I have not enabled server level access protection. I then scroll down past Advanced, because there is one more important bit of info that might need to be provided here.
The important field is ‘Website IP’ at the very bottom. I go back to my WPX.net Client Area, click on ‘Manage Service’ and open the ‘Service Details’ panel. From there, I select the ‘Server IP Address’ (not any of the two IPs listed under ‘Cloud IP Address’). I go back to my InfiniteWP instance, I paste that IP address and press the ‘Add Website’ button.
Why did I have to do this last bit?
The thing is, most websites nowadays — WPX included — use some sort of CDN. Had I left the ‘Website IP’ field empty, InfiniteWP would look it up using the website URL. But if the WPX CDN is active, this means that InfiniteWP will be contacting a different caching server every time. Having a CDN is a boon for customer-facing performance, but a total drag in the other direction.
By supplying the website IP along with the website URL, I make it possible for InfiniteWP to connect directly to the origin IP address and pass the website URL in the request, so that the origin server can process it. This kind of communication guarantess fastest possible communication speed between the website managed by InfiniteWP and the service itself.
This looks like a good time to pat myself on the back: my website is added, and I can even see that I have some modules that require updating (one needs to click on the line with the site name to make InfiniteWP show the available updates.

In case there is more than one update, or more than one website that has update(s), I can:
- Select all — by ticking the large checkbox at the top of the list (alternatively, just press the blue ‘Update All’ button in the top right corner)
- Select a single website — by ticking the checkbox next to the website name
- Select one or more kinds of updates (core/plugins/themes/translations) — by ticking the checkbox next to each component.
Selecting Which Updates to Install
The GUI will make much more sense with another example from a different InfiniteWP instance which I use to manage multiple real-world websites:

Observe how whenever there is more than one core, plugin or theme update, InfiniteWP will display a Select: All, Invert, None command next to each category to make my selection task easier.
Making Sure Updates Are Applied
When I initiate the update process, an animated icon next to the ‘Process Queue’ in the bottom right corner begins to spin. When the animation stop, the list of updates on top refreshes. If everything was selected for updating, it should be empty. If a module that I expected to update is still there, this means something did not go as planned. Time to check the Process Queue!

Every line in the Process Queue list is clickable. Successful operations are indicated with a green tick (✔) followed by a number of fulfilled tasks. Failed operations are indicated with a red exclamation mark (❗). When you hover over a failed entry, you can select to re-execute a failed operation:

You can either retry the operation, view the site response in human readable form, or receive the detailed output from the cURL command which InfiniteWP uses internally to communicate with the localy installed module in each client websites.
Other Stuff to Do Remotely
Apart from updating a website remotely, InfiniteWP can do other useful things as well. When you hover over an entry in the Site List on the left, the following menu appears:

From here you can do a lot of things, such as:
?? Show a quick view of site status (WordPress core version; number and state of plugins and themes; updates, if any)
?? Store links and notes for future use (these will be visible only to you)
?? Open the website front end (View Site)
?? Write New Post (opens the WP admin dashboard with a new post template already loaded)
?? Open Admin in New Tab (opens the WP admin dashboard home screen)
?? Create or Restore a Backup (this one requires a separate column of its own)
?? Refresh website status and update status of plugins needing update, etc.
?? Put site in and out of Maintenance Mode (you can edit the HTML and text content of the ‘Under Maintenance’ page which will be shown during Maintenance.)
?? Check server configuration: this one can be really helpful in checking server configuration, availability of required PHP modules, read/write permissions and so on.
?? Remove website (from the current InfiniteWP management console, not altogether…)
InfiniteWP Quirks & Limitations
Although InfiniteWP works great, sometimes (rarely) you may find that a website gets disconnected without you doing anything. A disconnected website will show up in red in the site list, like in this example screenshot:

Sometimes it will be sufficient to select the website in the list and click on ‘Re-connect’ from the context menu. If this doesn’t work, you need to remove the site and re-add it. Re-adding a website requires you to go back to the WordPress site itself and disable/enable the InfiniteWP Client plugin. This will regenerate the connection details and the encryption key which is used to connect the website securely with the InfiniteWP dashboard.
A secondary issue related to this is that if there is a disconnected website by the time InfiniteWP prepares a notification email, the list will break at that point in the email and you will not be able to see if there are other sites that need updating.

It is worth mentioning that neither of these issues has lasting effects on the functionality of the application itself.
Recap
In this guide, I showed you how to install, configure and use InfiniteWP: a powerful tool for remote management of multiple WordPress instances from a single control panel.
Probably more than 95% of your work as a website administrator is done when you update your websites quickly and often. If you want to be good at your job, you must apply patches and updates religiously.
But everybody has their limits. How many websites can you manage at once before you become feeling overwhelmed?
Thankfully, using a single panel application means you don’t have to find the answer to this question. Managing updates from one place means that you can easily take care of dozens or hundreds of WordPress sites without breaking a sweat.
The reason is that you have managed to change this task from proactive (you need to remember to check every website for updates) to reactive (you get notified as soon as there are updates for any website and just need to review & apply these updates).