This step-by-step guide will show you how to install a free Let’s Encrypt SSL certificate on your website through the WPX Control Panel.
Step 1. Log in to your WPX account
Begin by logging into your WPX account. You can do this by visiting the WPX login page.
Step 2. Go to Control Panel
Once logged in:
- Locate your hosting plan in the WPX client area.
- Click the Control Panel button next to the plan you wish to manage.

Step 3. Install an SSL certificate
Inside the Control Panel:
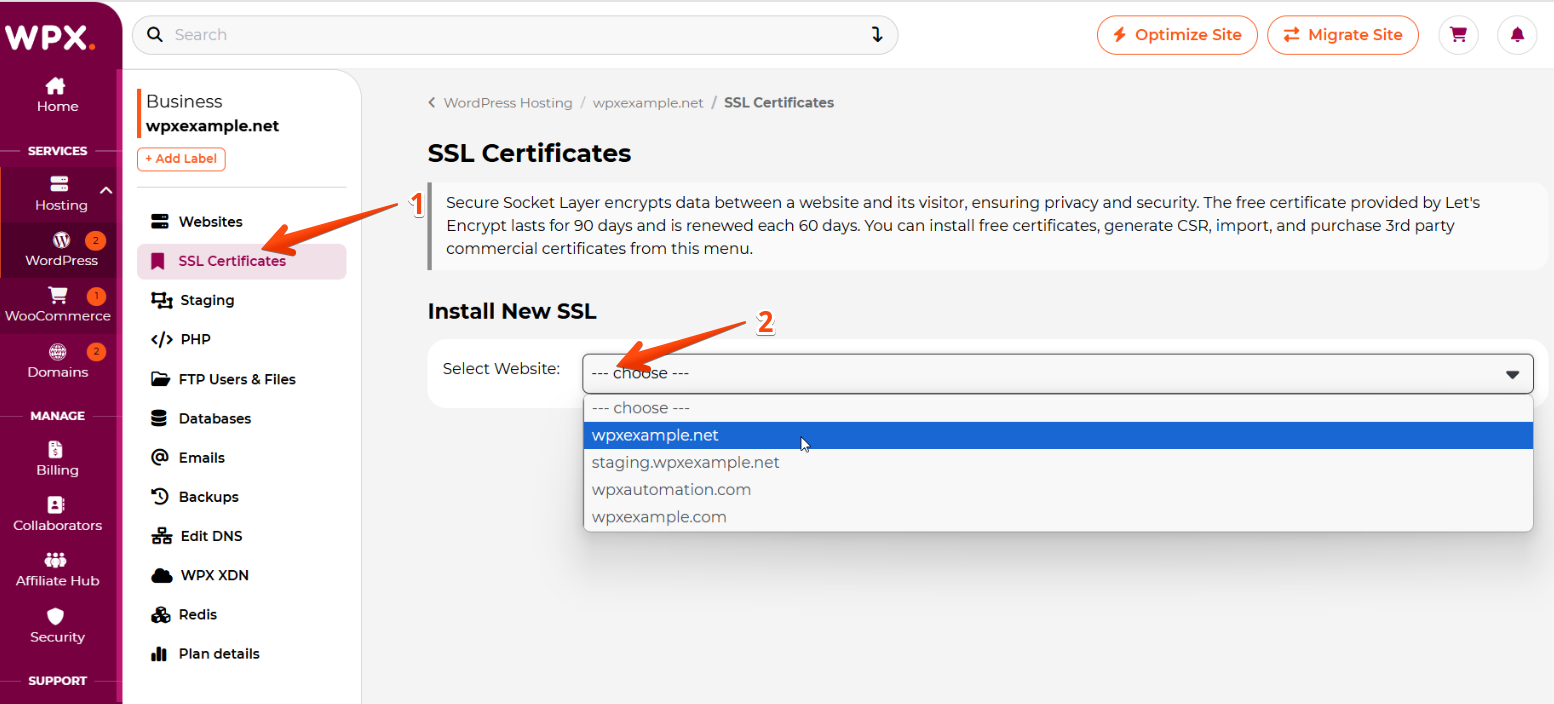
- Click on the SSL Certificates section.
- Select your website from the dropdown menu.

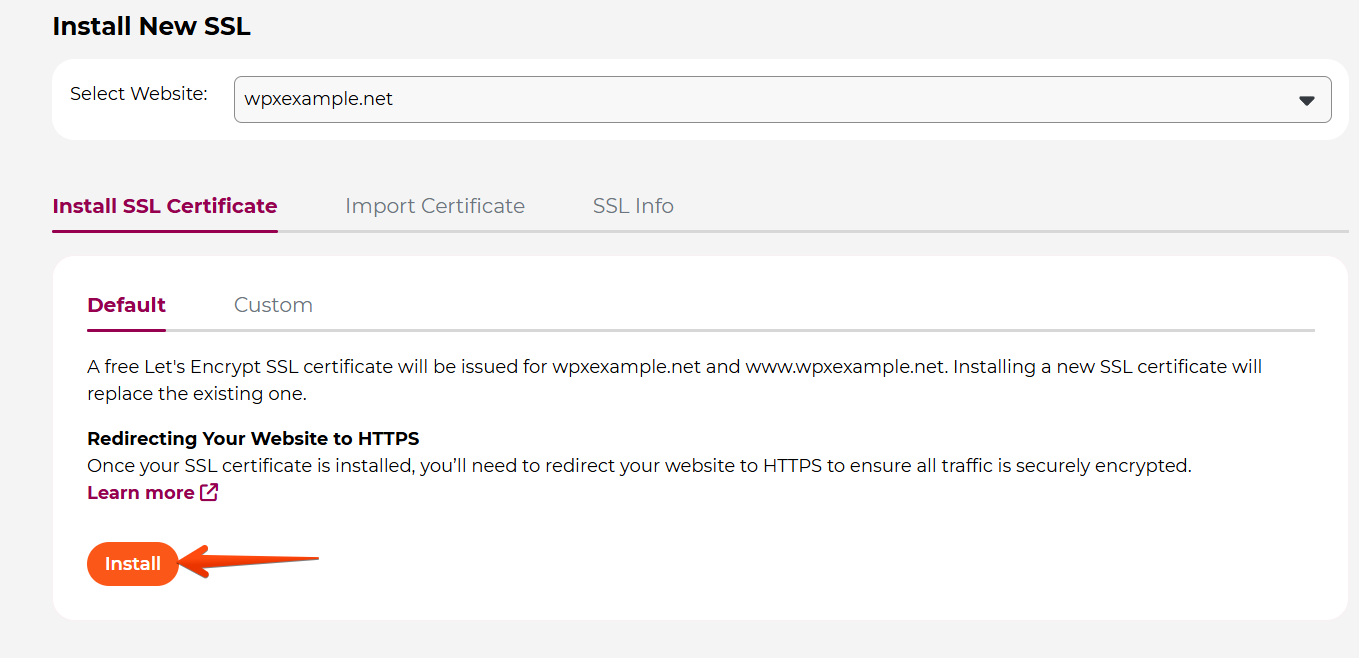
Click the Install SSL Certificate button.

WPX will automatically initiate the SSL installation process. Once completed, you’ll see a notification in the top-right corner confirming the successful installation.
Step 4: (Optional) Configure HTTPS
Fixing Mixed Content Issues
After installing your SSL certificate, your site may still load some resources over HTTP. This is called Mixed Content and can cause browser security warnings.
To resolve this:
- Install and activate the Really Simple SSL plugin in WordPress.
- The plugin will automatically configure your site to load content securely over HTTPS.
A detailed guide on enabling HTTPS can be found here
Using Cloudflare?
f you’re using Cloudflare with your website, make sure you’ve correctly configured SSL there as well. You can follow our dedicated guide:
Stuck at any point? Don’t worry, just click the live chat widget in the bottom-right, and one of our support agents will assist you in under 30 seconds.