If you’re not using WPX name servers (NS records) but still want to use WPX XDN (our Content Delivery Network) for your site, this guide will show you how to do it.
You can enable WPX XDN simply by pointing your domain’s A records to specific WPX IP addresses, without changing your NS records.
Step 1. Log in to your WPX account
Begin by logging into your WPX account. You can do this by visiting the WPX login page.
Step 2. Go to Control Panel
Once logged in:
- Locate your hosting plan in the WPX client area.
- Click the Control Panel button next to the plan you wish to manage.

Step 3: Open the WPX XDN Menu
Inside the Control Panel:
- Select the WPX XDN menu.
- Here, you’ll see all websites eligible to use WPX XDN.
- The Status column indicates whether WPX XDN is Enabled (On) or Disabled (Off) for each site.

You will also find the 4 custom A records (IP addresses) needed to point your domain to WPX XDN.

Step 4: Point your domain using A Records
The next step is to update your domain’s DNS settings at your current domain registrar or DNS provider:
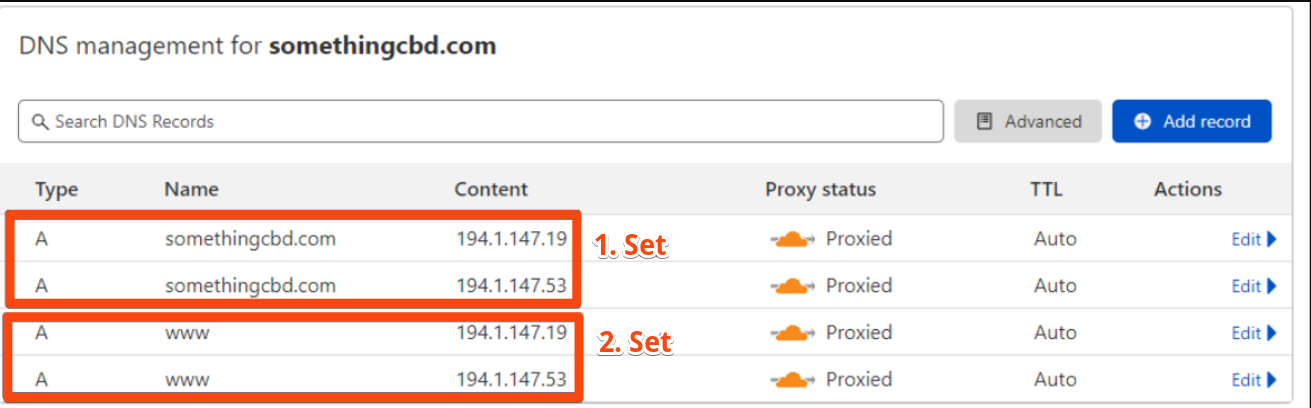
You need to create 4 A records for your domain:
- 2 for the root domain (
@) - 2 for the
wwwsubdomain
The IP addresses you use must be the exact ones listed in your WPX Control Panel under WPX XDN. Do not use example IPs from the guide here, because the IP addresses for your hosting plan may be different.
If you are using Cloudflare as your DNS provider, here is a helpful article on how to point your site to WPX XDN via Cloudflare.
Step 5: Wait for DNS Propagation
After updating your A records, please allow approximately 1 hour for DNS propagation. Once propagated, WPX XDN will start working properly for your website.
Stuck at any point? Don’t worry, just click the live chat widget in the bottom-right, and one of our support agents will assist you in under 30 seconds.